ID Document is a non-core criteria response type and as such, must be installed through the store. There is no configuration required in the store; this is done in the individual criteria.
ID Document response type can be used to ensure that targets provide acceptable combinations of documents e.g. Right to Work, Proof of ID and address, etc. Furthermore, document combinations can be changed easily when legislation or internal requirements make this necessary. By selecting ID DOCUMENT as the criteria response type, you will be presented with the following:
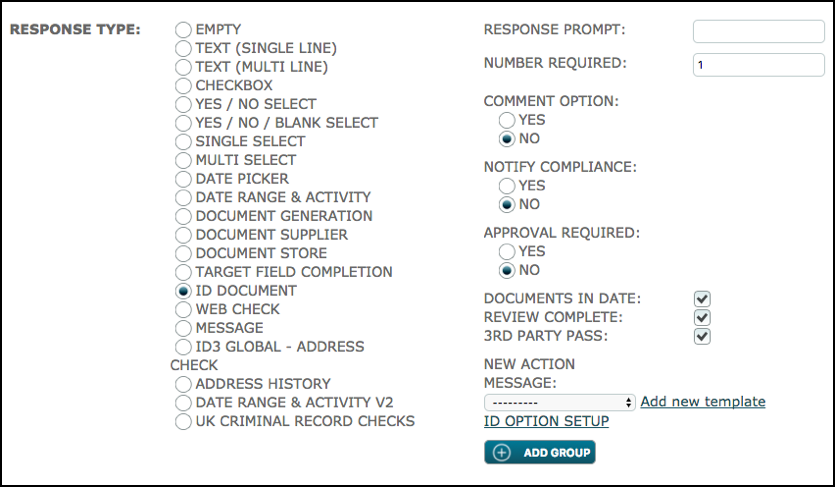
Note that DOCUMENTS IN DATE, REVIEW COMPLETE and 3rd PARTY PASS options are no longer operational and will soon be taken out of the system.
To configure the criteria click ID OPTION SETUP. The following set-up will be displayed:

You will need one set of these fields for each document option you wish to be available.
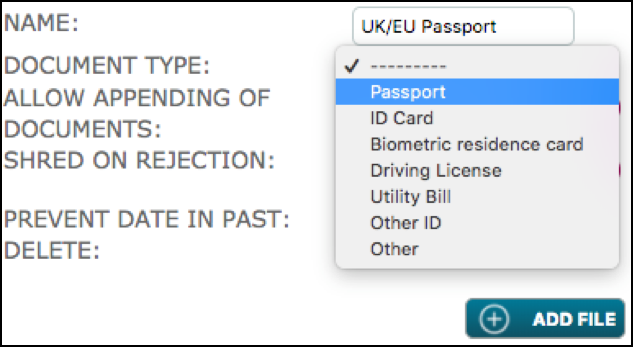
NAME: this field is to specify the document’s name e.g. Passport, Driving Licence, P60, Bank Statement.
DOCUMENT TYPE: there are 7 standard options to choose from Passport, ID Card, Biometric residence card, Driving Licence, Utility Bill, Other ID and Other. The final option, “Other” is used for documents which do not fall into any of the other types. The response to this option simply requires that a document must be uploaded but the additional fields on the response modal are not mandatory.
For the purpose of this article, a ‘Right to Work’ criteria is going to be used as an example.
ALLOW APPENDING OF DOCUMENTS: this option allows the system user to add additional documents at the approval or completion stage of the criteria.
SHRED ON REJECTION: if ticked the response document will be deleted if the criteria is rejected or rejected/asked again by a system user.
PREVENT DATE IN PAST: this option does not allow the target or user (whoever is responsible for completion) to select a date in the past. The latter, can be very useful with documents that necessarily need to have a date that is greater than today’s, i.e Visas and ID Cards.
DELETE: tick here to delete this document option if it is no longer required or has been created in error.
Click on ADD FILE in order to provide the target/user with more information about the file required.
A set of four more fields is displayed: DESCRIPTION, NOTES, EXAMPLE FILE & PAGE. These fields are specific to the document in question allowing clear instructions to be given.
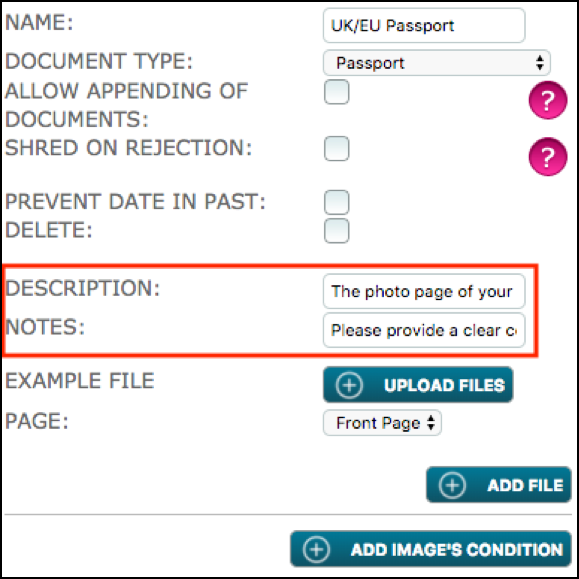
DESCRIPTION: provide a description of the required document, e.g. “The photo page of your passport.” (See below).
NOTES: additional instructions in regard to the document, e.g. “Please provide a clear colour copy.” (See below)
EXAMPLE: here you can upload a sample file so that the target/user can refer to an image of the required document.
PAGE: to specify what part of the document is required, either the Front or the Back Page.
These options with the exception of the PAGE field, work in exactly the same way as other response types where documents are required.
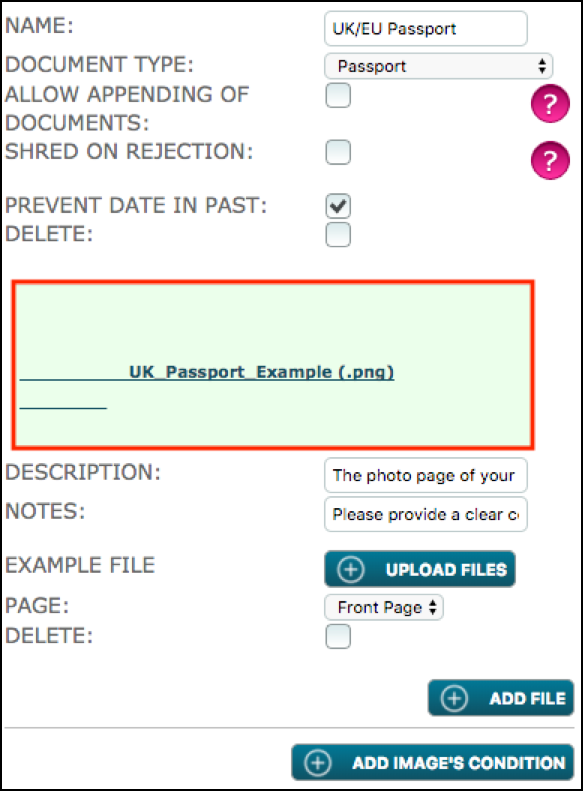
The below screenshot shows an ID Option Setup with example file.
The below screenshot, shows how the ID Option is displayed to the target or user completing the criteria. Note the Description, Notes and “show me an example” link.
Once all the relevant documents are defined in the ID OPTION SETUP feature, you can divide the documents into groups. This will allow you to build a workflow within the criteria, similar to the ‘In-Level Sequencer’ functionality.
For example, the first group could be called ‘Identity Documents’, and the latter can be the starting point for all nationalities. The second group could be for the visas and the third group could contain documents that are specific to the United Kingdom route i.e P45 or NI Number. (See below)
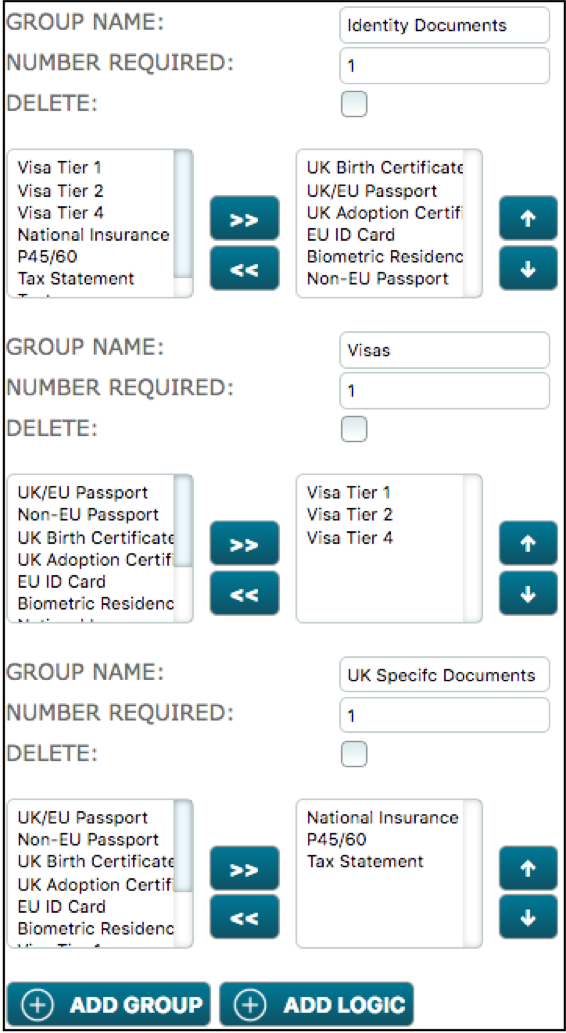
Once all the groups have been set up, as above, you can stipulate how many documents are required from each group.
Note: you can create as many groups as you need, and the same document can be allocated to more than one group.
Start building the workflow by clicking on the ADD LOGIC button.
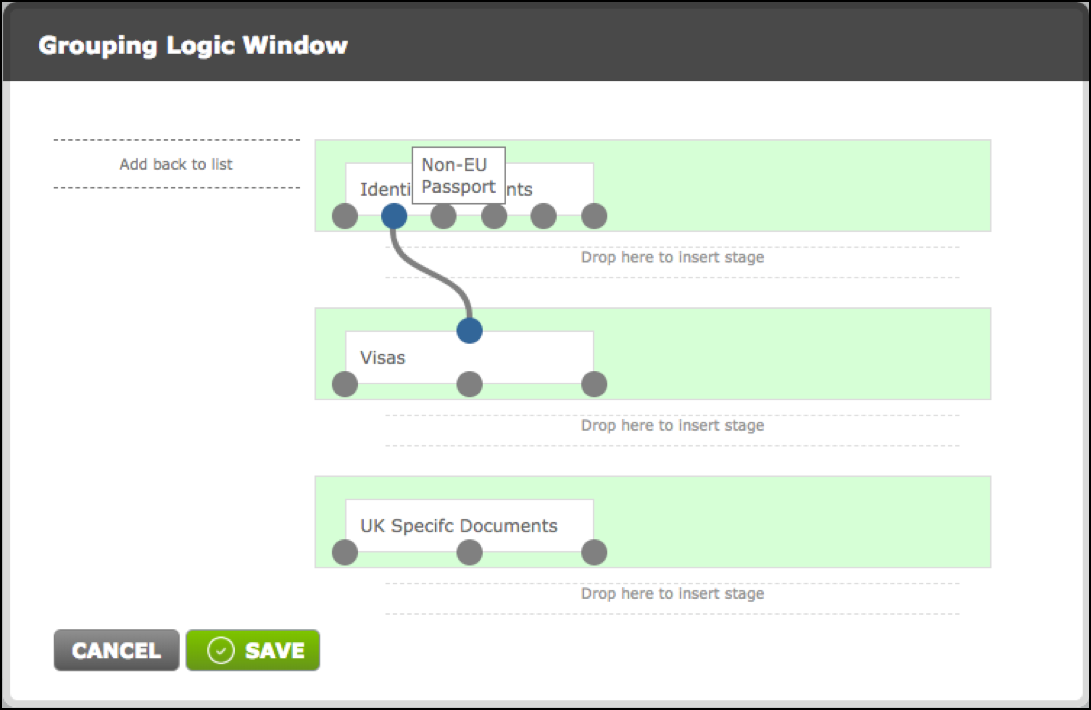
On the left-hand side of the ‘Grouping Logic Window’, the three groups that have been created are presented in order.
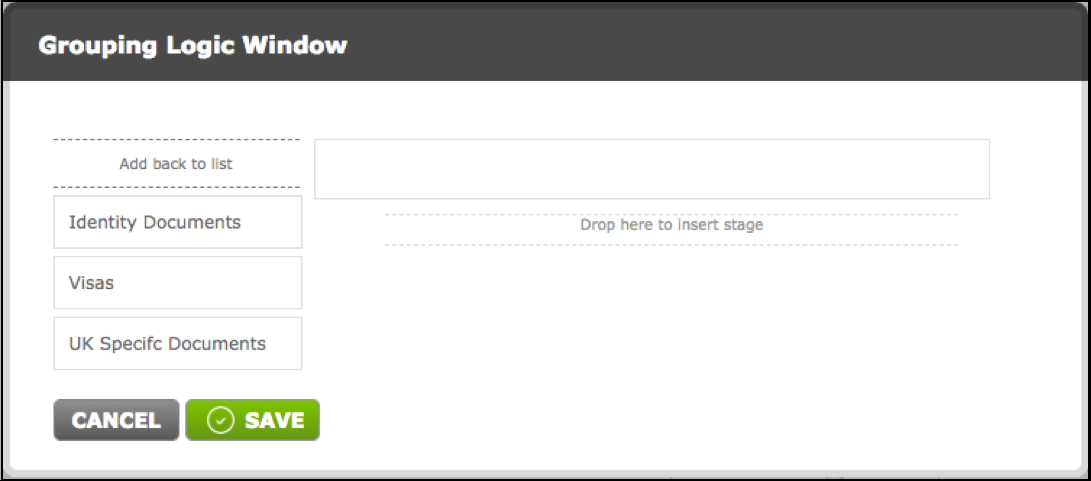
This next part is quite similar to the ‘In-Level Sequencer’. Drag the groups to the right-hand side of the ‘Grouping Logic Window’ in the order they will be presented to the target or user responsible for completing the criteria.
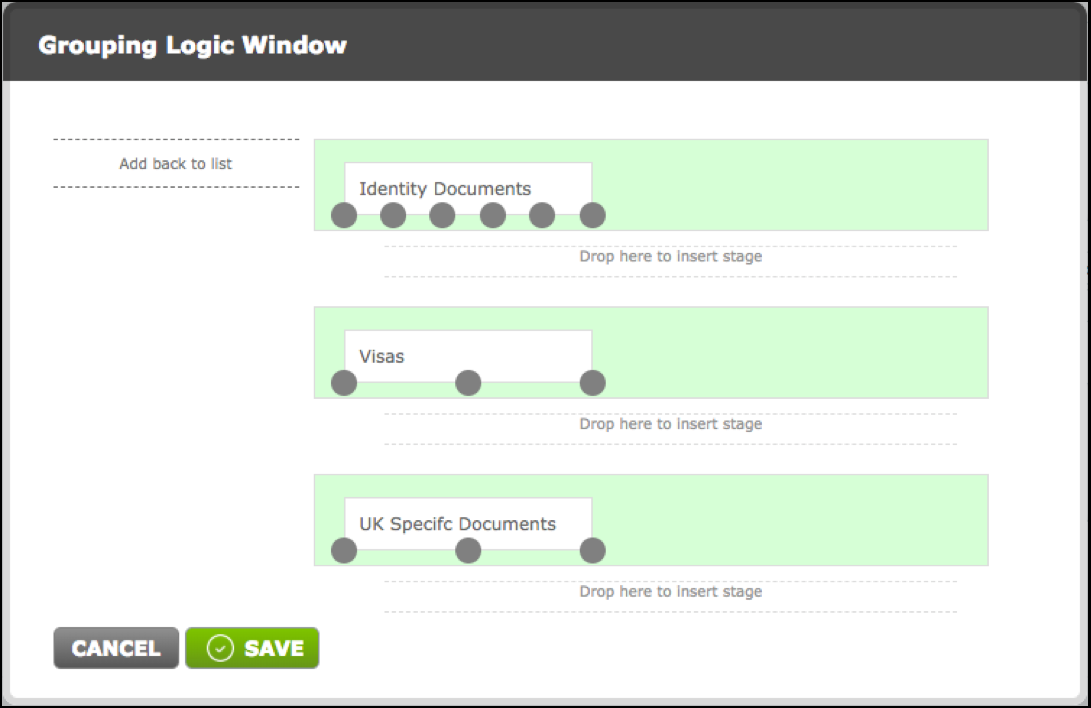
In order to create the ‘Workflow’, click on the nodes from the top group and drag a connector down to the desired group. For example, the ‘Non-EU Passport’ is going to be linked to the visas group (see below), prompting non-EU nationals to provide an additional document, in this case a ‘Visa’.
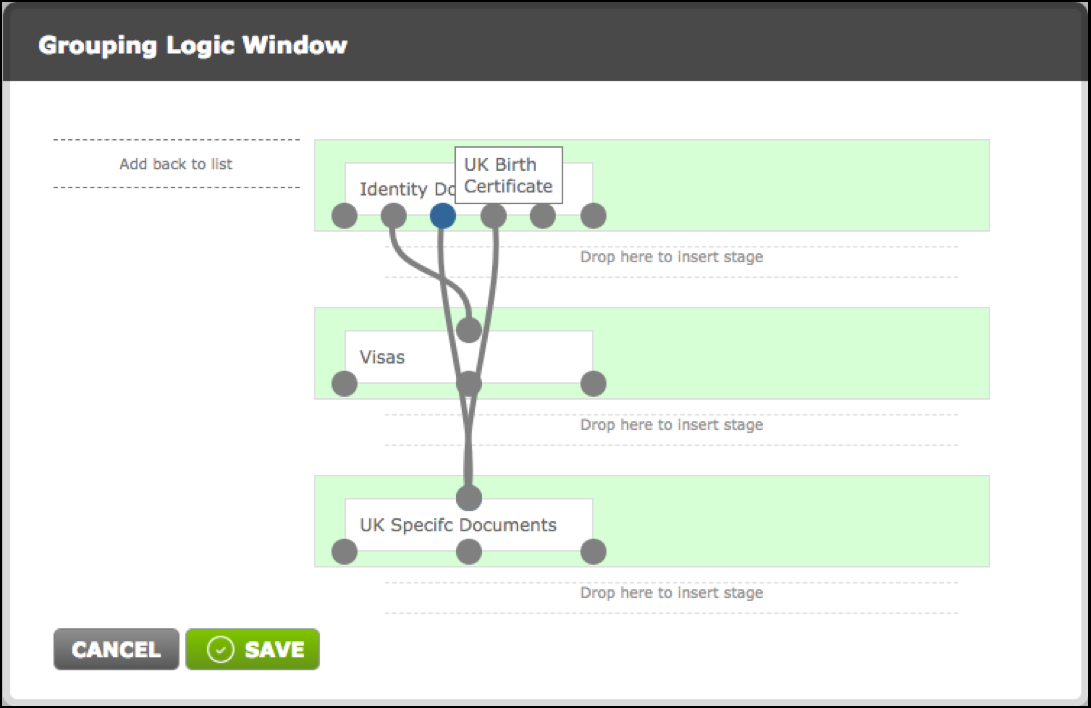
If a target selects either ‘UK Birth Certificate’ or ‘UK Adoption Certificate’, they will be prompted to provide one of the three documents that are present in the ‘UK Specific Document’ group in order to prove NI number. Click on ‘SAVE’ once the set-up is complete.
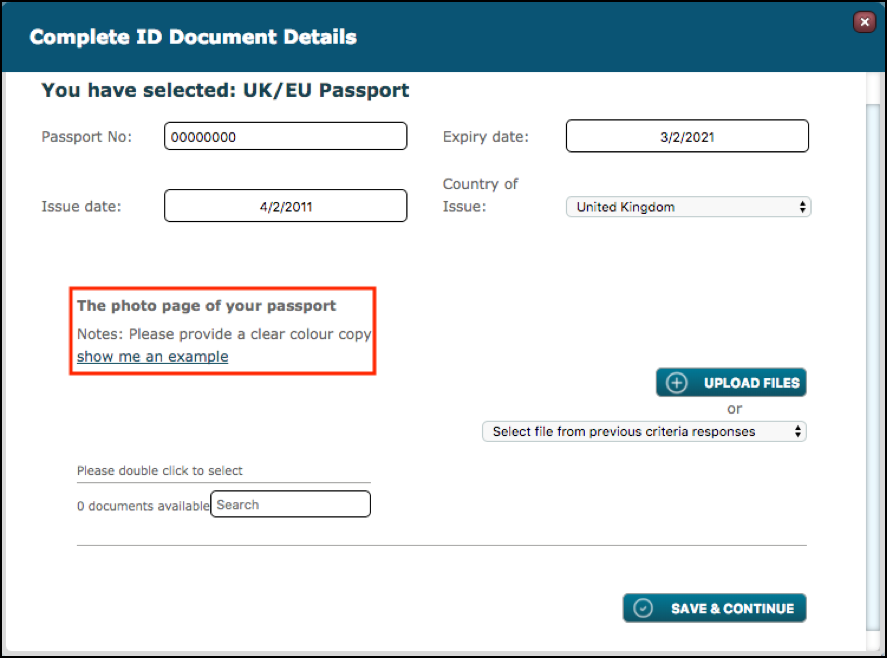
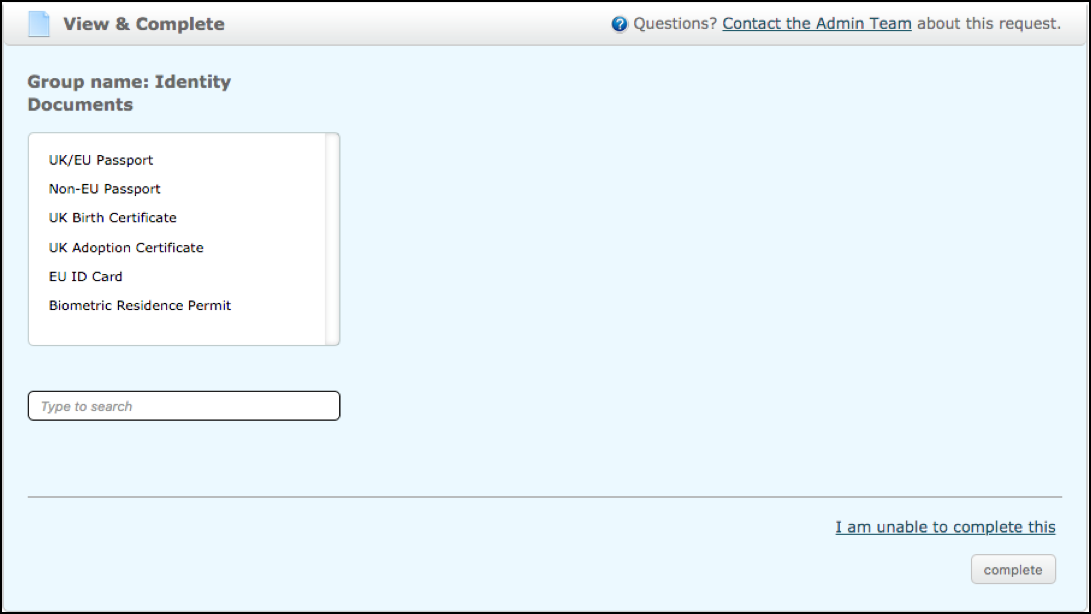
From a target’s point of view, the portal will look like the image below, where the options will correspond to the first group ‘Identity Documents’.
Based on a target choosing ‘UK/EU Passport’, they will be prompted to upload files.
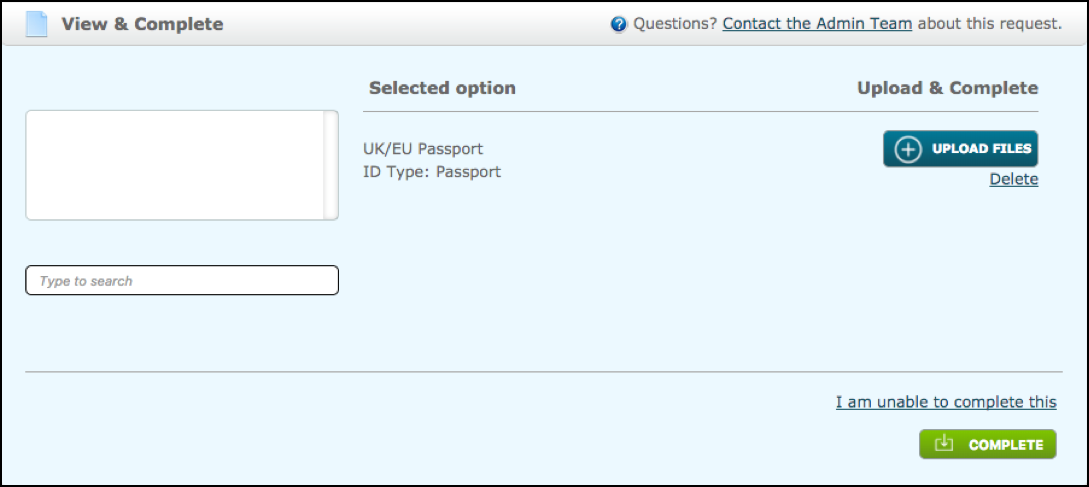
Inside the UK/EU Passport upload window, which falls under the ‘Passport’ category, the target will be prompted to input the ‘Passport Number’, ‘Expiry Date’, ‘Issue Date’ and ‘Country of Issue’. Where, the ‘Expiry Date’ is dependent on the ‘Prevent date in the past’ option.

By selecting ‘Non-EU Passport’, targets will be prompted to also provide a ‘Visa’.

Inside the Visa, which falls under ‘Other ID’ document type, the target will be prompted to input only the ‘Document Number’, ‘Expiry Date’, ‘Issue Date’ and ‘Document Type’. For the ‘Non-EU Passport’ the upload window is going to be identical to that of UK/EU Passport.

If a target selects either ‘UK Birth Certificate’ or ‘UK Adoption Certificate’, based on the logic set-up, they will be prompted to upload a second document as evidence of NI number.
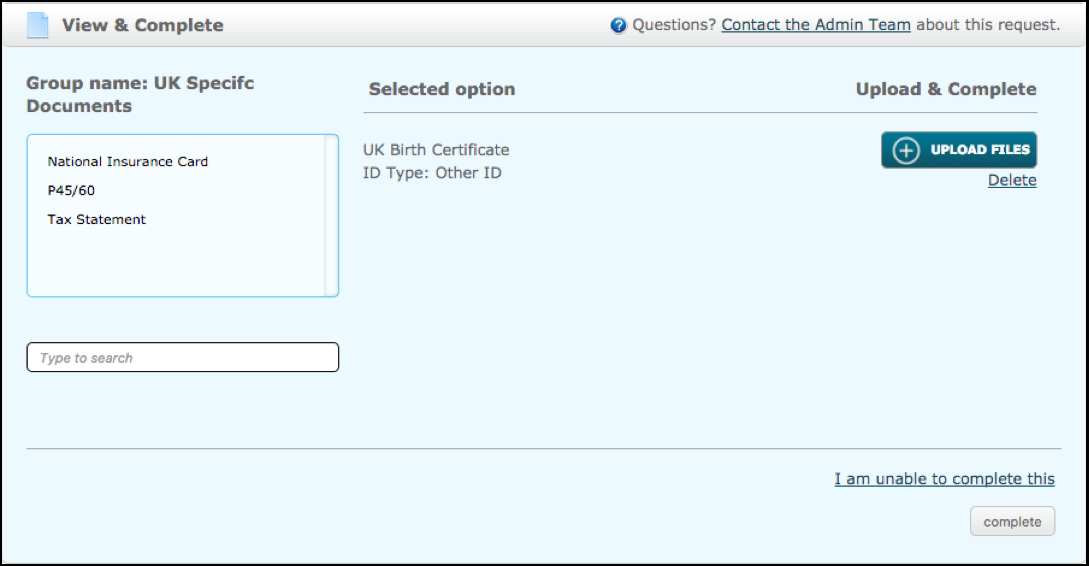
The ‘UK Adoption Certificate’ also falls under the category of ‘Other ID’. It contains the three standard fields: ‘Document Number’, ‘Expiry Date’ and ‘Issue Date’ plus ‘Document Type’.

For the ID Document response type it is likely that an approval will be required. The referral option should also be considered. Click here for details.
For the rest of the criteria set-up please click here.
Comments
0 comments
Please sign in to leave a comment.