In Autologyx, we have the ability to set up ‘Standard Validators’ into the system. These standard validators can be downloaded from the store and implemented into the system through target fields.
Standard validators are used as a constraint on values that are inputted by a Target. This ensures that the correct format is inserted for the chosen Target field. For example, the format for an IP Address is (0.0.0.0). When the validator is chosen for the IP address target field, the system will check that the value entered by the target is in the format above. If not, an error message will occur.
To download the validators, go to Store > and search for Validator
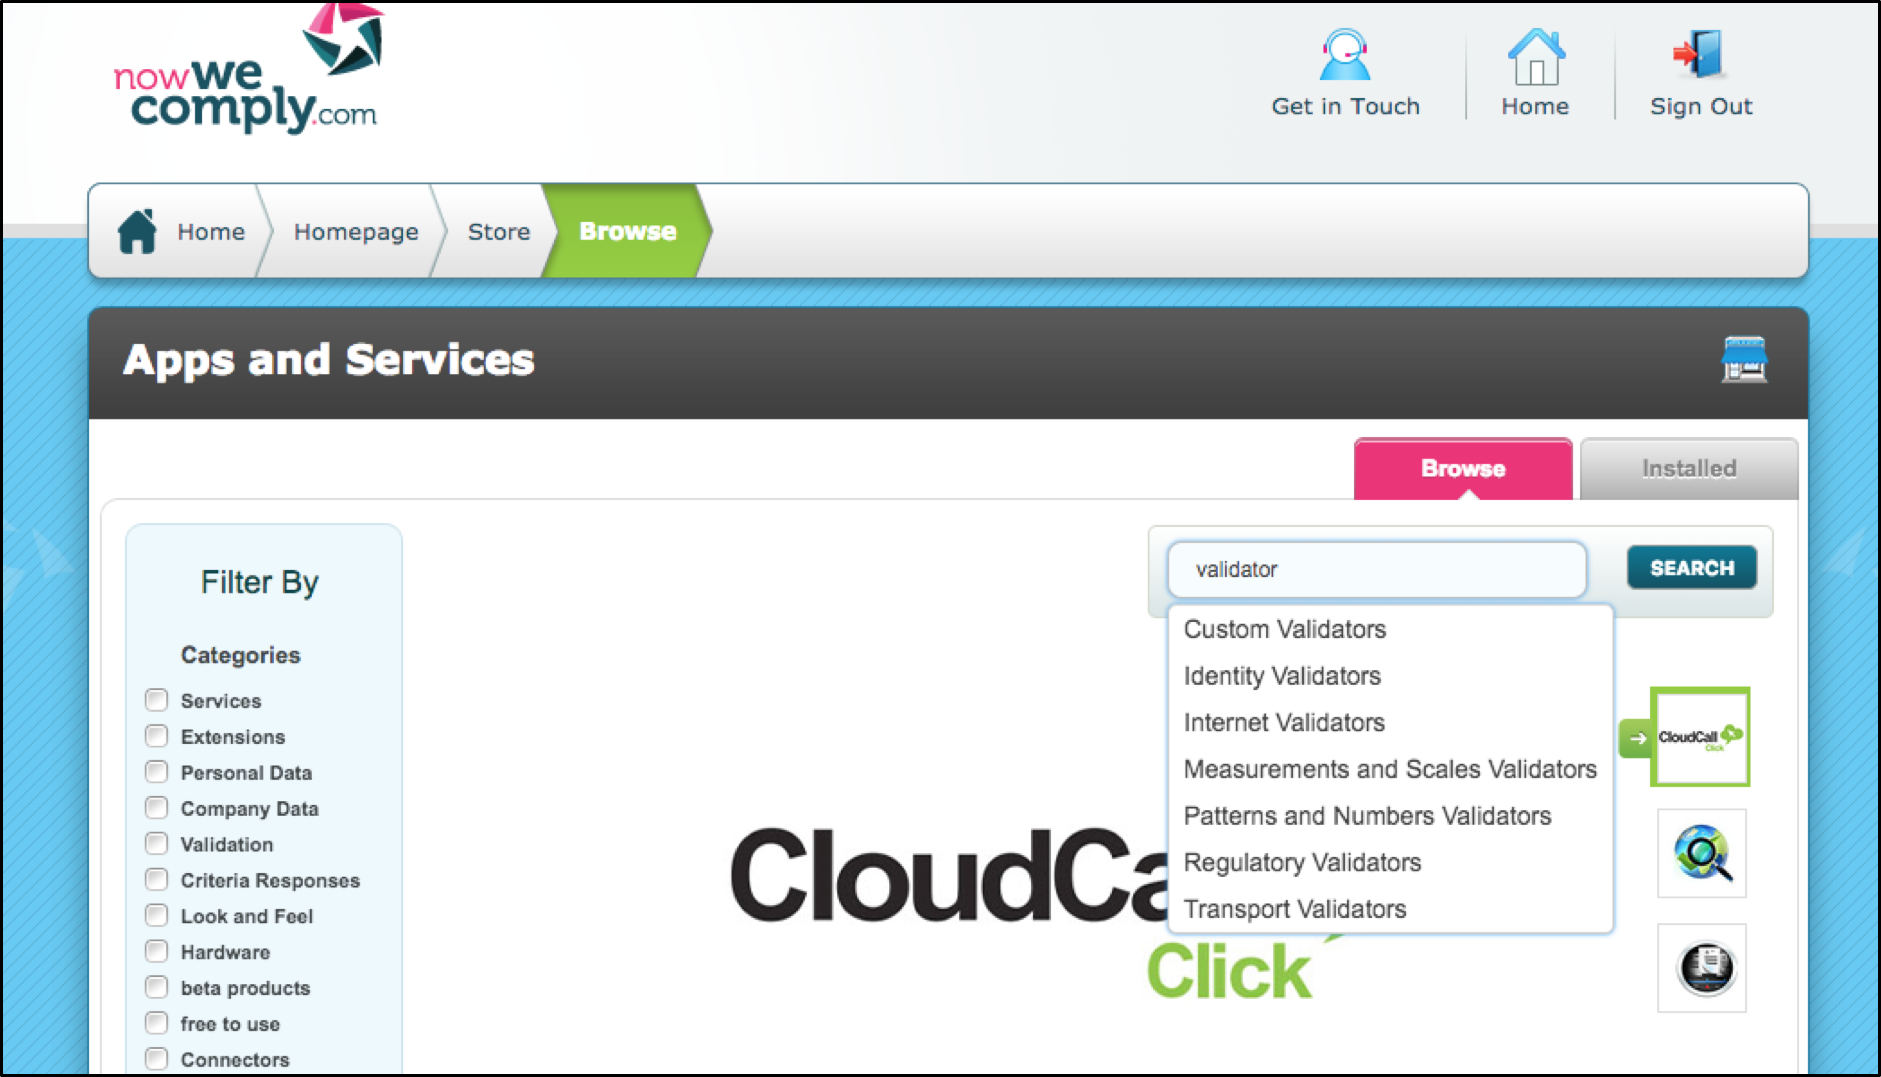
As you can see form the image above, a list of seven option appear when the word ‘validators’ is searched.
The standard validators comprise of Internet, Identity, Measurement & Scales, Patterns & Numbers, Regulatory and Transport. There are also custom validators that is explained in the article called Custom Validators.
As stated above, validators provide validation checks for different types of data. These types of data have been split into six sub-categories. As follows:
Internet – Provides checks on data connected to the internet such as Free email providers, Domain Name and IP Address.
Identity – Provides checks on form of identification such as Passport, National Insurance and NHS numbers.
Measurement & Scales - Provides checks on data used for Measurement E.g. Temperature
Patterns & Numbers - Provides checks on types of numbers such as Decimals and Percentages
Regulatory - Provides checks on codes that are used in the industry such as the International Classification of Diseases code (IDC9 Code)
Transport - Provides checks on codes that are related to transportation e.g. Airway Bill Number, UK Vehicle Registration, India Vehicle Registration and Vehicle Manufacturer’s Identification Number
In this article, we will demonstrate how to use the identity validators. Download the identity validator from the store to view an overview.
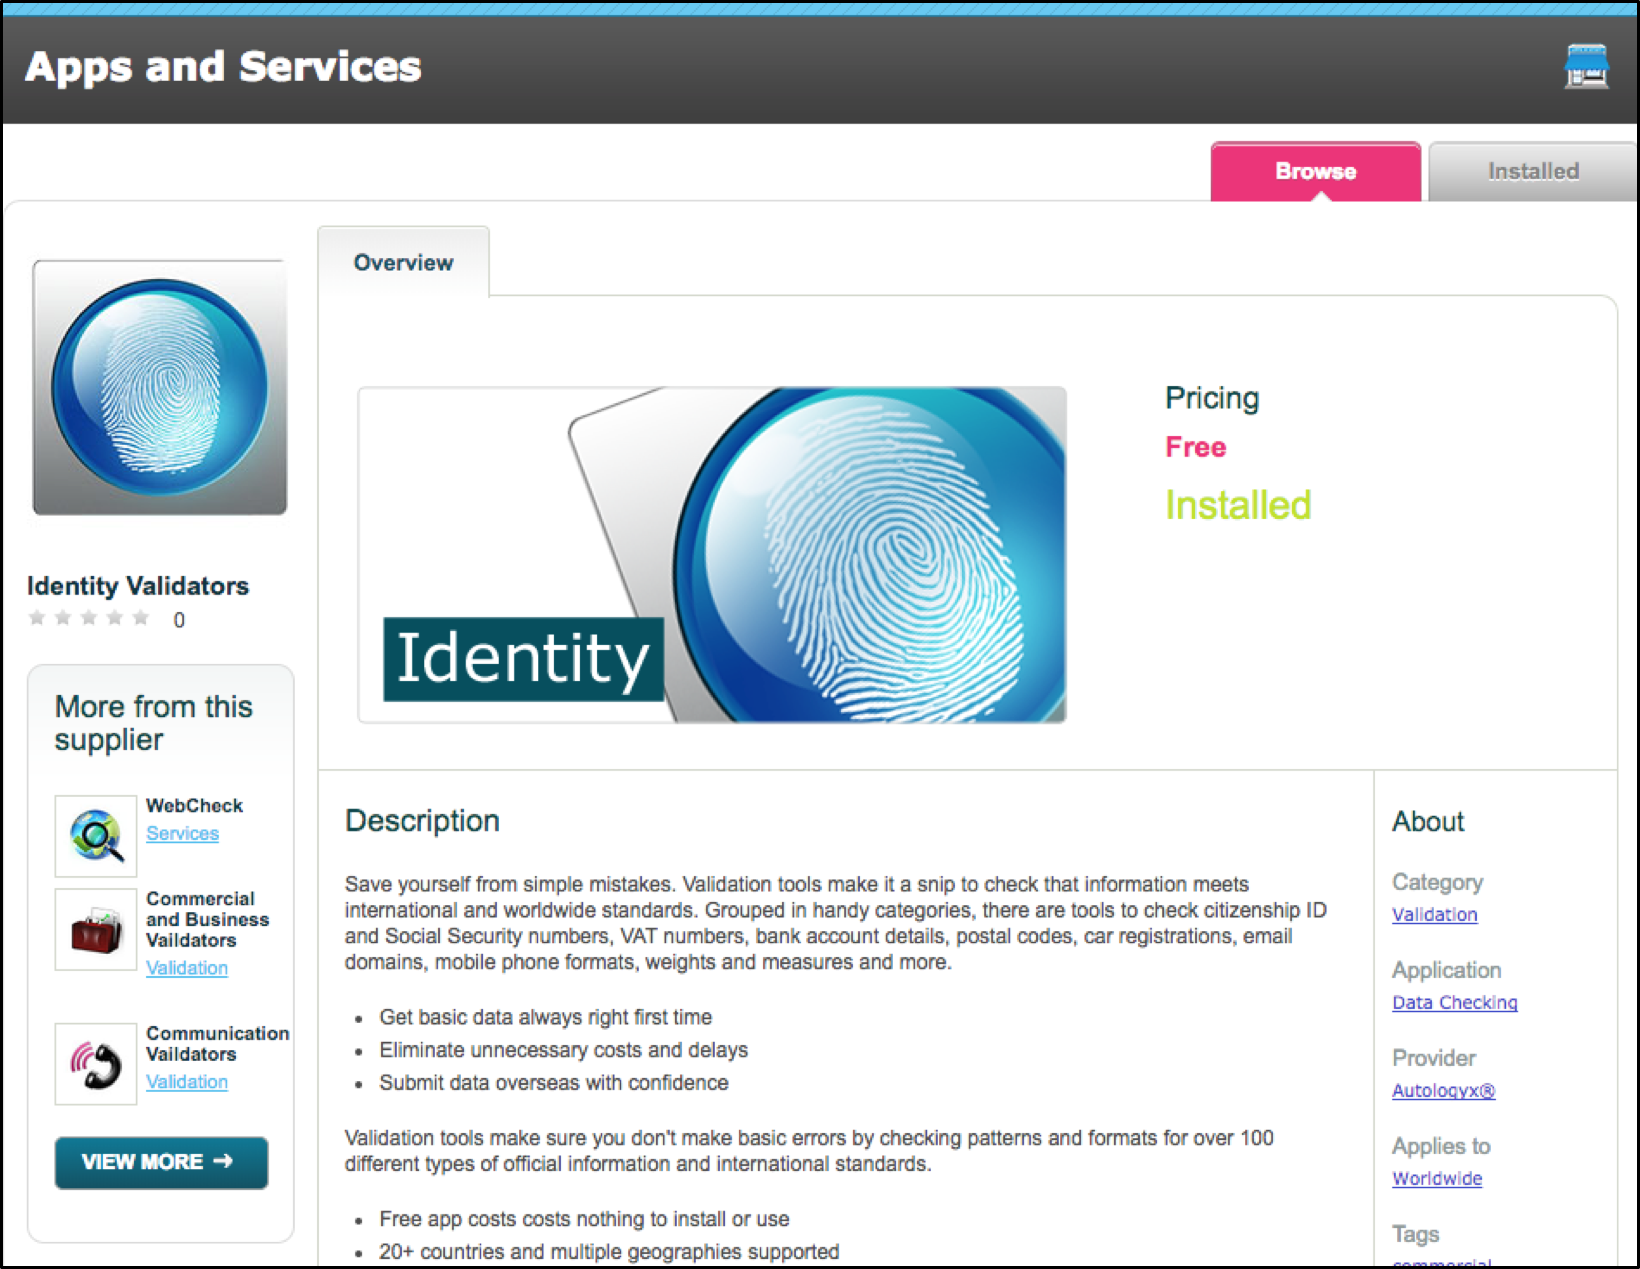
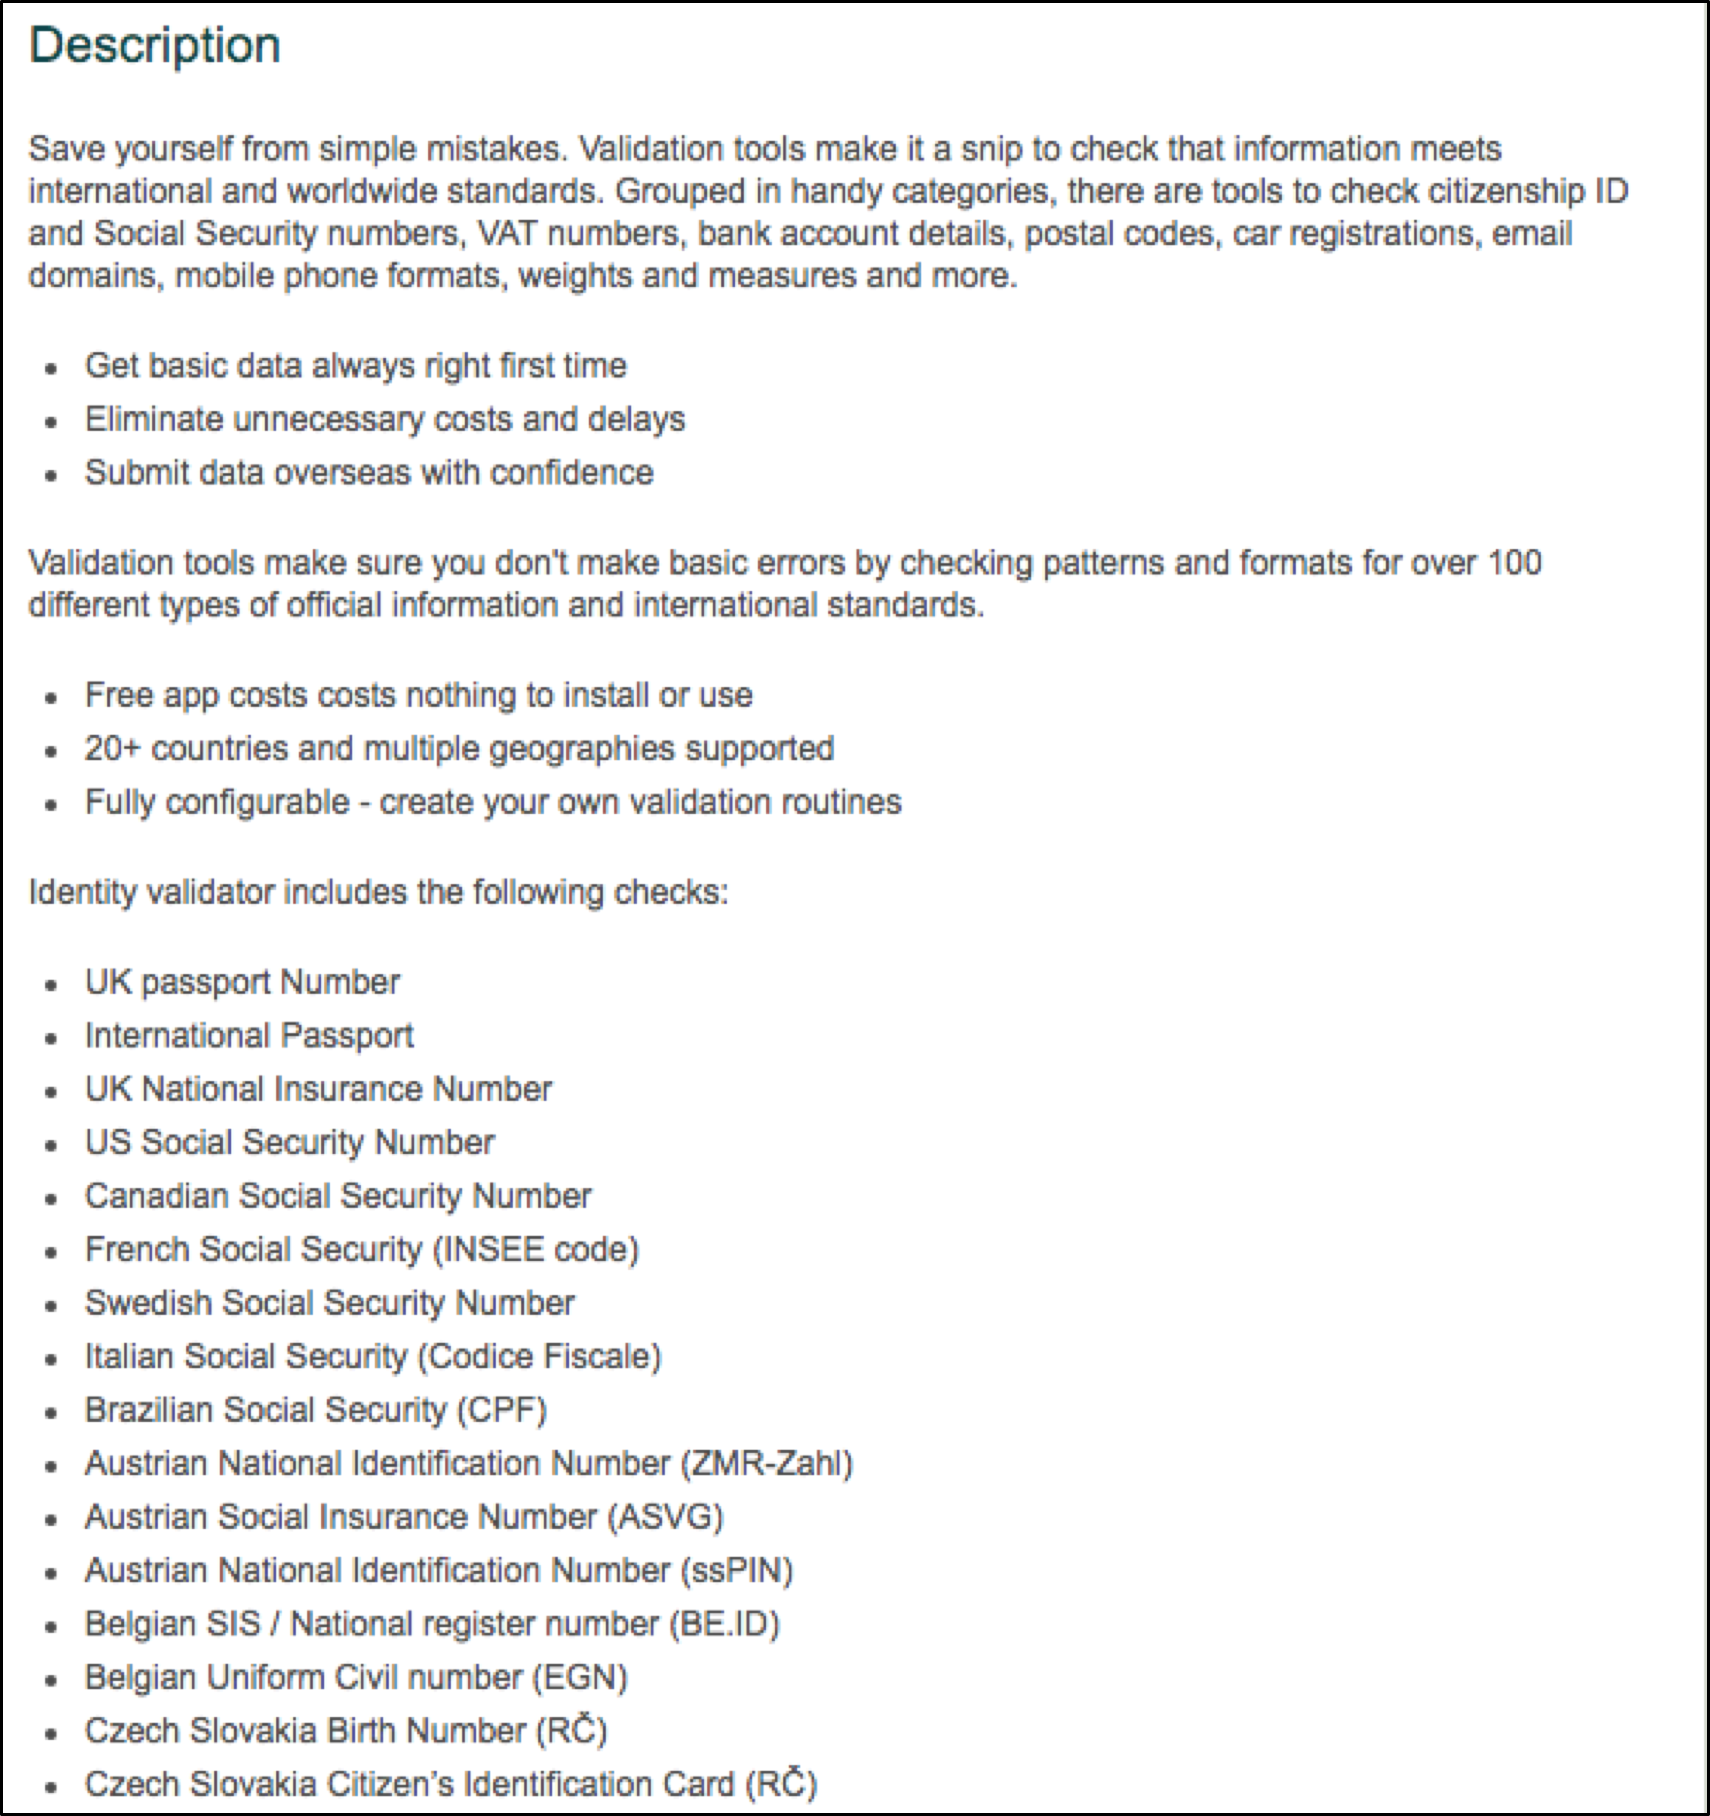 As you can see above, the page gives a brief overview of what a validator is and provides some examples of what the identity validators can be used to validate; these can then be implemented in the system through target fields.
Create a new target type, go to Admin > Targets> Edit target types
NOTE: The target type must be a person, because the field needs to be manually populated.
To avoid confusion, ensure that the Target field name is similar to the validator that is in use. Make sure that the type is freeform.
Once the target field has been saved, we will assign the target field to the relevant target group.

To do this, go to Admin > Targets> View/Edit Target Group List and edit your target group.
The image below, shows the validators column on the right-hand side. In the validators column, a drop-down menu is available which enables the target to select any validator in the system. Here the field UK Passport Number has a standard validator 'UK Passport Number', this validator was an option within the Identity Validators section in the store.

Set the visibility to display and edit to allow the target to interact and set the validator column to the relevant validator type. In this case it is the UK Passport Number.
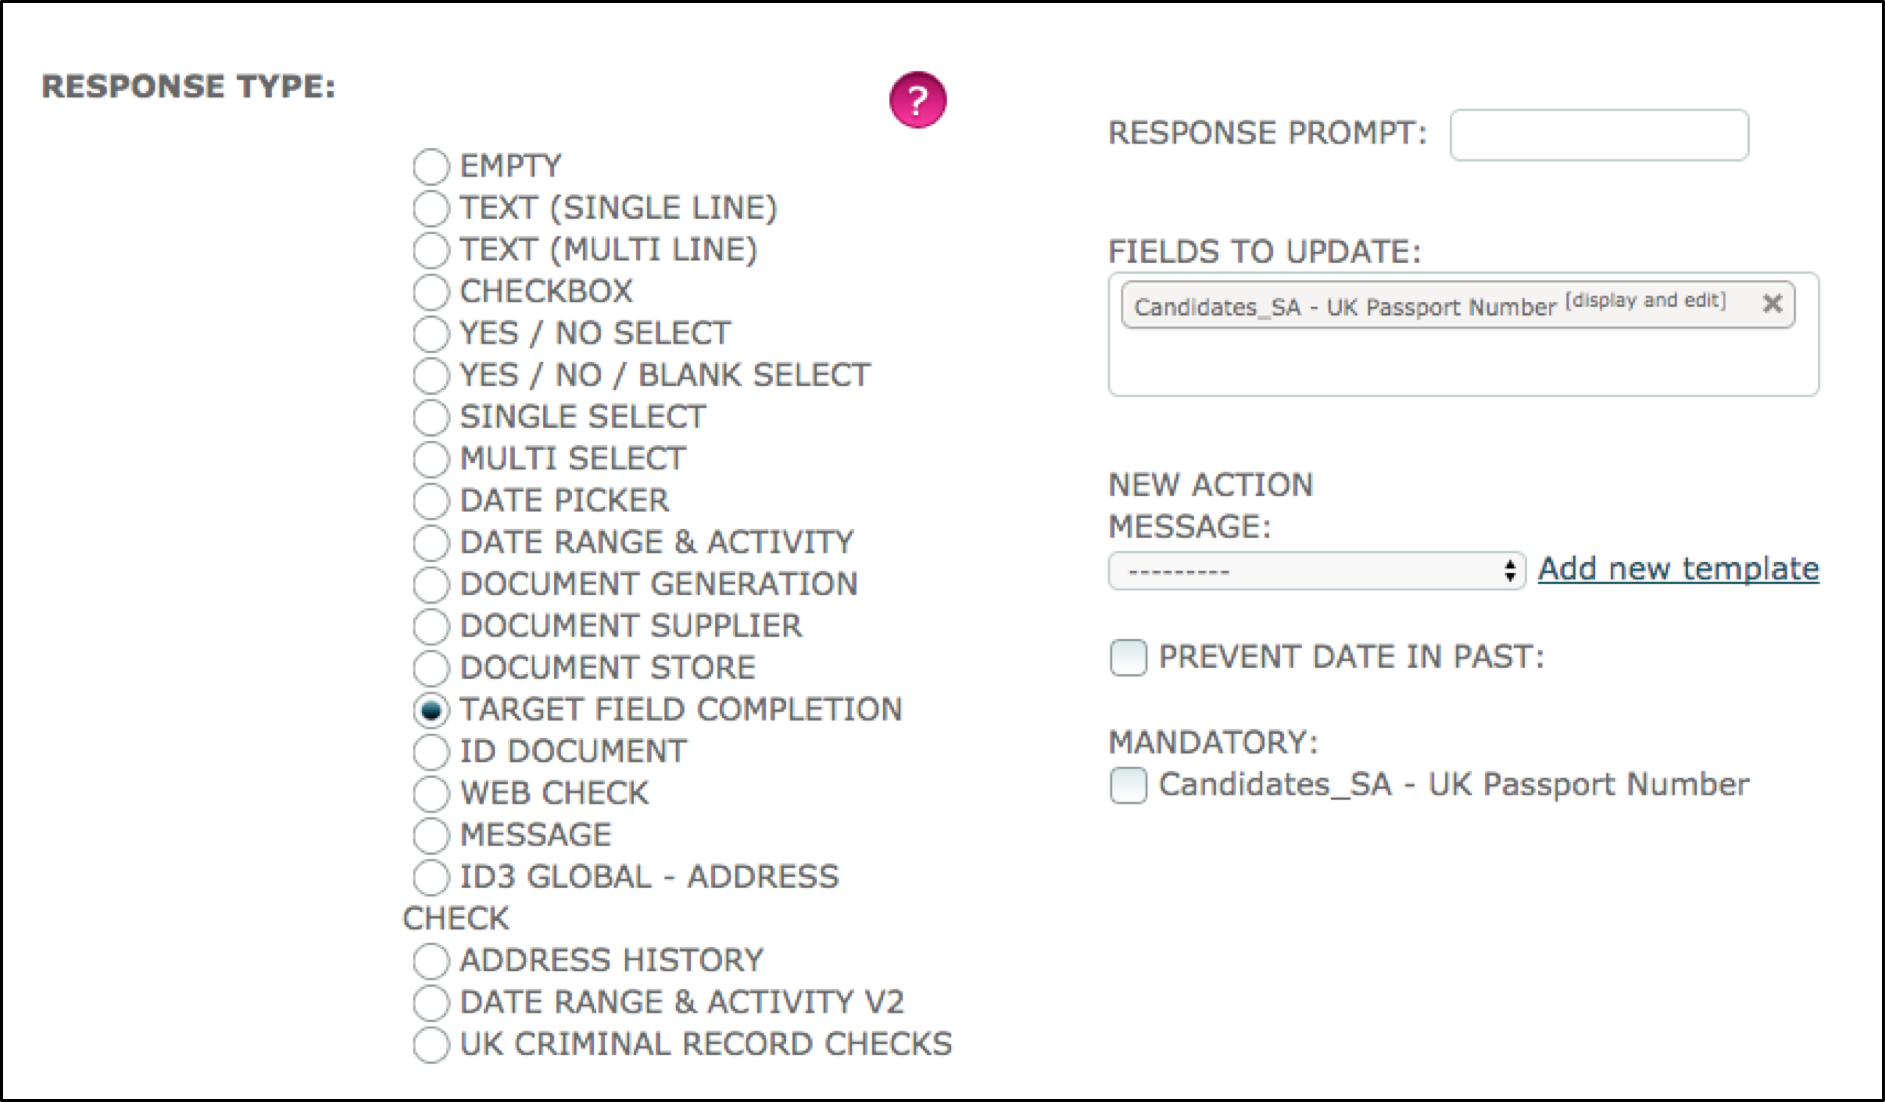
Create a criteria where the response type is target field completion. Enter your new the target field name previously created into the ‘Fields to update’ box.
Make the field mandatory and save.
Demonstration
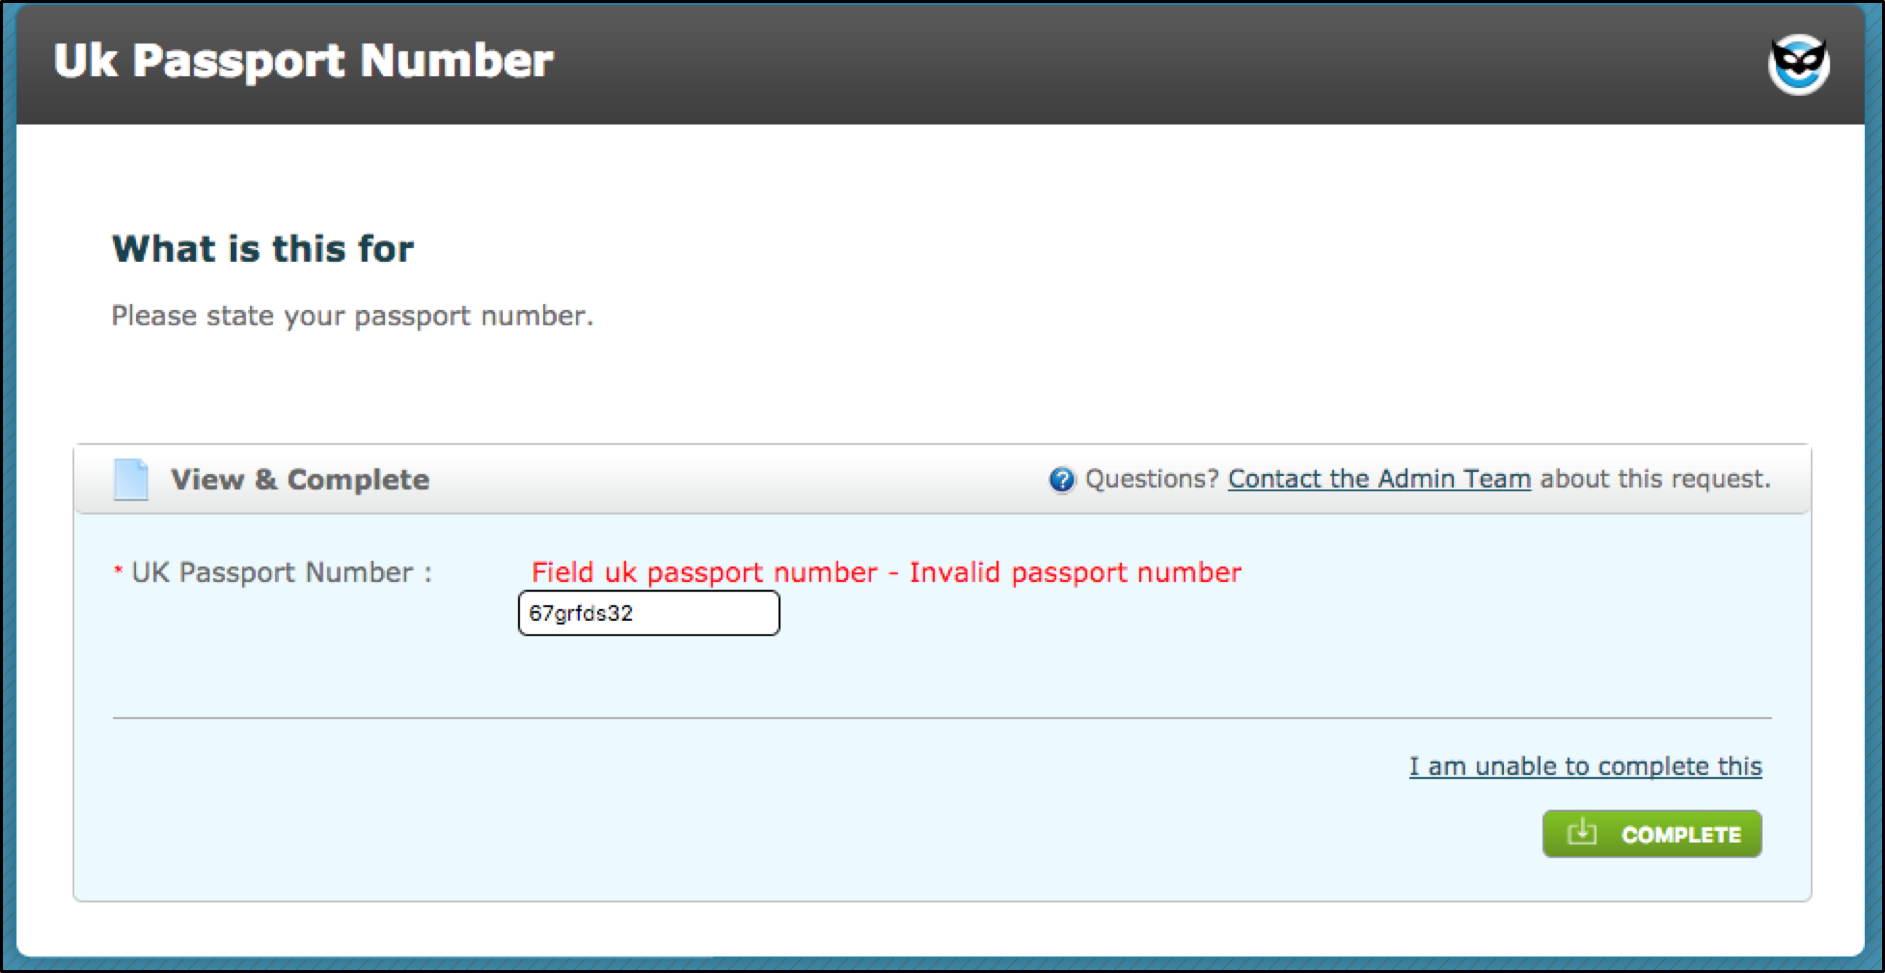
With the validator initialised, if the target enters the wrong format an error message occurs. The above error message is the standard provided when a validator is purchased, but this can be edited and changed to be as detailed as you want it to be. Providing an example of the value format in the error message, is recommended.
Comments
0 comments
Please sign in to leave a comment.