
It is worth spending a little time getting to know the menu functions before you start building your Sequence. You will see a left hand vertical menu, at the top of which are the Actor objects. These can be clicked on and dragged into the Stage part of the workspace when you need them. They are explained in detail HERE.
Other objects in the left hand menu are:
Truth Tables – only shown if you have installed Truth Tables from the Store. The names of the truth tables will be listed. However, once you have selected the Target Group against which your Sequence will run, the truth table list will be filtered only to truth tables which have been set up to check data for that Target Group. Again, you can click and drag a truth table onto the workspace when required.
Sequences – this section of the menu will be populated with the names of any Sequence which have been set up to commence using the condition, “When Sequence Activated”. We will look at how this works later in the module.
Target Groups – this section will list all Target Groups in your system.
Levels – this section will list all Levels in your system. However, once you have selected the Target Group against which your Sequence will run, the Level list will be filtered only to Levels which have been set up for assignment to that Target Group.
There is also a horizontal menu across the top of the workspace.
Here the menu options are more traditional, such as Edit/Save, Delete, Undo. You will also see functions for the following:
Clear – only enabled when in Edit mode you have made changes to the Sequence. This will clear all the changes since the Sequence was last saved. You will be presented with a confirmation modal as shown:
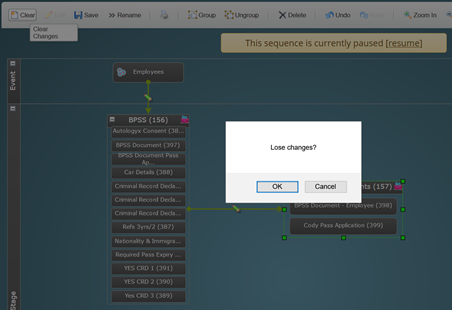
When you click OK the changes made will be removed. However, if your action to clear changes was a mistake, click Undo and they will be re-instated.
Rename – this allows you to change the name of the Sequence.
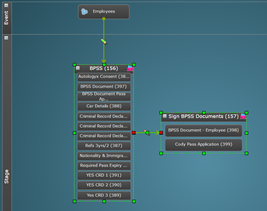
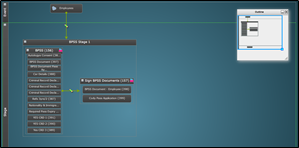
Group/Ungroup – this feature allows you to click on the workspace and drag your cursor over several objects thereby selecting them, as shown on the left. Click Group and you will be presented with a modal in which to Name the Group, as shown on the right:
 |
|

Click OK and the selected objects will be grouped as shown below:

Grouping not only allows you to put your workflow into sections like this:
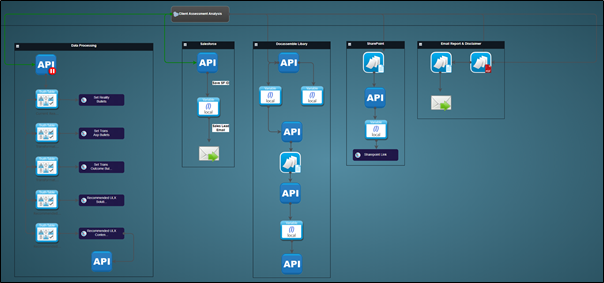
but more importantly it gives you the ability to assign a number of Levels or to commence a sub-process with one trigger to the group, as shown below:
Zoom In/Zoom Out/Zoom Actual – Zoom In and Zoom Out do as you would expect – make your view larger or smaller. Zoom Actual will take the frame size back to the default.
Navigator – this tool is particularly useful when you have a very long or very wide workflow on the Sequence. Click Navigator and an “Outline” modal appears on the top right hand side of the workspace. Click, drag and drop the blue outline into the position on the Sequence you wish to view/work on. Click Zoom Actual to return to the default layout.
 |
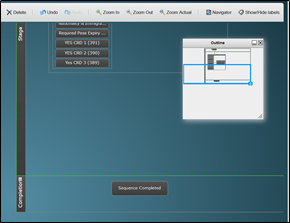 |
Close the Navigator when you’re finished.
Comments
0 comments
Please sign in to leave a comment.