
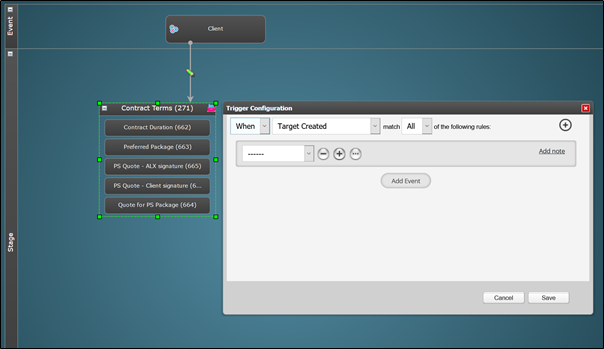
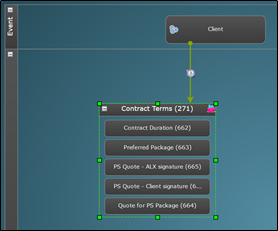
The trigger conditions described in this article are those which can be used to start a Sequence. In the below screenshot there is a grey trigger from the Target Group (Client) to the Level (Contract Terms). The trigger is grey because the Trigger Configuration to the right has not been saved. When saved the trigger will be green. A Sequence will not save if any triggers remain grey.
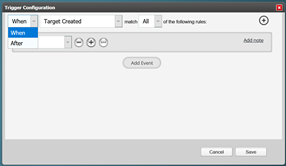
A Sequence can be triggered to commence “When” the selected method is true OR it can be delayed. Open the drop-down which is defaulted to When and there is an option for After.
Select After and two further fields are displayed before After. The second of these fields has options based on time.
 |
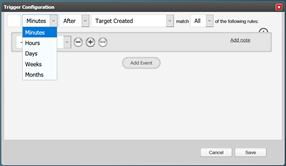 |
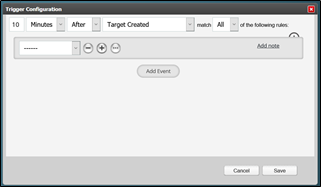
Select the appropriate time option delay and enter the number required in the first field, as shown below, on the left. When the trigger configuration is saved a clock icon is shown on the trigger to indicate that this is a timed trigger.
 |
 |
Target Created
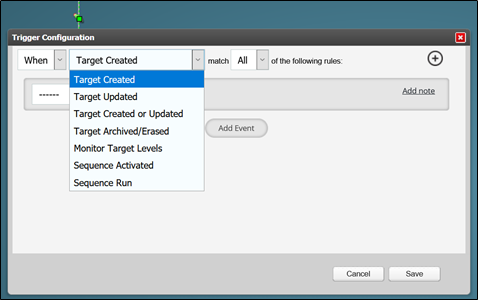
The above screenshots show the most commonly used method of starting a Sequence. This is When (or After a specified time) a Target is Created. This simply means that when a Target of the selected Target Group is added to the system the Sequence will commence the workflow. It doesn’t matter what method is used to create the Target, the Sequence will run.
In the Sequence shown, 10 minutes after a Client Target is Created, the Level Contract Terms will be assigned. In this case all 5 Criteria in the Level will be assigned at the same time because there are no additional triggers to prevent this.
The other options for Sequence commencement are shown in the below drop-down:
Target Updated
This is another commonly used method of starting a Sequence or a particular workflow contained in a Sequence. It relies on data in the Target Record being added or amended. However, it is rarely used without further conditions being added; Click Here for information on adding secondary conditions.
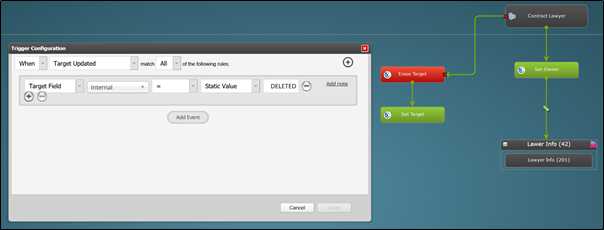
In the below example, the Sequence workflow is started by an update to a Target in the Contract Lawyer Target Group with an additional condition being that a Target Field on the record called “Internal” must have the value “DELETED”.
It is important to note that addition or change to a Target Record by certain methods constitutes an Update to the Target. The change made manually directly into the Target Record as below is an update.
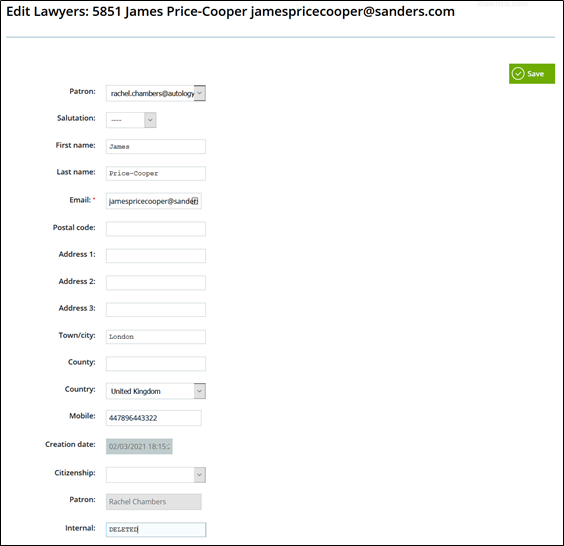
A change made via a Dynamic Form is an update as is a change made via an API Call. However, a change made via a Set Target Actor in a Sequence does NOT constitute an update.
Target Created or Updated
The Sequence will start when a Target is created/added to the Target Group OR when a Target record is amended.
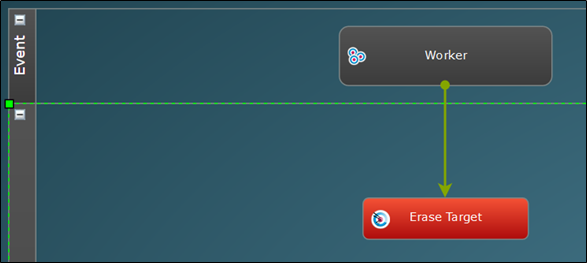
Target Archived/Erased
The Sequence will start following a Target being archived or erased. Each of these actions can be done either from the Target List:
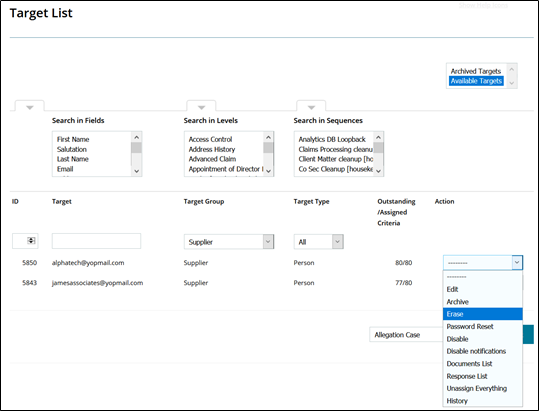
Or, from another Sequence using the appropriate Actor:
Click Here for our section giving full details on the Archive and Erase feature set.
Monitor Target Levels
This allows you to monitor Levels which have already been assigned to a Target via another Sequence or manually.
It is useful when you want to add additional workflow but your original Sequence is complicated or already very detailed.
If all of the Levels in your Sequence have been assigned via another Sequence and this one is simply used to monitor Target Levels, you can place the Levels on the workspace and it is not necessary to connect them from the Target Group.
In the below example, a Level called “Contract Generation & Signatures” is assigned.
The Criteria are sequenced so that:
- the contract document is generated
- it is sent to the Contractor for signing
- when the Contractor has signed the document it is passed to the Client for signing, shown as in Criteria ID 629 below
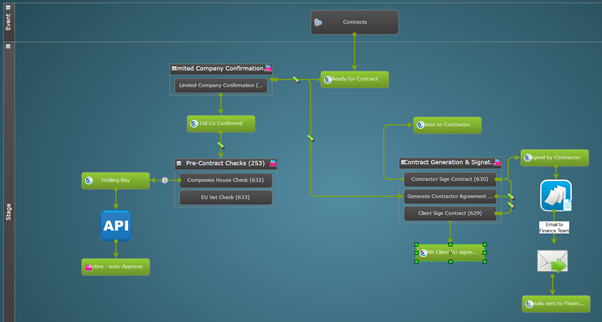
In another Sequence, the same Level is placed on the workspace; you will note the absence of a trigger connection from the Target Group object. As soon as the Sequence is set to running, the Contract Generation & Signatures Level is being monitored.

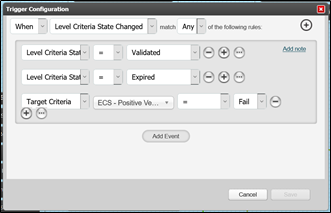
In this example, the trigger condition is one that is commonly used with this feature. “When Level Criteria State Changed”. This will check the state changes of each Criteria in the Level eg from Assigned to Answered to Validated or Rejected or Expired.
The additional condition being used here is Criteria “Client Sign Contract Assigned” = Yes. Because of the way the signing Criteria are assigned in the previous Level, this tells us that the process has gone beyond the contractor signing the contract document, and in the first Sequence for example, the Finance Team will have received their Email.
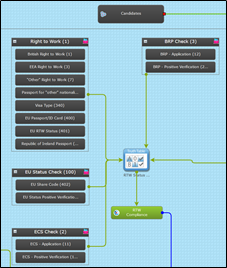
The ability to monitor Target Levels is particularly useful when connecting to a truth table like this:
 |
 |
All 4 Levels shown have no connection from the Target Group. But they each connect to the truth table. Each of these triggers includes the conditions:
Level Criteria State = Validated or
Level Criteria State = Expired
The change of criteria state to either of these values will force the truth table to do a check for a match.
Sequence Activated
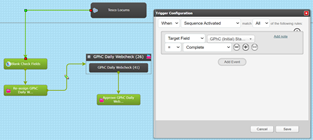
This method allows you to activate the Sequence from another Sequence. In the example shown, the Sequence called “Assign Checks V2” has the starting trigger, “When Sequence Activated”.
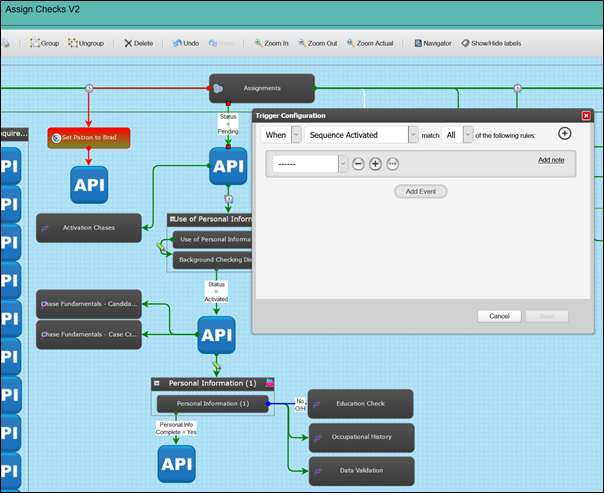
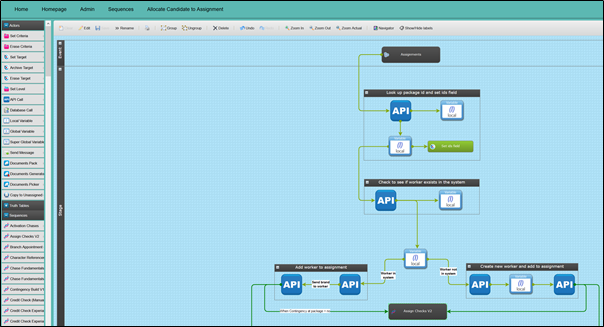
In the Sequence below called “Allocate Candidate to Assignment” you can see in the Sequences section of the left hand menu, there are a number of Sequences. The 2nd in the list is “Assign Checks V2”. All the other Sequences listed also have a starting trigger using the condition, “When Sequence Activated.
The Sequence object can be dragged and dropped onto the workspace of another Sequence and connected from any other object.
Note the Sequence object “Assign Checks V2” is connected at the bottom of the page following two different routes, both of which have an API Call Actor before the Assign Checks V2 Sequence is activated.
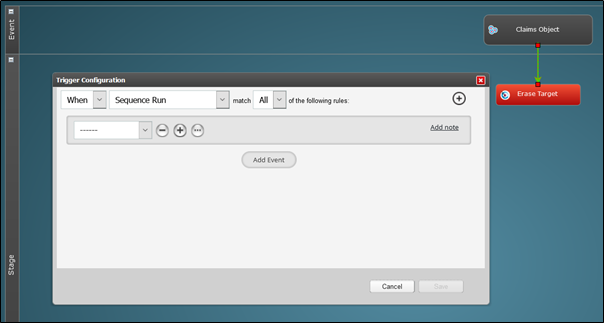
Sequence Run
This method allows you to create a workflow but keep it paused until you want to run it manually or by using the Sequence Scheduler.
In the Sequence List, the Sequence State is Paused and the Action menu contains an option for “Run”.

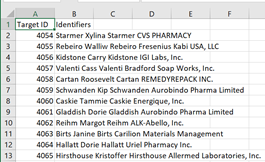
When you select Run from the menu the system will calculate the number of Targets which will be affected. It will also produce a .csv file of those Targets giving the Target ID and Identifier fields.
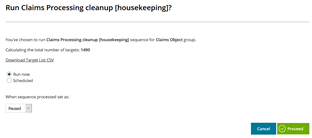
Note on the first screenshot above, the default option is “Run now”. When you click Proceed the system will start the Sequence and process the request.
In another field you have the option to leave the Sequence Paused or Running once the processing is complete. One very important thing to bear in mind when using this activation method is that if you leave the Sequence Paused after the Run, only the first object in the Sequence will be assigned/activated/enabled/sent, etc. In order to run a process consisting of more than one object you must leave the Sequence Running for it to process through those objects.
An alternative to this would be to use the “Sequence Activated” method to commence a Sequence which has more than one object to process and then create another Sequence which would be scheduled to Run the activation of the first Sequence. The second Sequence will have a State of “Scheduled” and will run according to the Schedule – see our article on setting up the Sequence Scheduler HERE.

 |
 |
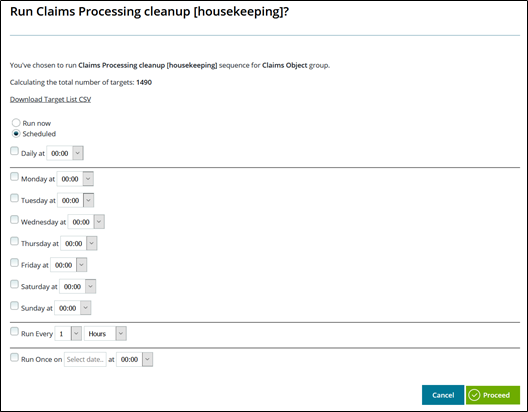
If you have installed the Sequence Scheduler from the Store, you will also have the option for “Scheduled”. If you change to this option further fields will be displayed allowing you to choose a schedule from one of the following options:
- Daily at a certain time
- Selected days of the week at set times
- Run Every - specified number of minutes, hours, days, weeks or months
- Run Once on a selected date at a set time
When you have made your schedule selection, click Proceed and you will be taken to the Sequence List where you will see that the Sequence State is now “Scheduled”.
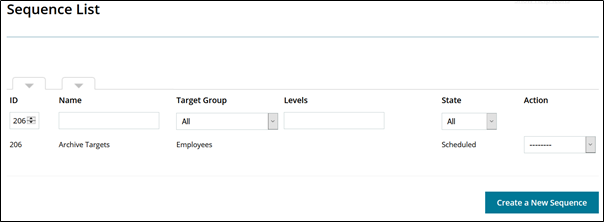
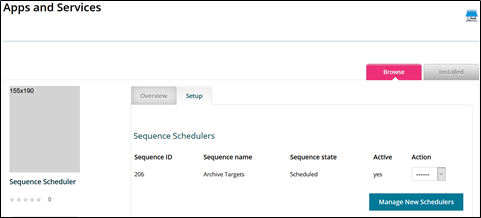
The scheduled Sequence will also appear in the Setup tab on the Sequence Scheduler in the Store.
Comments
0 comments
Please sign in to leave a comment.