The default logo used is the Autologyx logo.

This can be changed to a logo of your choice by adding some HTML code to the stylesheet in the System Pages Styling feature.
Ensure that System Pages Styling is installed in the Store.
Add the following HTML code:
img {
visibility: hidden;
}
#logo {
background-image: url();
background-repeat: no-repeat;
width: 210px;
height: 30px;
border: none;
margin-top: 28px;
}
After background-image: url, in the brackets this is where you need to enter the URL of the image you wish to be displayed. Ensure that the URL has apostrophes (‘) either side of the URL for it to work.
Ensure that the stylesheet is ticked as Active and Save.
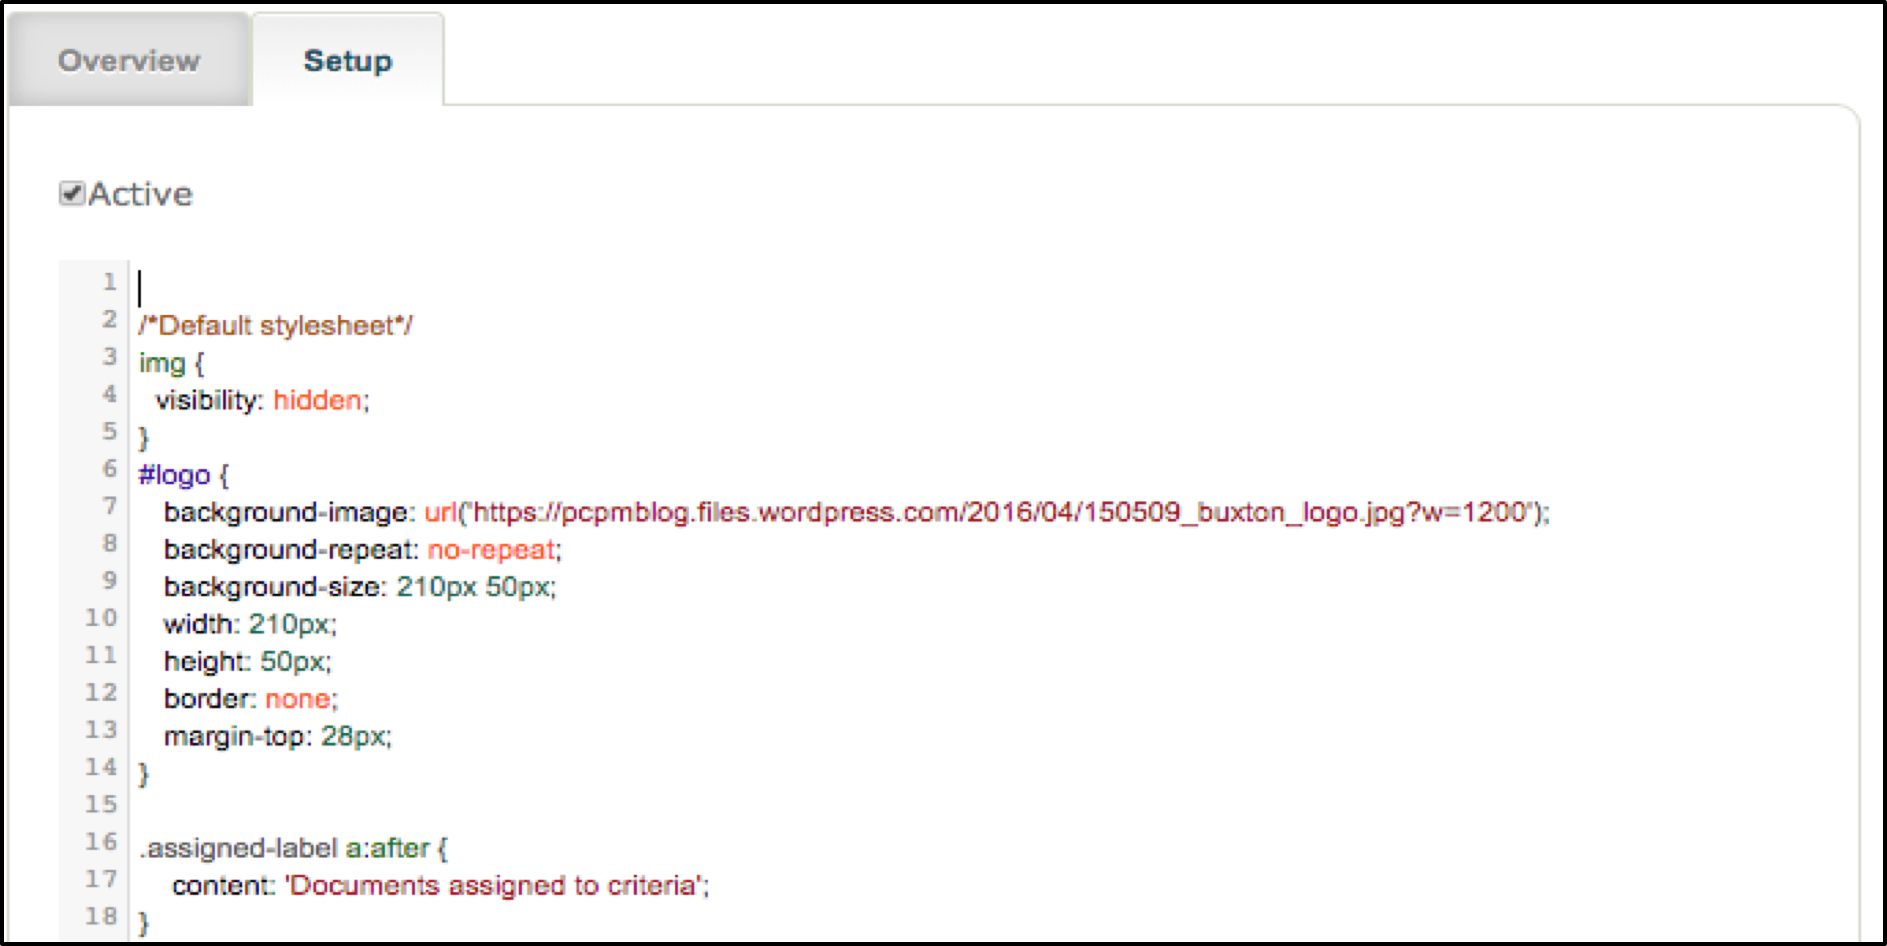
In the example below, the URL used is a logo for the company ‘Buxton’. On line 9, background-size is where you can alter the size of the image you wish to use. On lines 10 and 11, this is where you can set the size of the box where the logo will be inside of. If the width and height are greater or lower in line 9 than what is shown in lines 10 and 11, then the logo will not fit in properly.
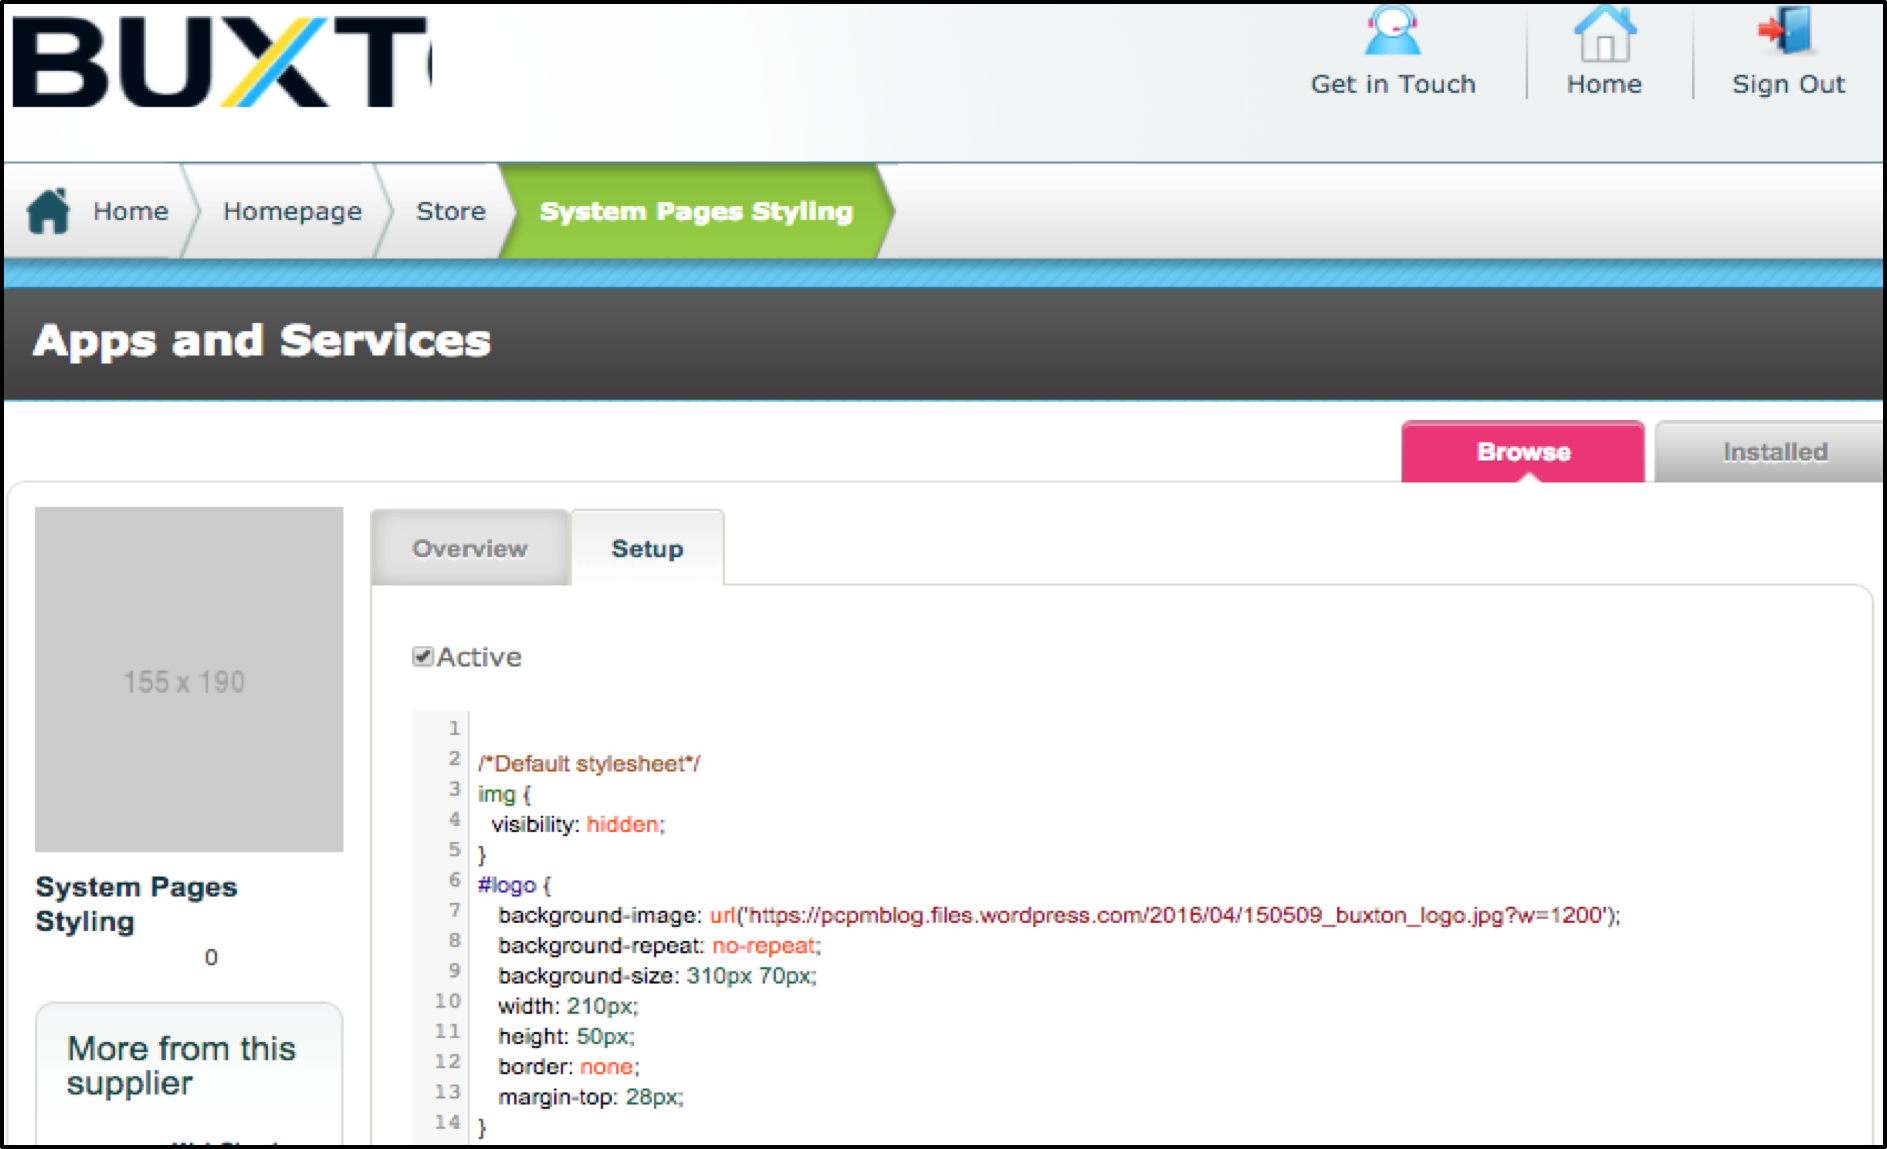
As you can see in the image below, on line 9 the width and height for the background size of the image, are greater than what the width and height of the frame of the box is on lines 10 and 11. The result of line 9 having greater values is shown below with the logo, as you can see it is too big to fit in the size of the frame configured.
In lines 3 and 4, the Autologyx system has the Autologyx logo hard coded in, so these 2 lines are setting the defaulted image to be hidden in order for the desired logo to show on its own only.
As you can see below, a new logo is now visible instead of the default Autologyx logo.

When any changes are made, ensure that once saved and active, that you also refresh the page for the changes to be implemented and displayed.
Comments
0 comments
Please sign in to leave a comment.