In the Action menu in the right most column of the form you have just created, select Configure Fields
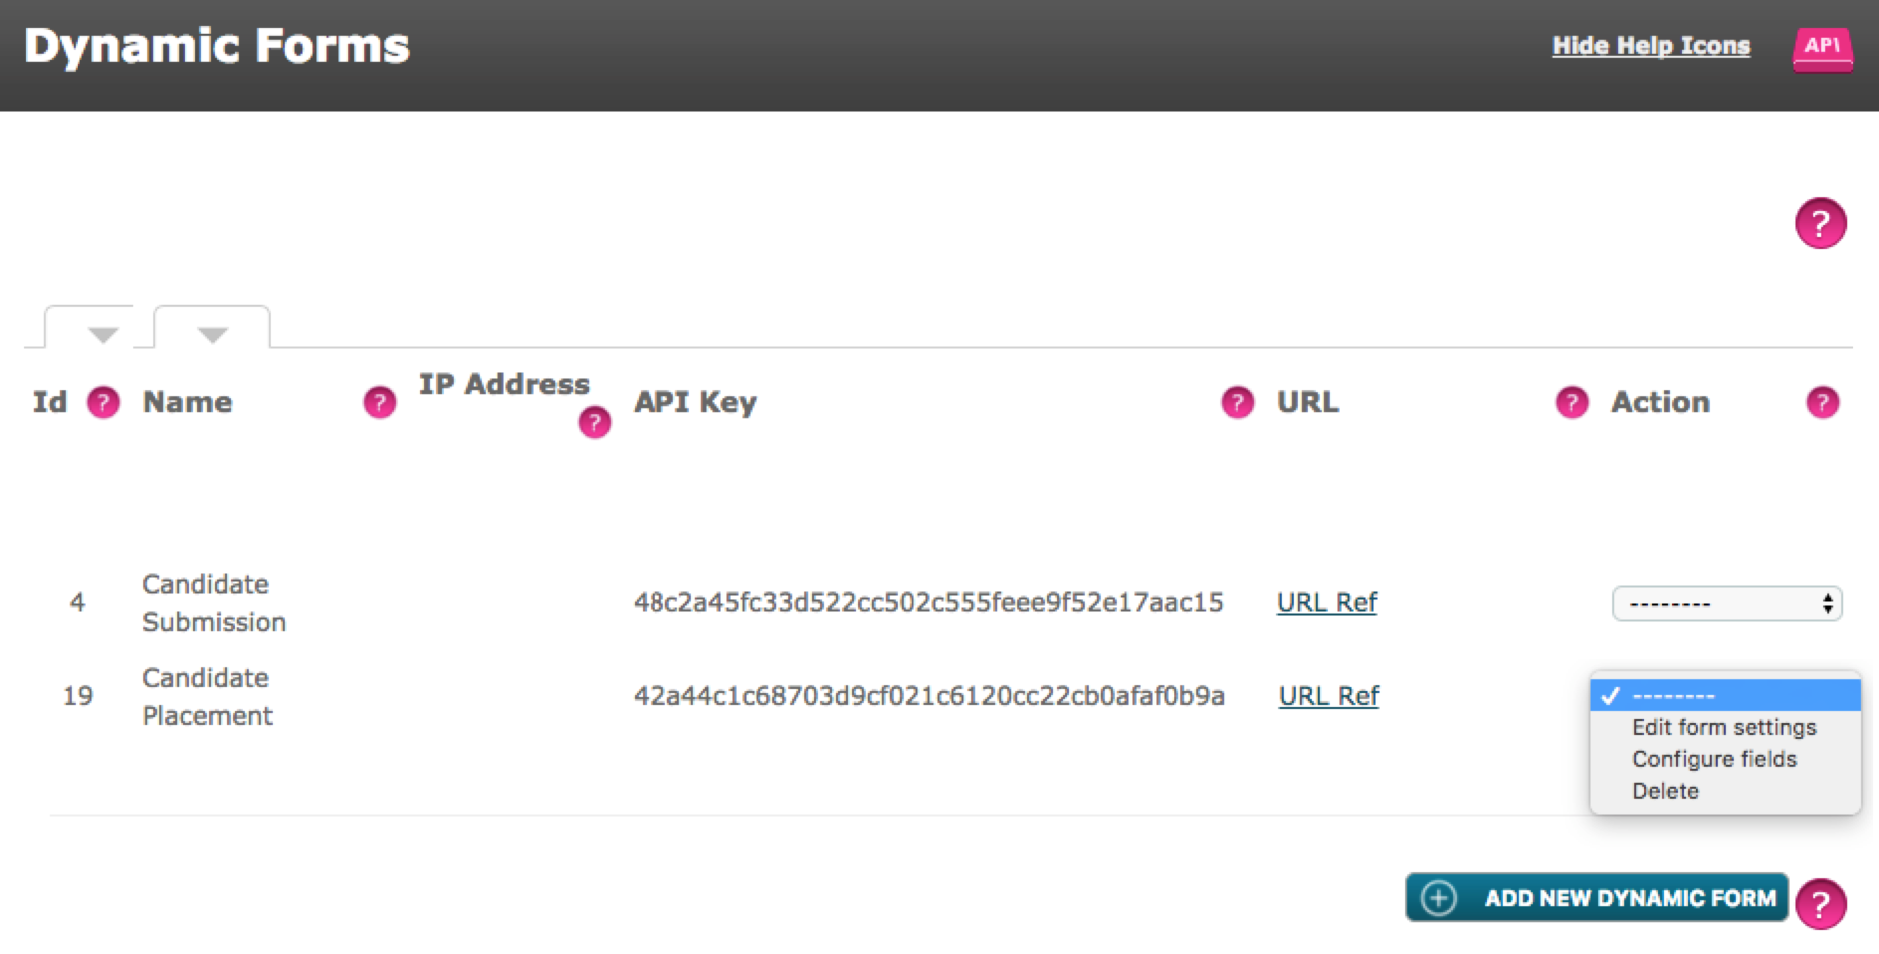
Select Configure Fields
All of the available fields to the Target Group (or Target Groups if you are using a Relational Target Group) will display here.
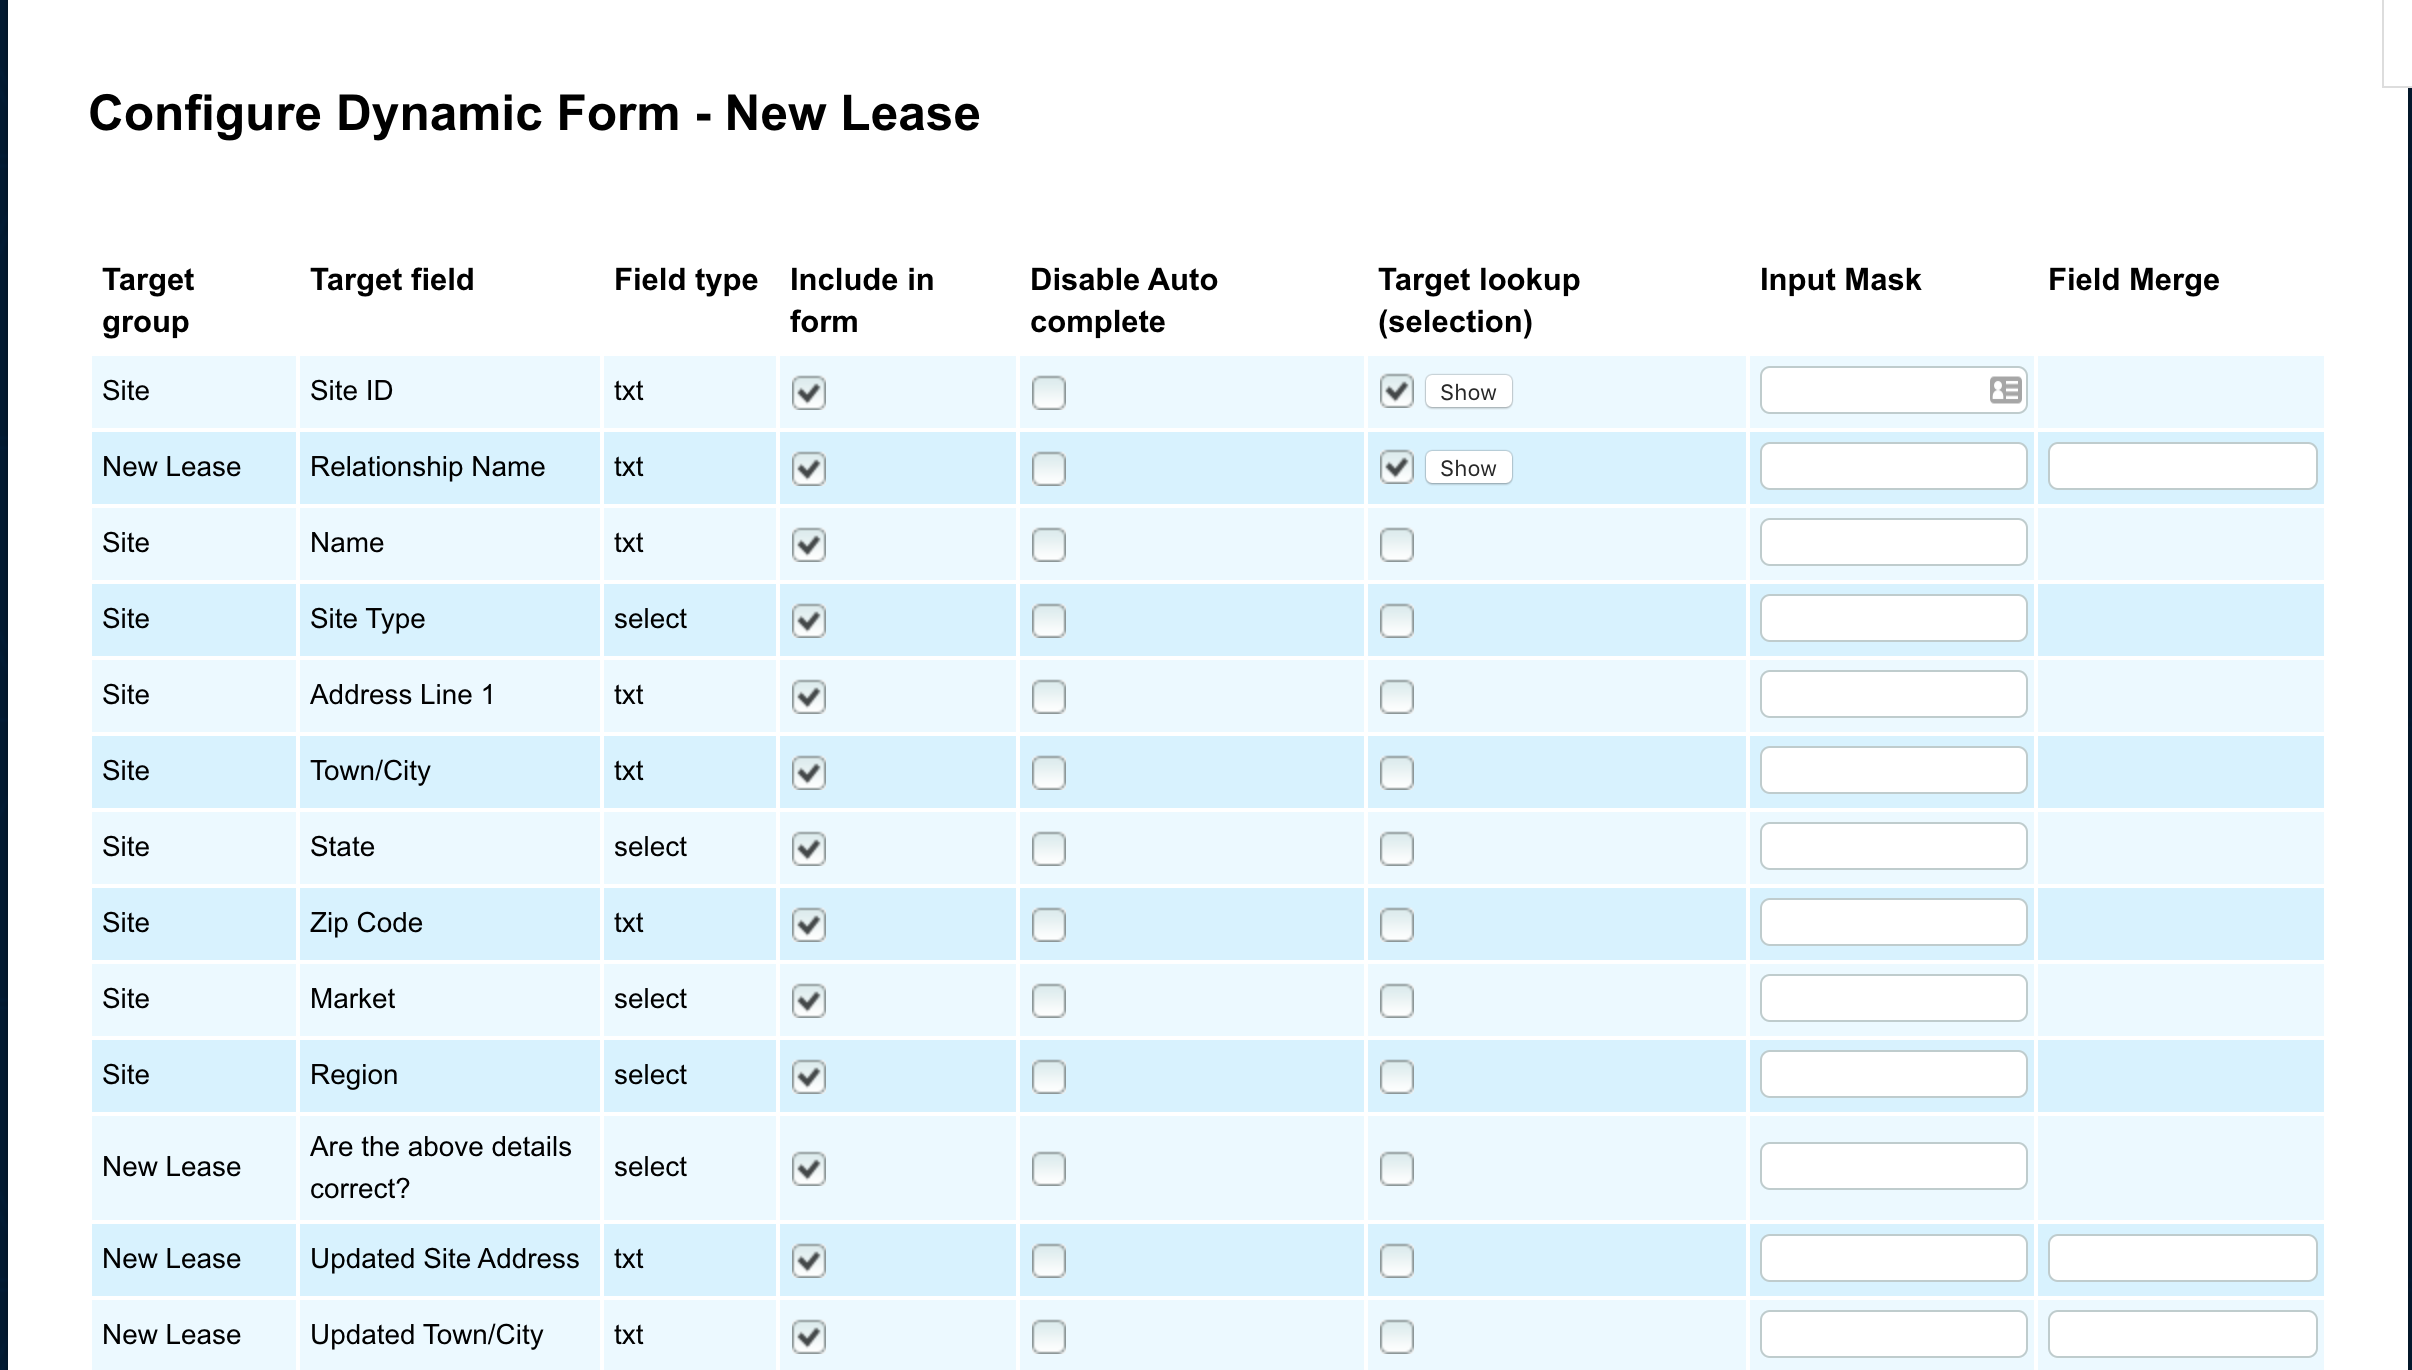
Include in Form
Select which fields will be included on the form. Drag and Drop fields to re-order them and check the toggle in the Include in Form column to include them.
Mandatory fields that have not been selected will prevent you from saving the form, be sure to include them

Disable Auto Complete
When completing the form, if you click in a field, then click in it again or alternatively type a space, a list of previously entered data will pop up, which can be a great time saver. However for some fields it may be better to stop this functionality altogether, in which case check the Disable Auto Complete toggle against the field.
Target lookup (selection) - Only relevant when the form Data Treated includes the ability to Update. This must be a field which holds unique data eg an email address or agreement/contract number. You will normally only require one Target lookup per Target Group.
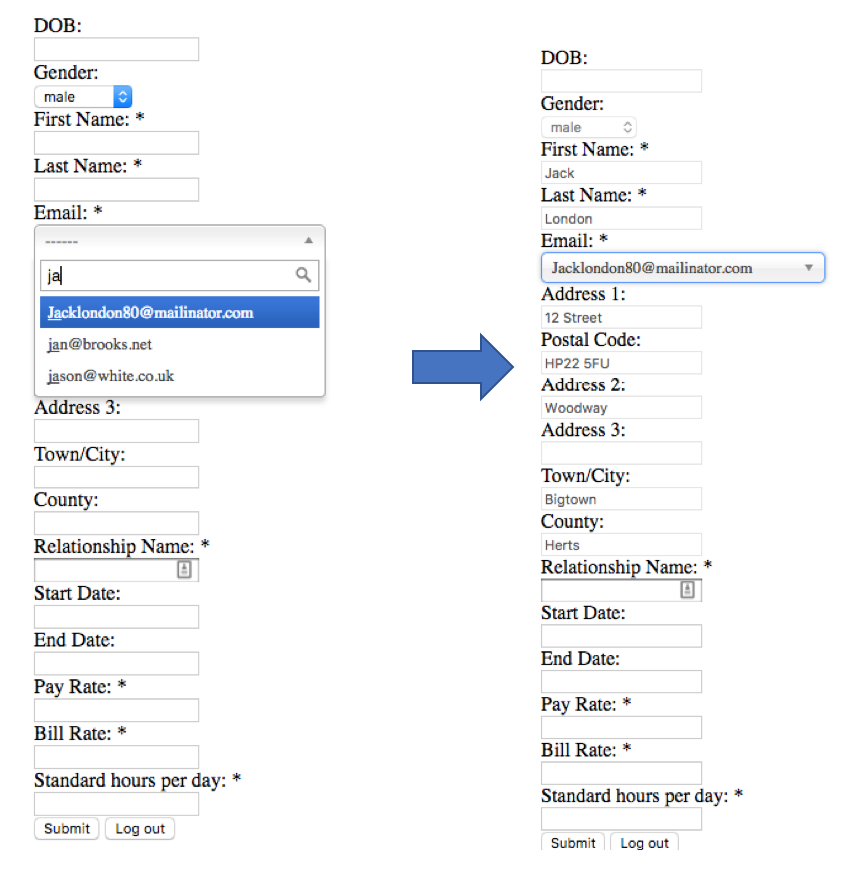
For example, if you choose ‘email address’ as the ‘Target lookup field’, when you enter text into the email address field it will present a list of matching email addresses in the system and when selected will populate the rest of the fields for that target, as seen below
To configure the Click the show button. Move the roles which do not have to be restricted into the right hand field leaving those you wish to apply the restriction to in the left hand field.
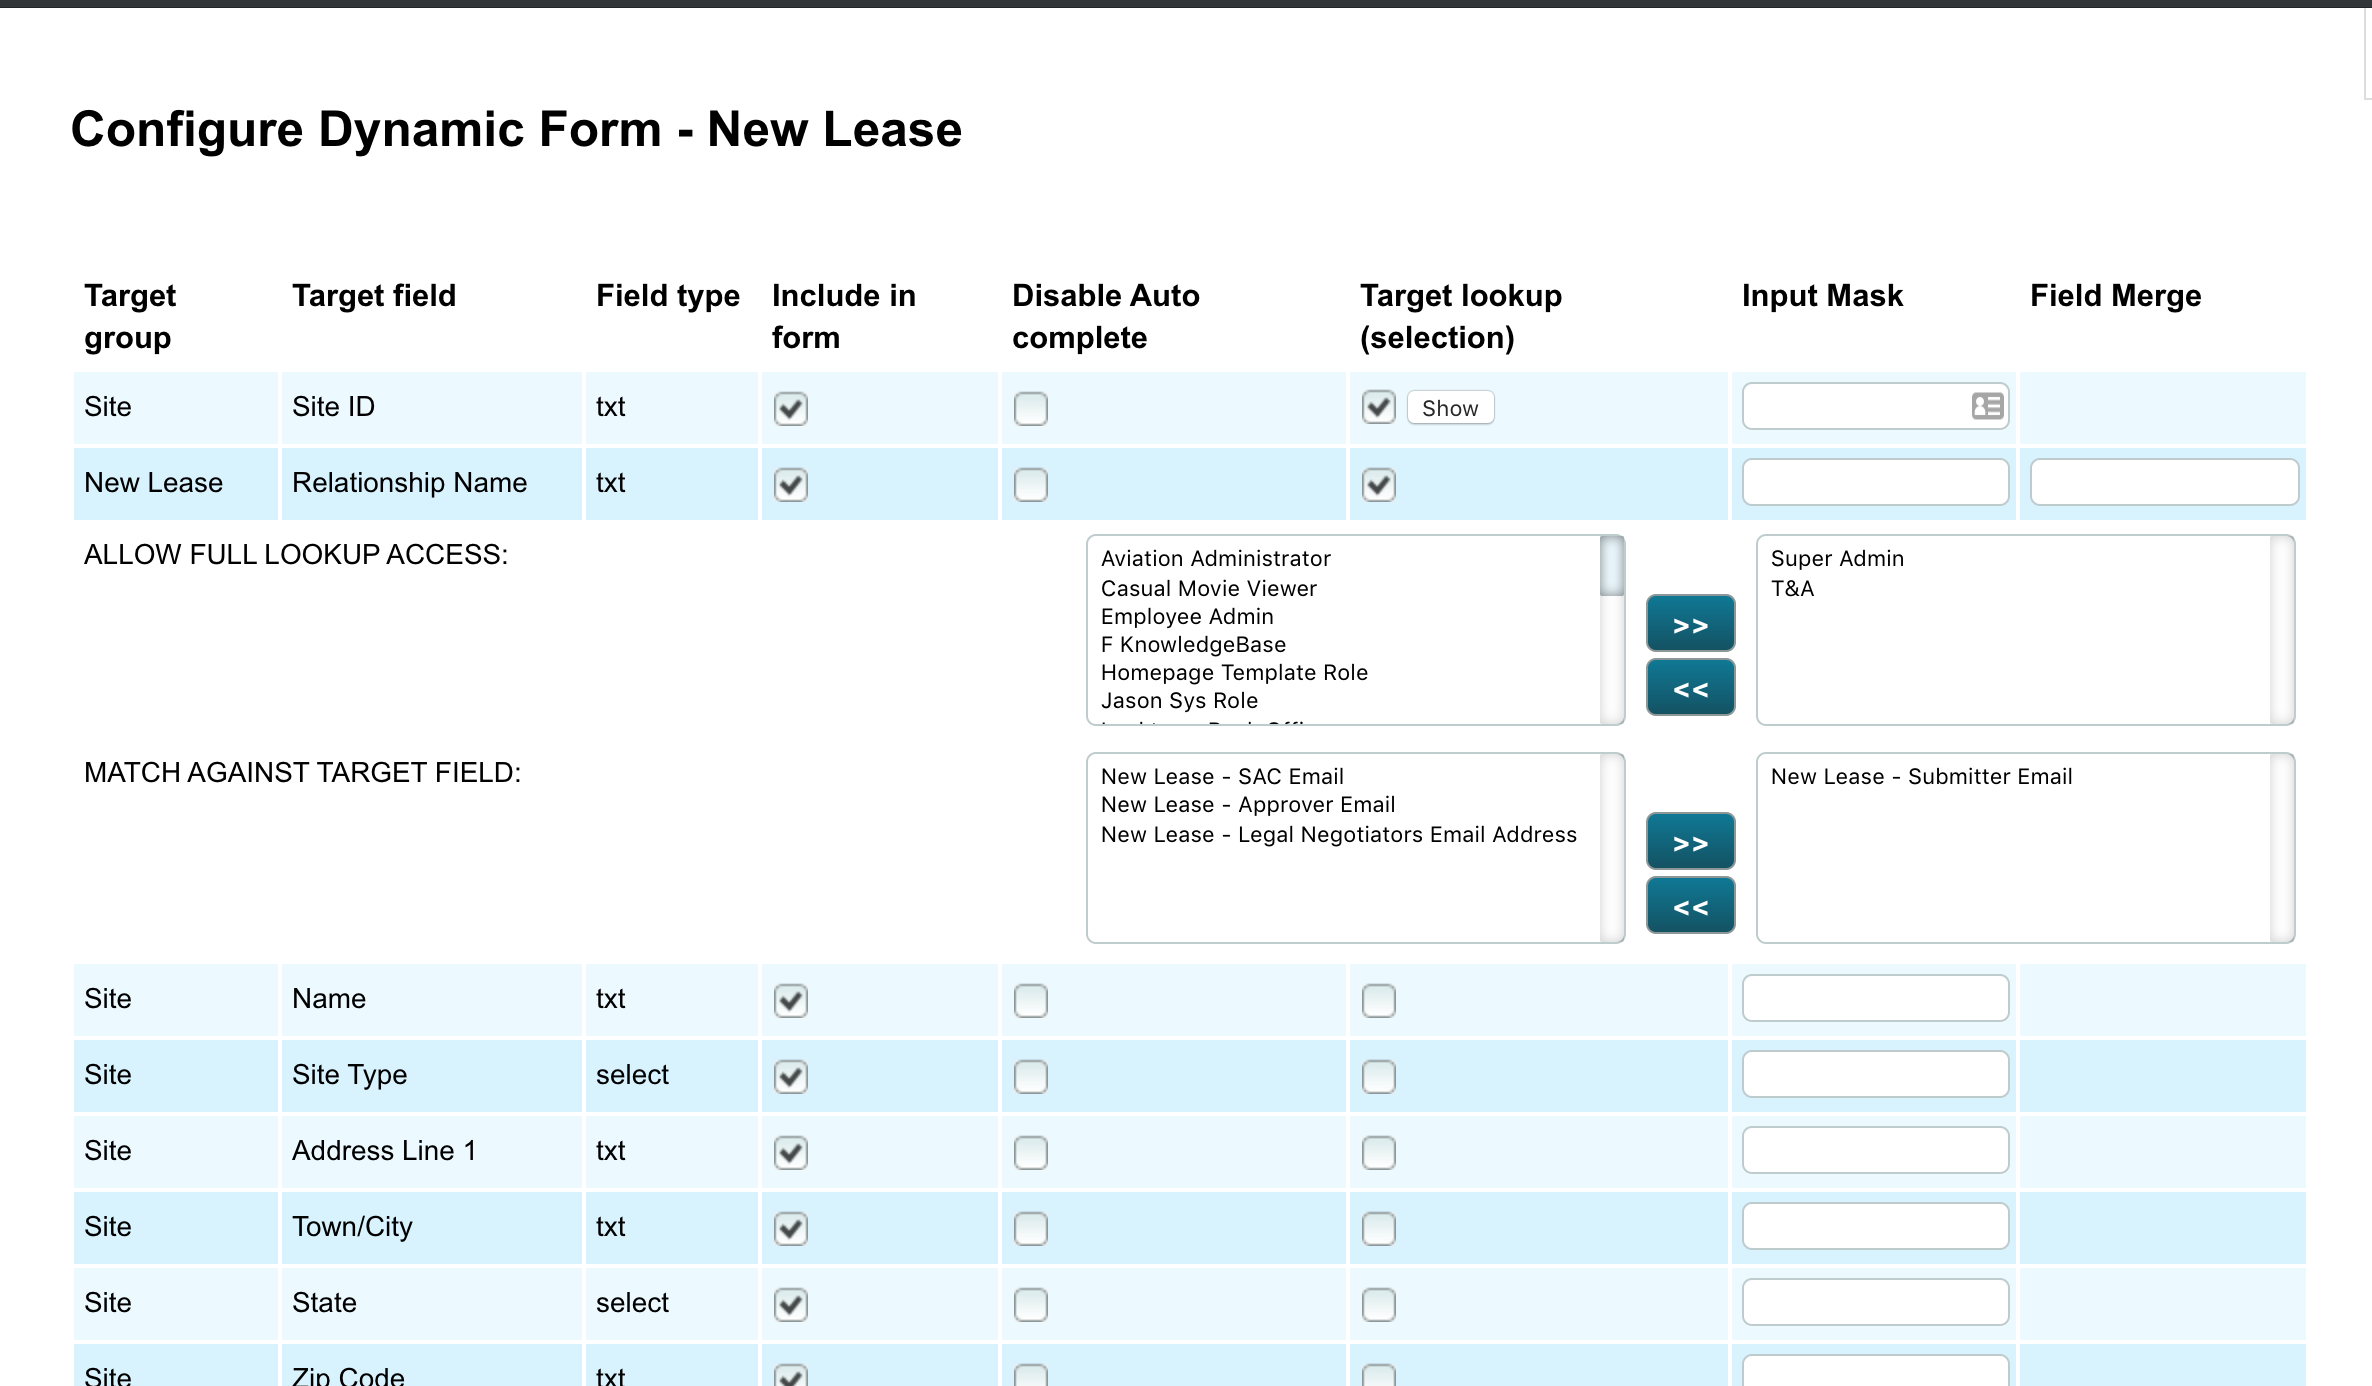
The Match Against Target Field will contain all the email fields in the Relational Target Group. Select the Email address field to apply the restriction to by moving it into the right hand field.
Input Mask – this will only work in HTML5 spec compliant browsers for URL forms (not Downloadable Forms).
You may wish to place some data control around the type of data that can be typed into the form. The Input Mask field lets you do that.
For example, here are some rules set up in the Configure Dynamic Form screen and what the result is in practice:
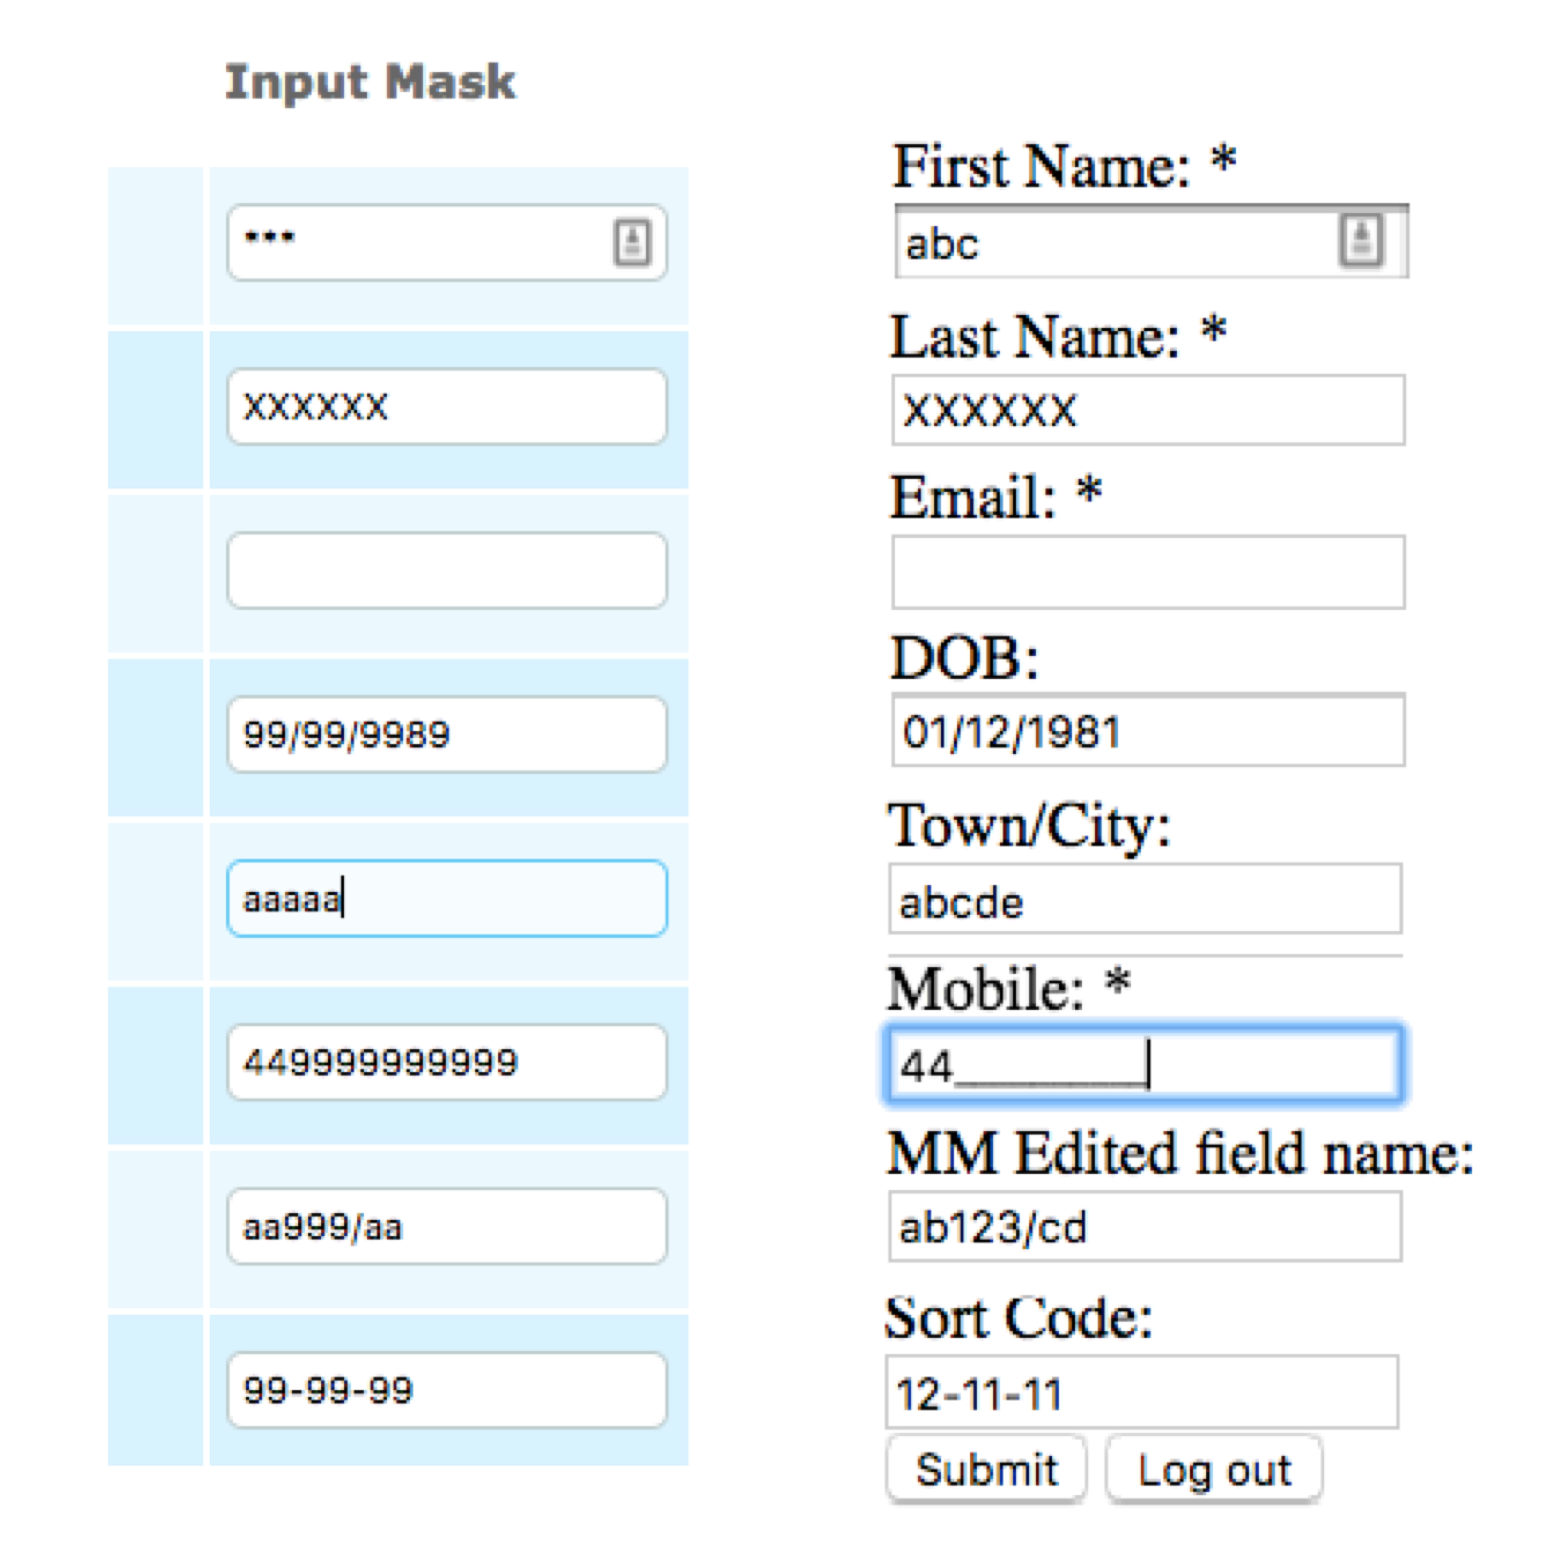
*** / Asterix – Determines the number of alpha numeric characters that can be entered into the field.
XXXXXX – or any characters that are not a lower case ‘a’. This will stop anything else from being entered into the field, it can’t be overwritten in the form.
Numbers – the number 9 means anything between 0-9 can be entered for that character space, notice in the example above there is an 8 in the date input mask. The 8 cannot be overwritten, only 9’s can be overwritten by numbers 0-9. In the Mobile number field I have set a prefix of 44 (can’t be overwritten) and then ten 9’s to allow another 10 digits of 0-9 to be entered.
Symbols – such as / or – cannot be overwritten in the form, and work as a great way for formatting dates or sort codes.
Lower case a’s - lower case a’s allow any Alpha characters to be entered in their place, in the Town/City example, only 5 characters can be entered because there are only 5 a’s in the Input Mask field.
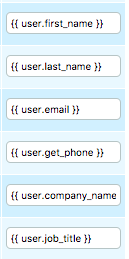
Field Merge - A User is able to merge in data in certain fields, such as a Users accounts details.
Comments
0 comments
Please sign in to leave a comment.