In Autologyx, we have the ability to Import Targets in to the system on top of the other methods that have been covered.
To Import Targets, go to Admin > Targets > Target Import
Step 1:
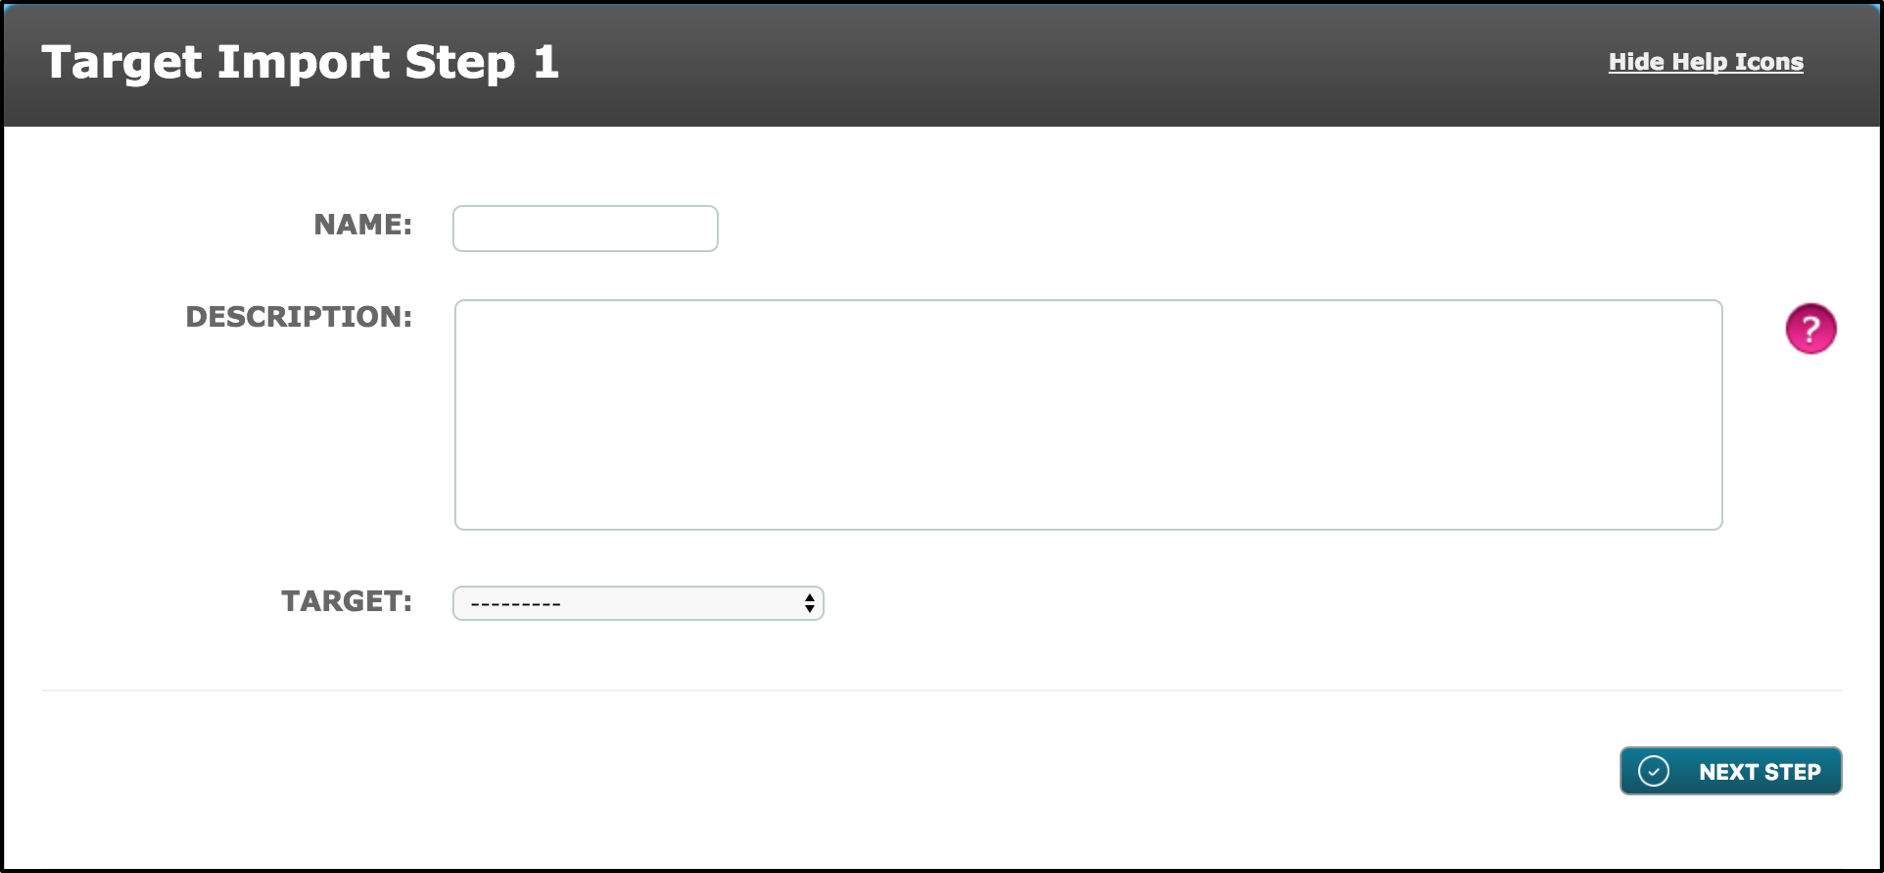 Name – Give the Target Import a name which is clear and recognisable to the users.
Description – Enter a brief description about who the targets that are being imported are.
Target – Select the required Target Group from the drop-down menu. When Importing Targets, all targets comprising of Person, Thing or a Relational target group can be used/selected.
Step 2:
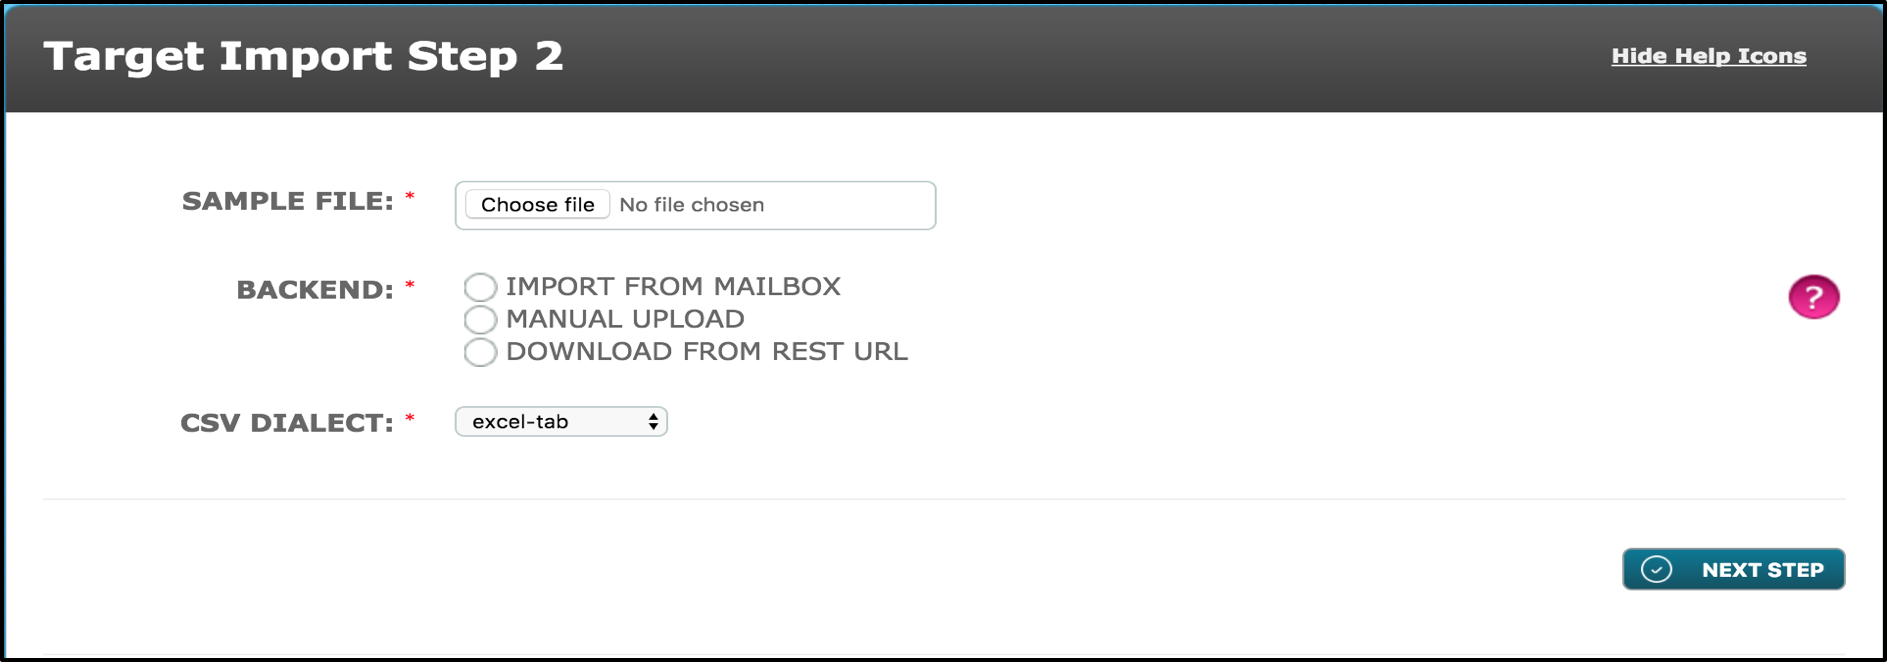
Sample File – This is where the file of the data to be imported is selected. Click on ‘Choose File’ and select the file from your documents that you wish to be imported.
Note: It is required that the file uploaded must be from Excel and that the format of this Excel file, must be either a ‘Tab’, ‘CSV’ or ‘Semicolon’ file.
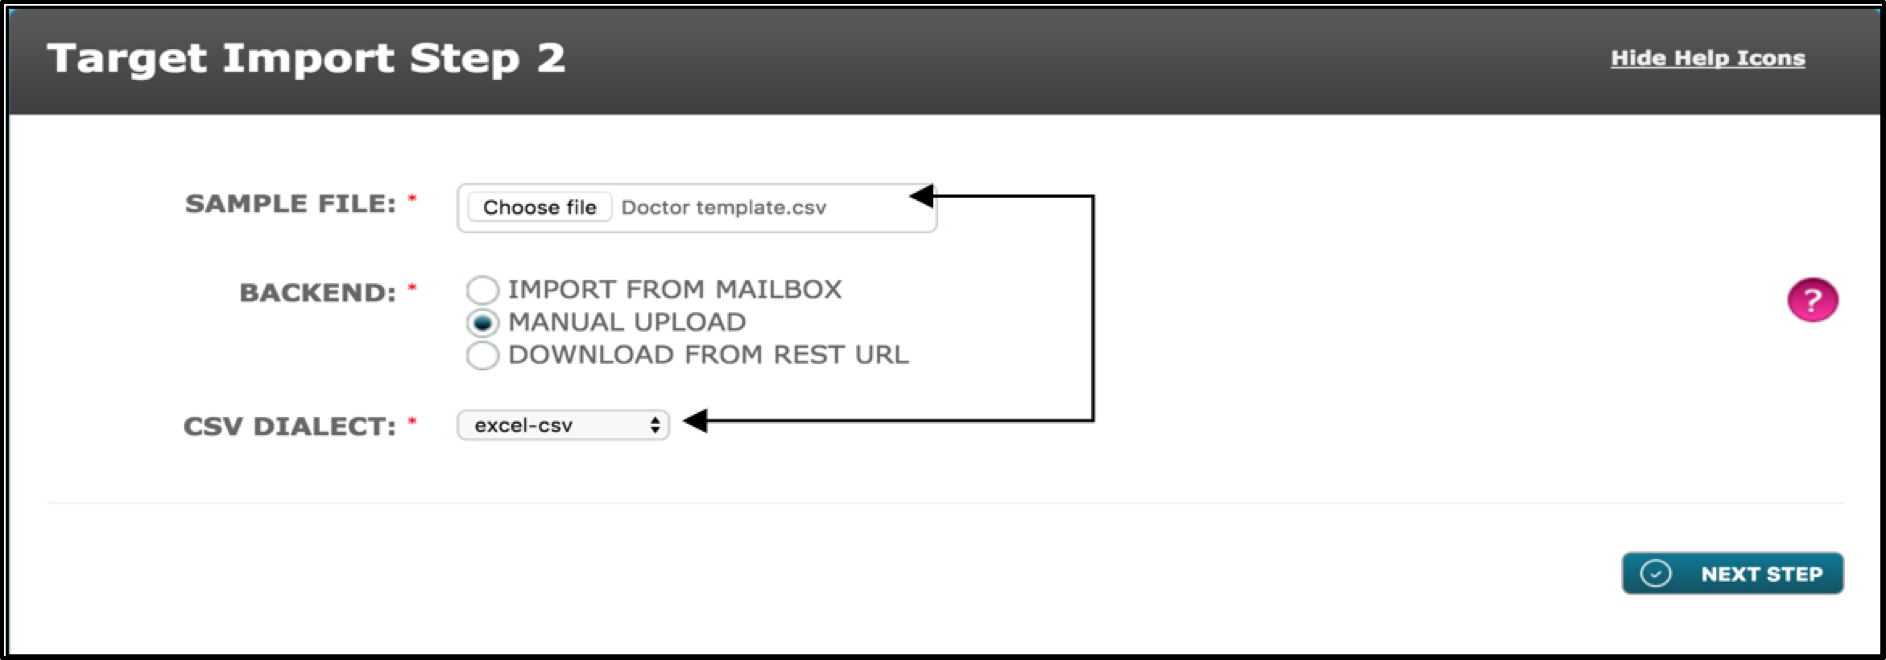
Backend – This is where you choose how and where the file is uploaded from, if the Excel file has been chosen from your documents, then select ‘Manual Upload’.
CSV Dialect – Select the file type of the Excel document as explained previously in the ‘Sample File’ instructions. From the drop-down menu, select either ‘excel-tab’, ‘excel-csv’ or ‘excel-semicolon’.
Note: It is important that the document file type uploaded, matches the CSV Dialect drop down menu selection.
 Step 3:
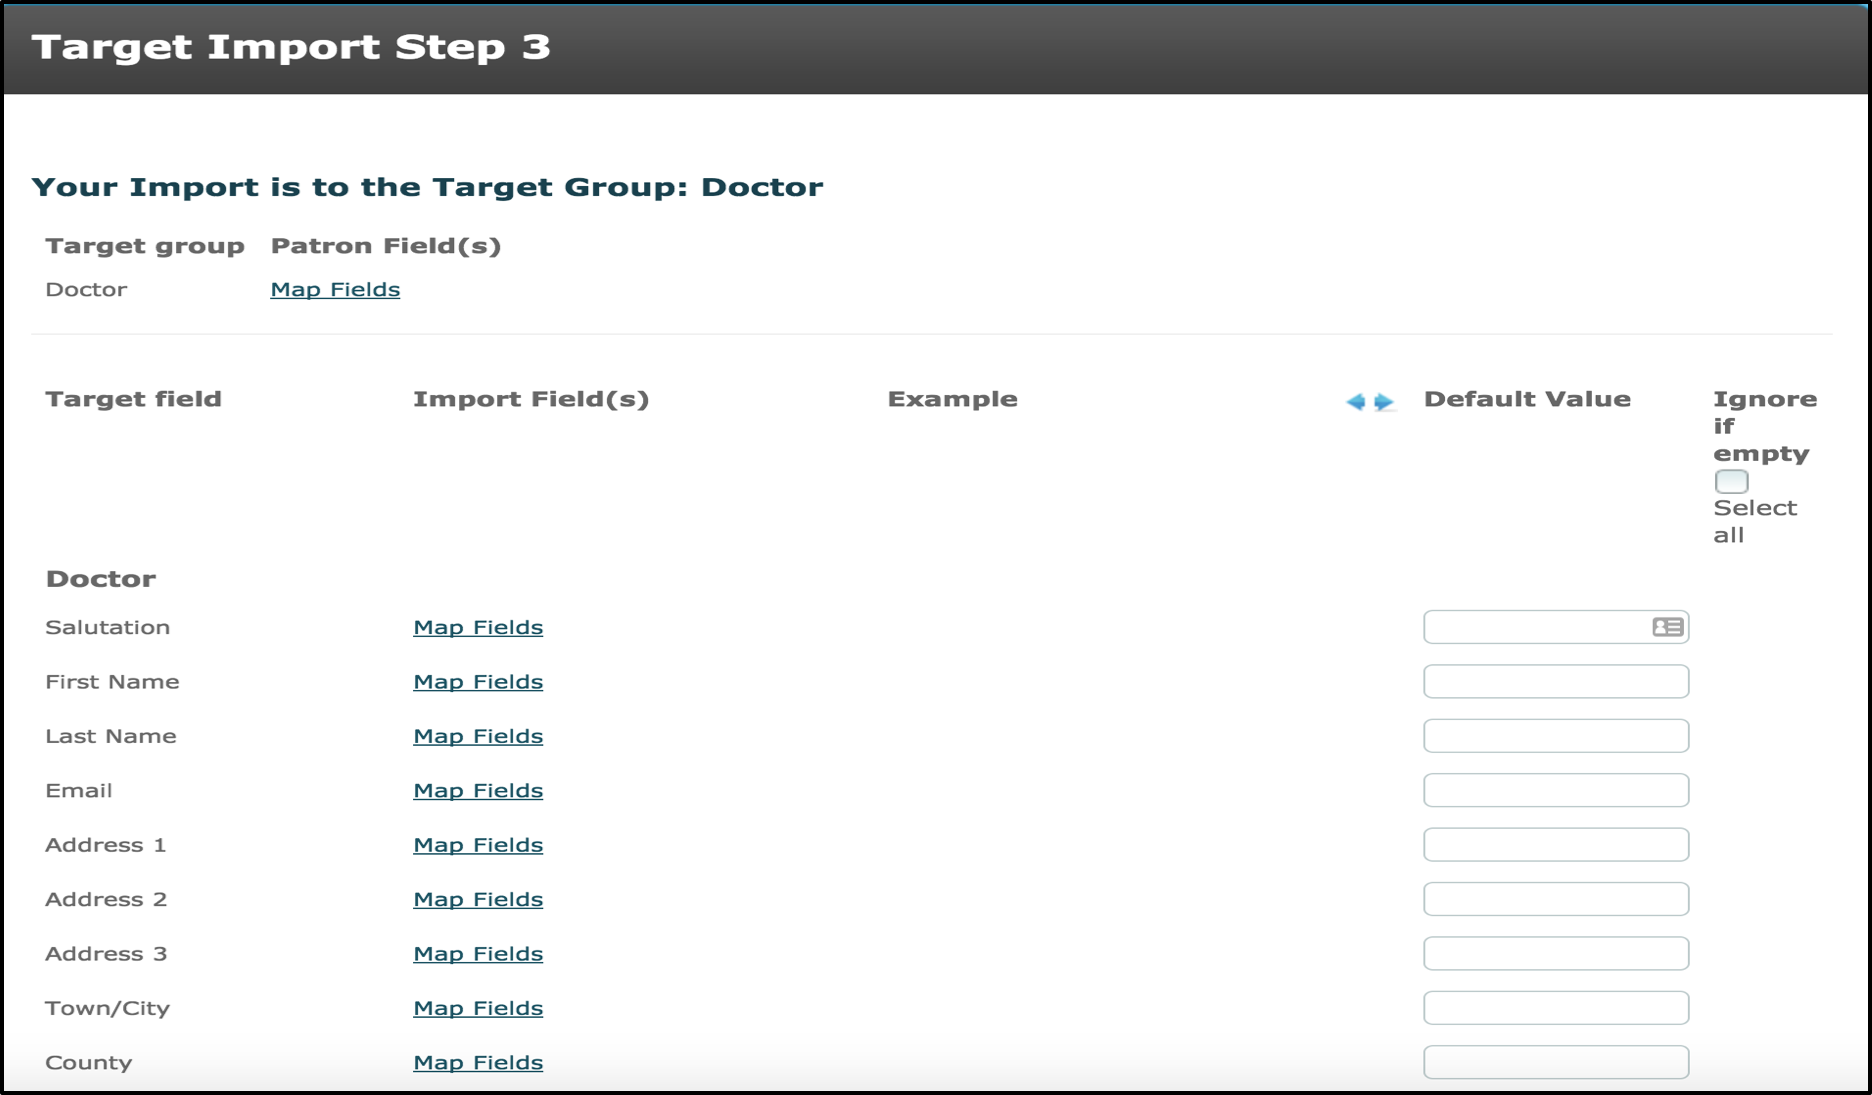 As seen in the above image, there are 5 columns.
The first column ‘Target Field’ will present all the Target Fields that have been assigned to the Target Group that was selected on the first step of the Target Import.
The second column ‘Import Field(s)’ allows the user to click on ‘Map fields’ for each target field, this button allows the user to manually link the Target Fields from the Target group, to the Excel documents Target Fields titles.

For the target field First Name, the user would then select ‘FIRST NAME’ from the fields to map to link them.
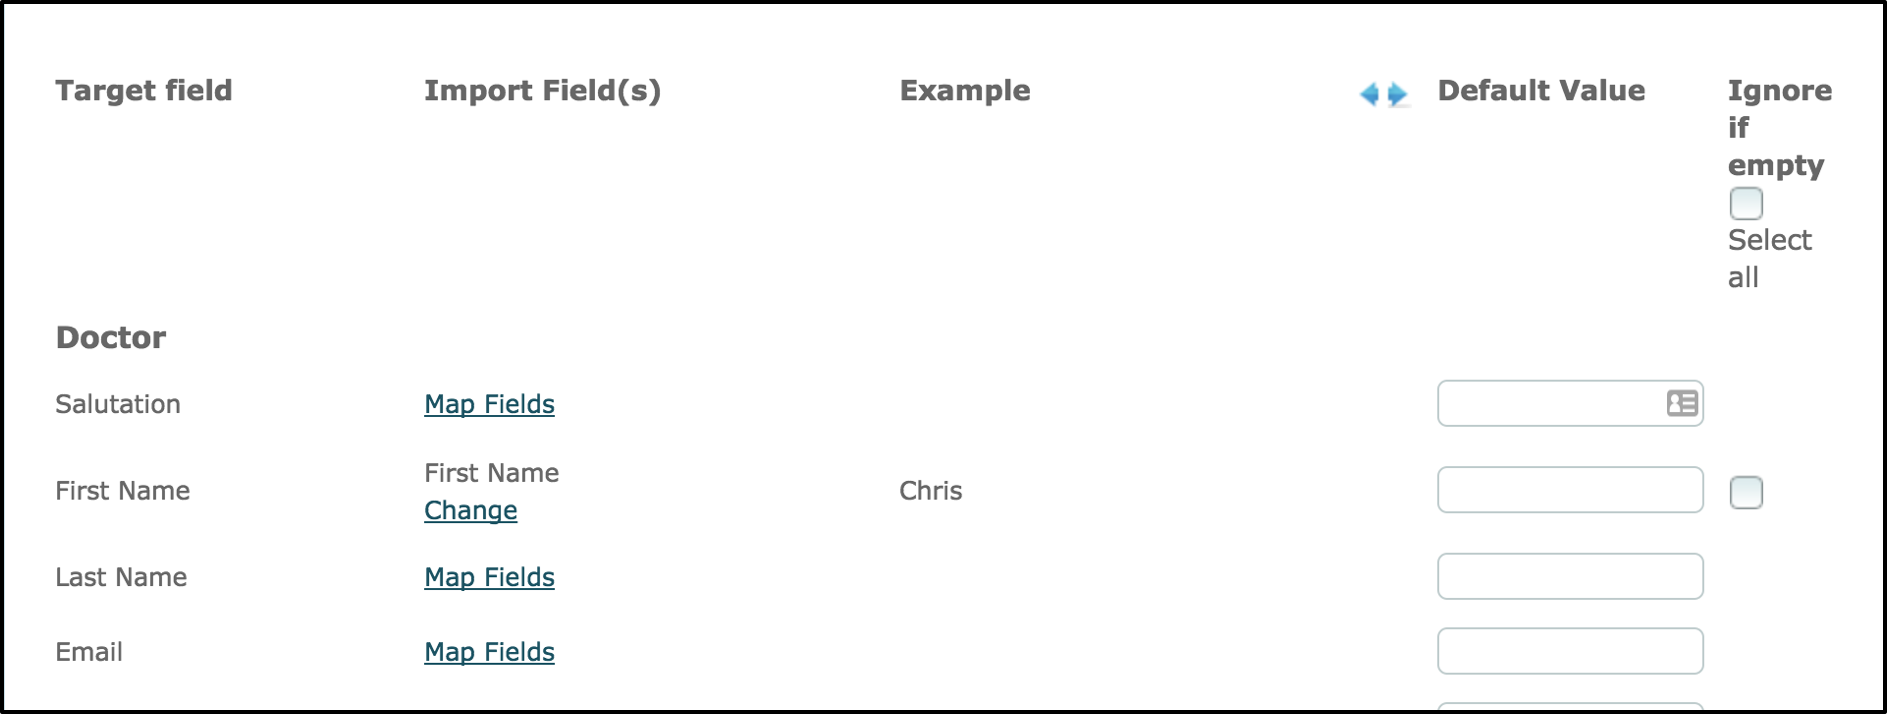
Once completed, the previous list will be updated. Continue to select the ‘Map Fields’ options for all the Target Fields that are the same as what is shown in the Excel document columns. If there are Target fields that do not need importing through ‘Map Fields’, then leave them blank.
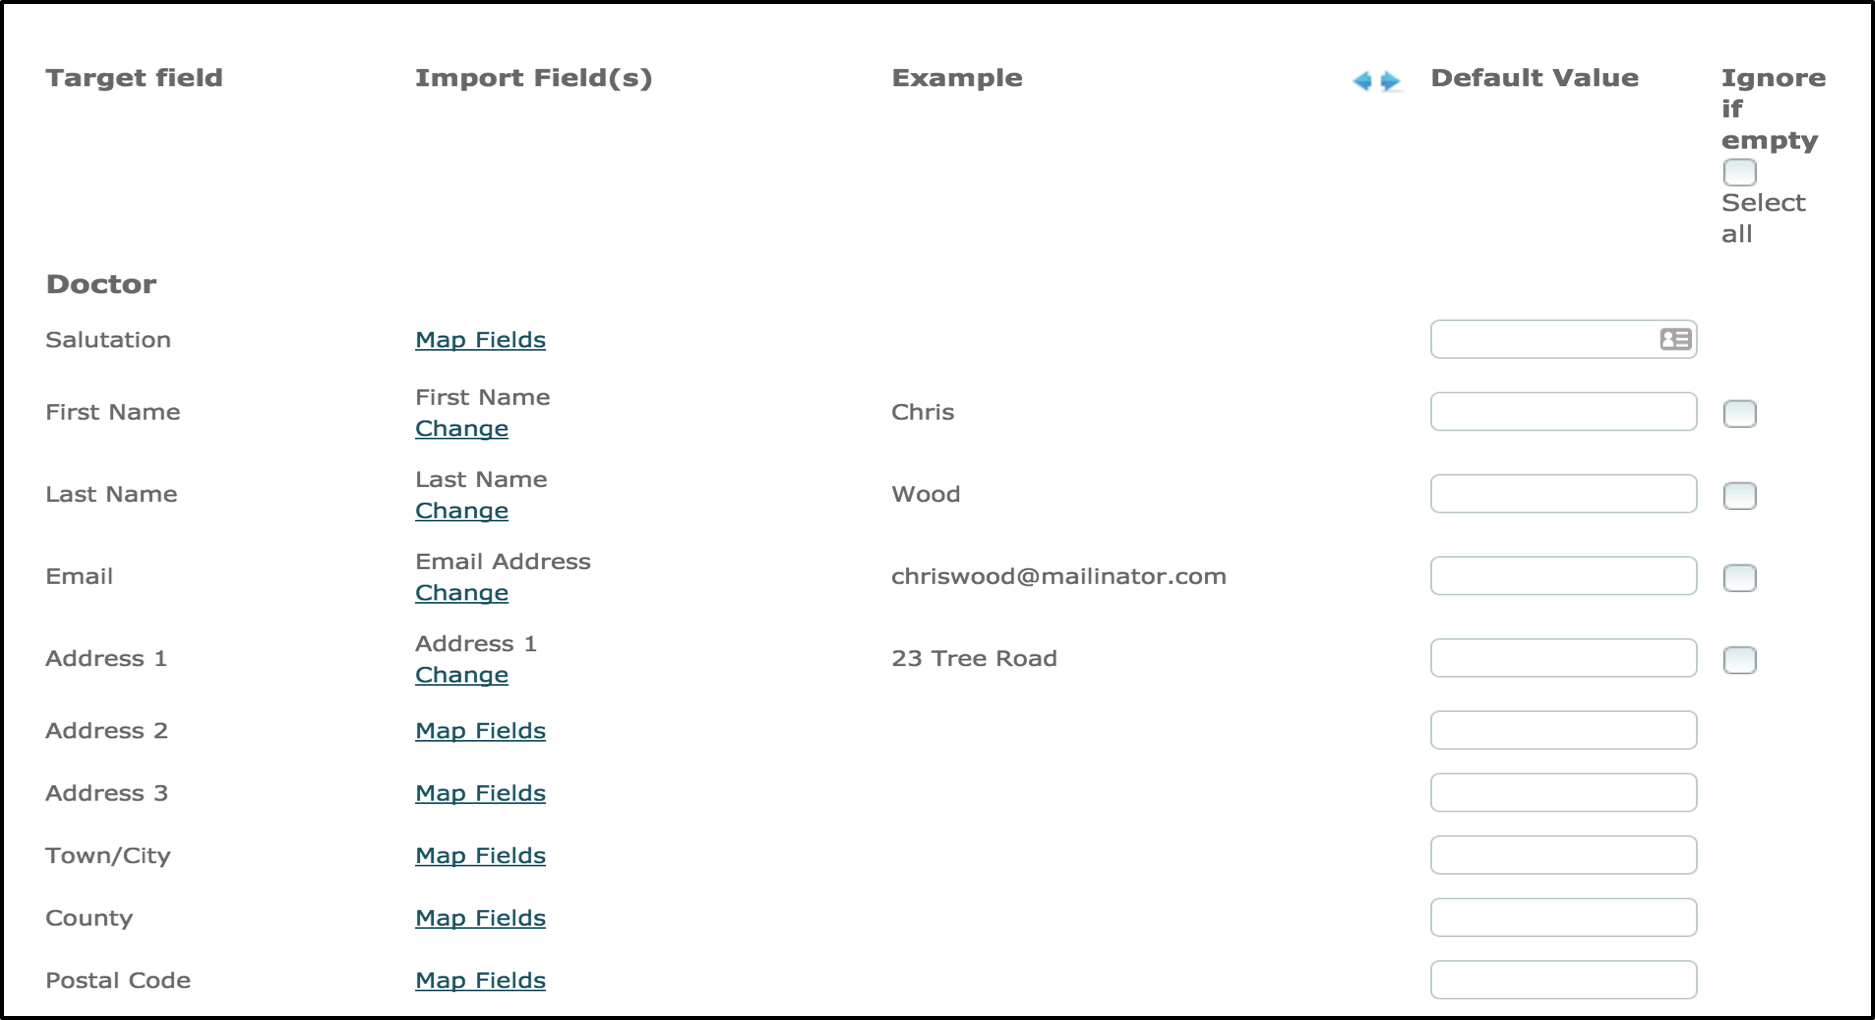
After the user has selected all the relevant fields to import in the second column, an example of each field is provided in the third column. The example provided in the third column is generated using the first Target found on the Excel document. This is the opportunity to check if the data from the first target has been imported successfully.
In the fourth column ‘Default Value’, this allows the user to fill in a response for the field automatically, where all targets would have the same response.
In the fifth column ‘Ignore if empty’, this allows the user to select individual fields or the ability to ‘Select all’. If a field has been selected to ‘Ignore if empty’, it will allow the data from the Excel document to still upload even if the field in the Excel document is blank. If the ‘Ignore if empty’ boxes are un-selected, then the data in the Excel document with the corresponding field will not ignore this and therefore the import will not proceed. Further in to the Target Import process, if the ‘Ignore if empty’ has been selected, but these fields are empty in the Excel document, then a list of errors will arise for the mandatory fields, further in to the process more information will be provided on this.
Step 4:
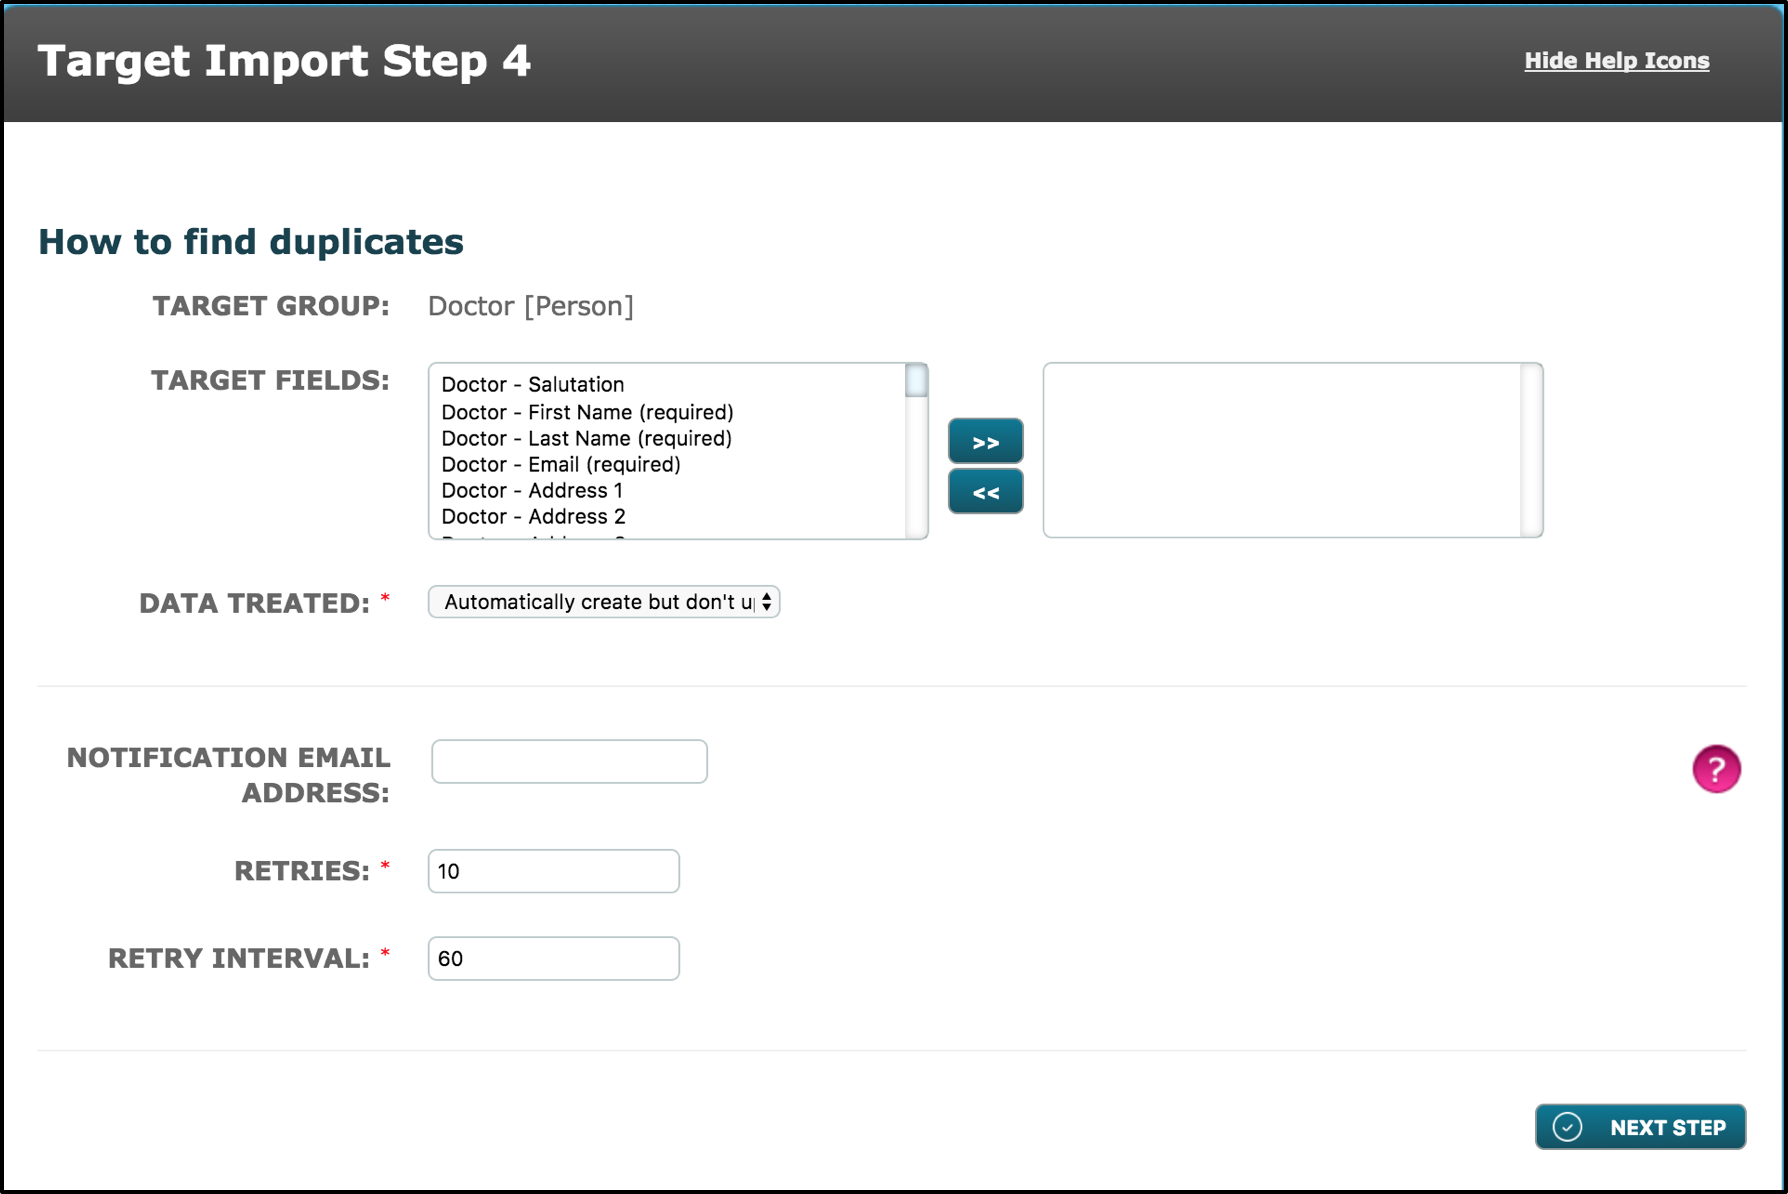 The next step is used to find duplicates. From the list of target fields provided, the user will select the Target Field(s) that is the identifier field. The identifier, being the unique value that each target will have, will mean that if more than one target has the same value, then it is a duplicate. Select the appropriate Target Field(s) and move it into the right box.

Data Treated – This allows you to select how the imported data is treated.
- Automatically create but don’t update existing targets – this option allows you to create an individual or Relational target. In addition, it allows you to create or select existing child targets for the relationship.
- Automatically create and update existing records – this option allows you to create or update an individual or relational target. As above, child targets can be created or selected for the relationship but they cannot be updated
- Automatically update existing but don’t create records – this option allows you to update existing targets. In the case of a relationship the relational target can be updated but not the child target.
Notification Email Address – This allows the user to be updated via Email if the target import has been successful or not, and in the event that the import is unsuccessful, will inform the user how many targets had failed.
Retries – Choose a number for the user, that number will then be the number of attempts to Import the targets again once the data has been updated having been unsuccessful in the past.
Retry Interval – Choose a number for the user, this number will be the number of minutes where a retry attempt can take place.
Note: If the Excel document file contains a small quantity of targets such as below 10, then set the ‘Retry Interval’ to a low number, where as if there are 10,000 targets in the Excel document file, then set a larger number of minutes to wait.
Step 5:
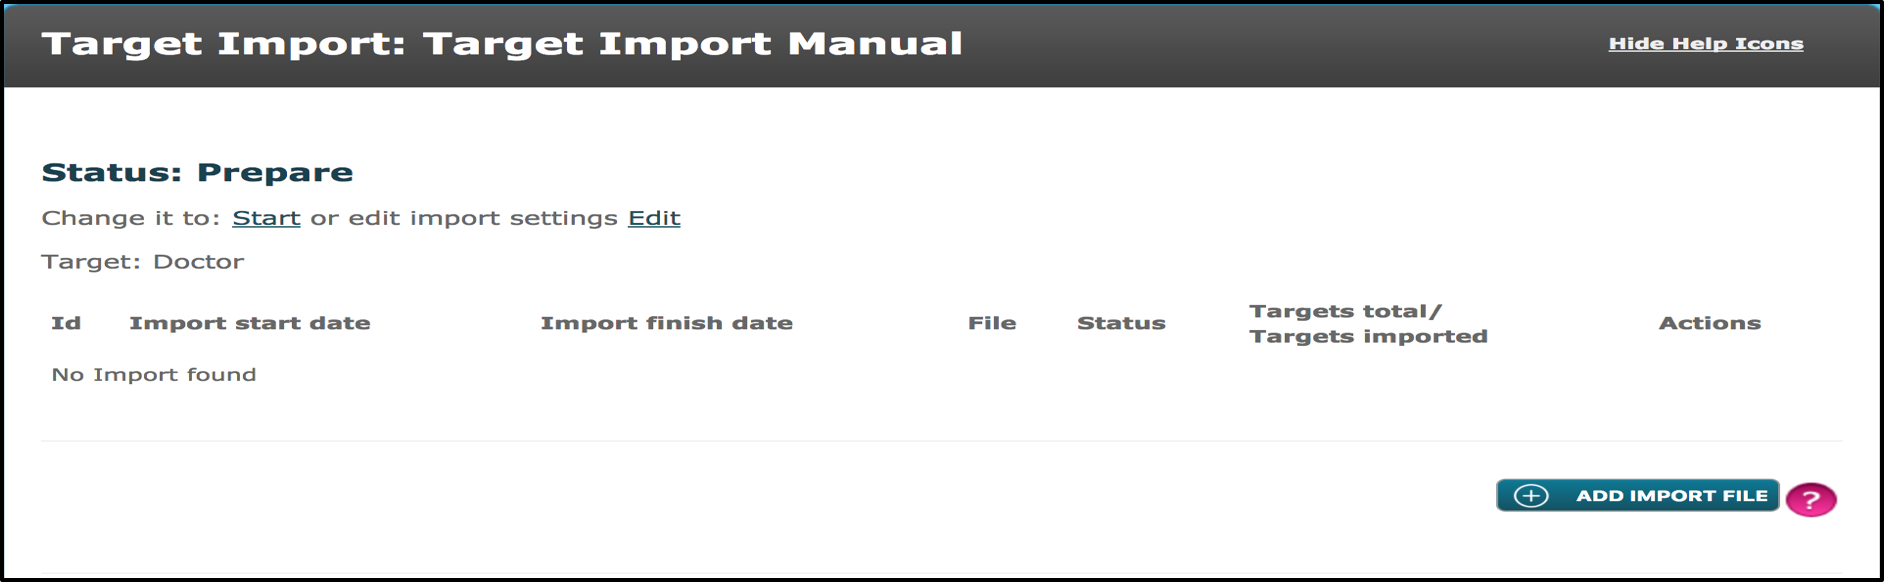 Here the user will import the Excel document file by clicking on the ‘Add Import File’ button.
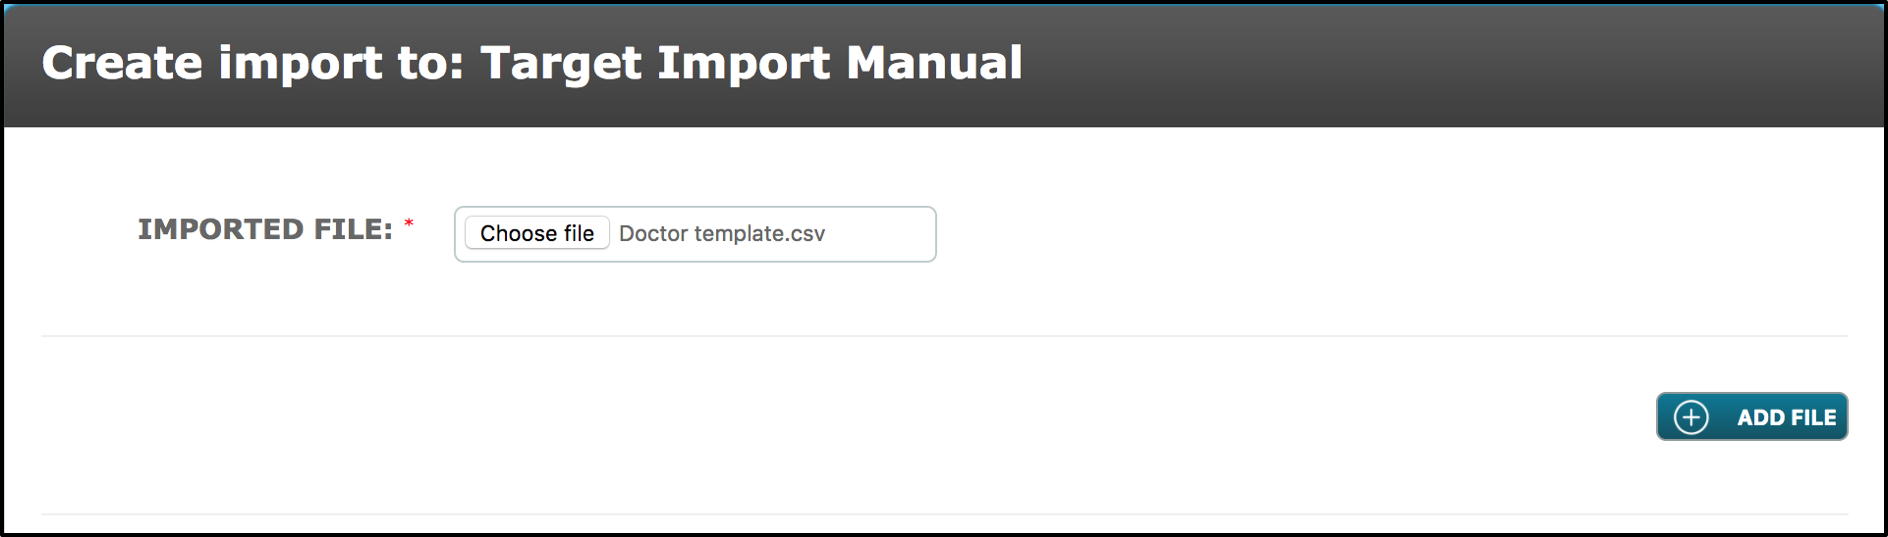
Then the user will select ‘Choose File’ and select the appropriate Excel document file. Once completed, select ‘Add File’ to proceed.
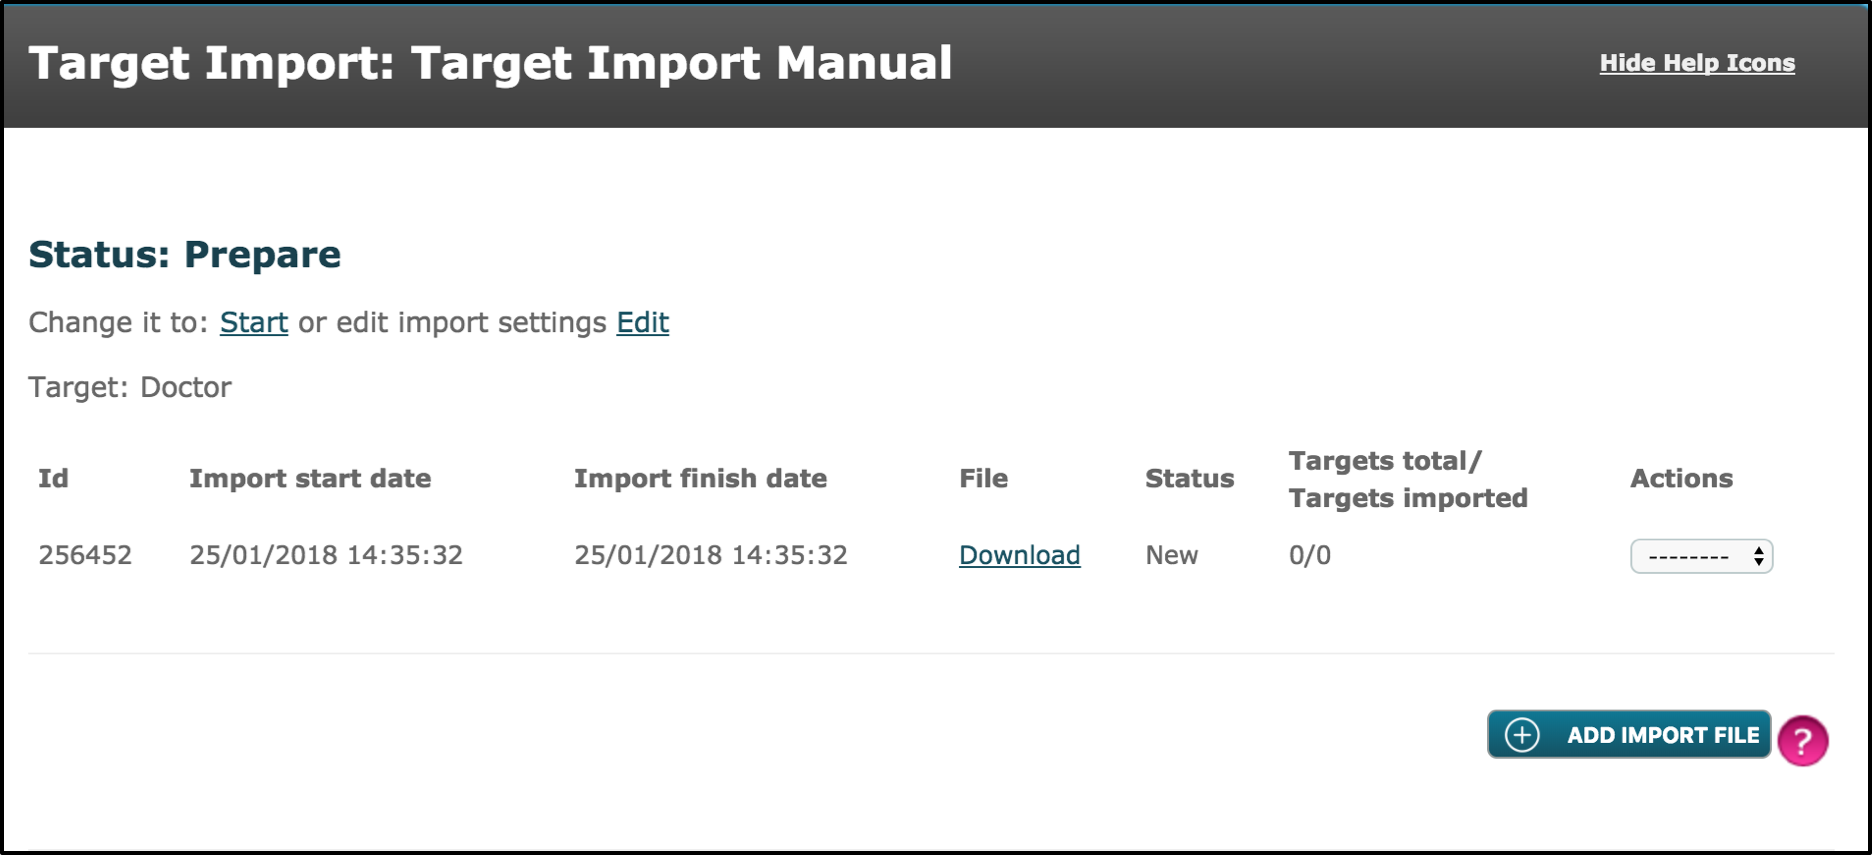
Now the file has been selected, the Target Import is ready to take place. The status prior to the start of the Target Import is at ‘New’. When the user is ready to start the Target Import, select the ‘Start’ button located under the ‘Status: Prepare’.
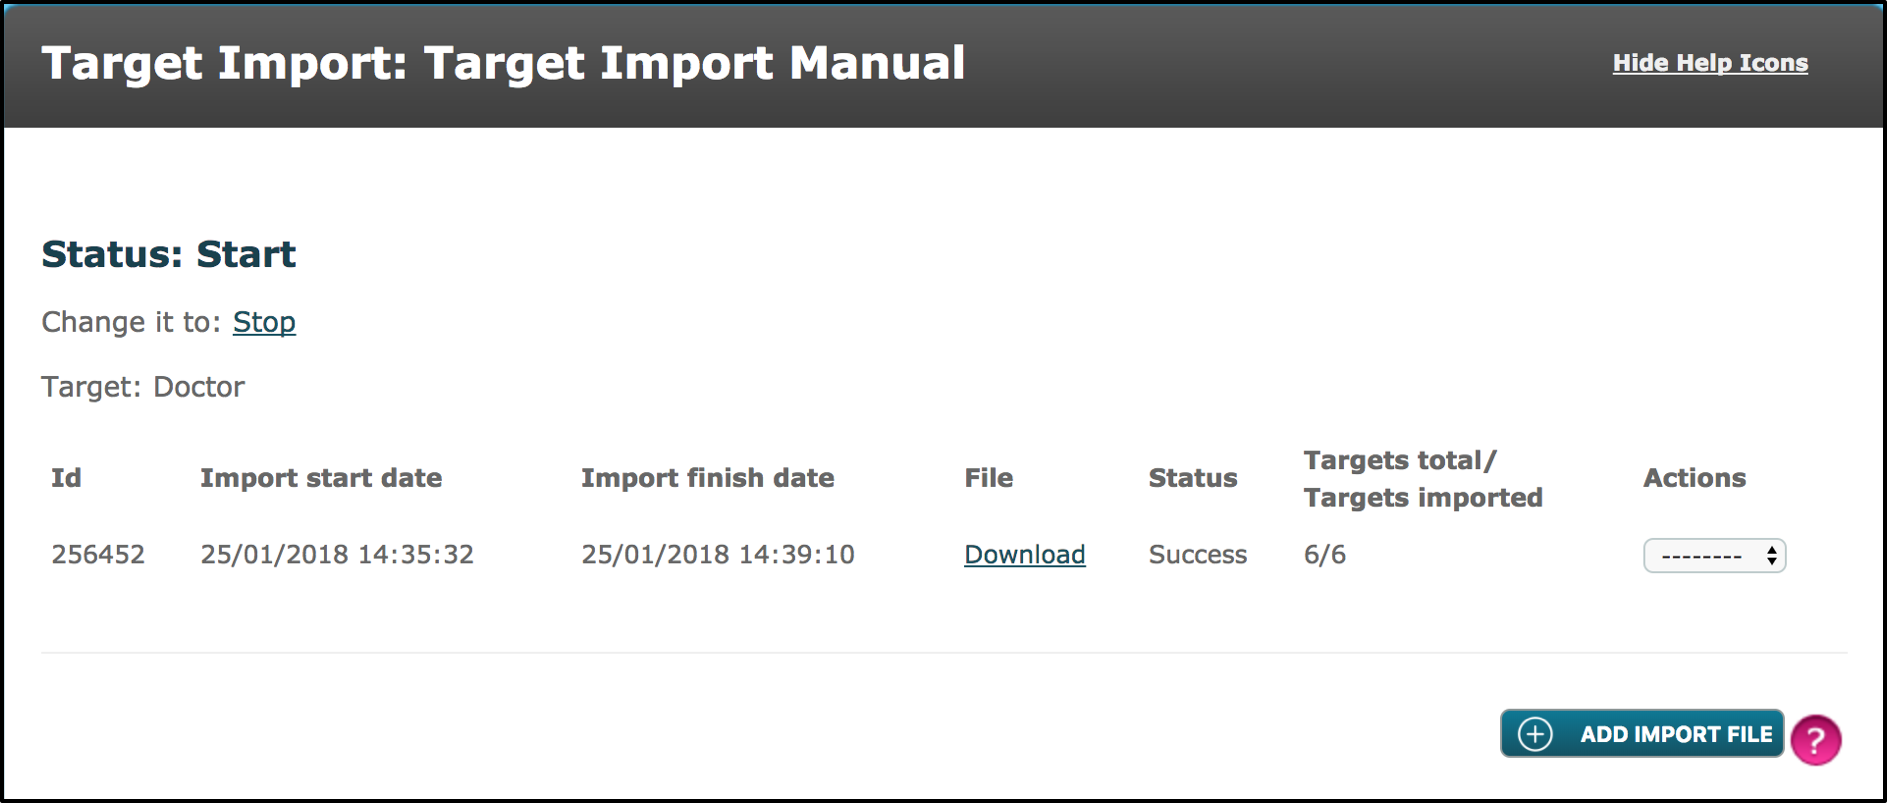 The Target Import has been run and the status for this Target Import has updated to ‘Success’. Of the 6 targets used in this example, all 6 of the targets had the required target fields completed successfully.
The existing Excel document will now be uploaded again to have its data imported. However, this time, the data will be manipulated so that some of the data will be incorrect in some of the target fields intentionally in order to see the outcome.
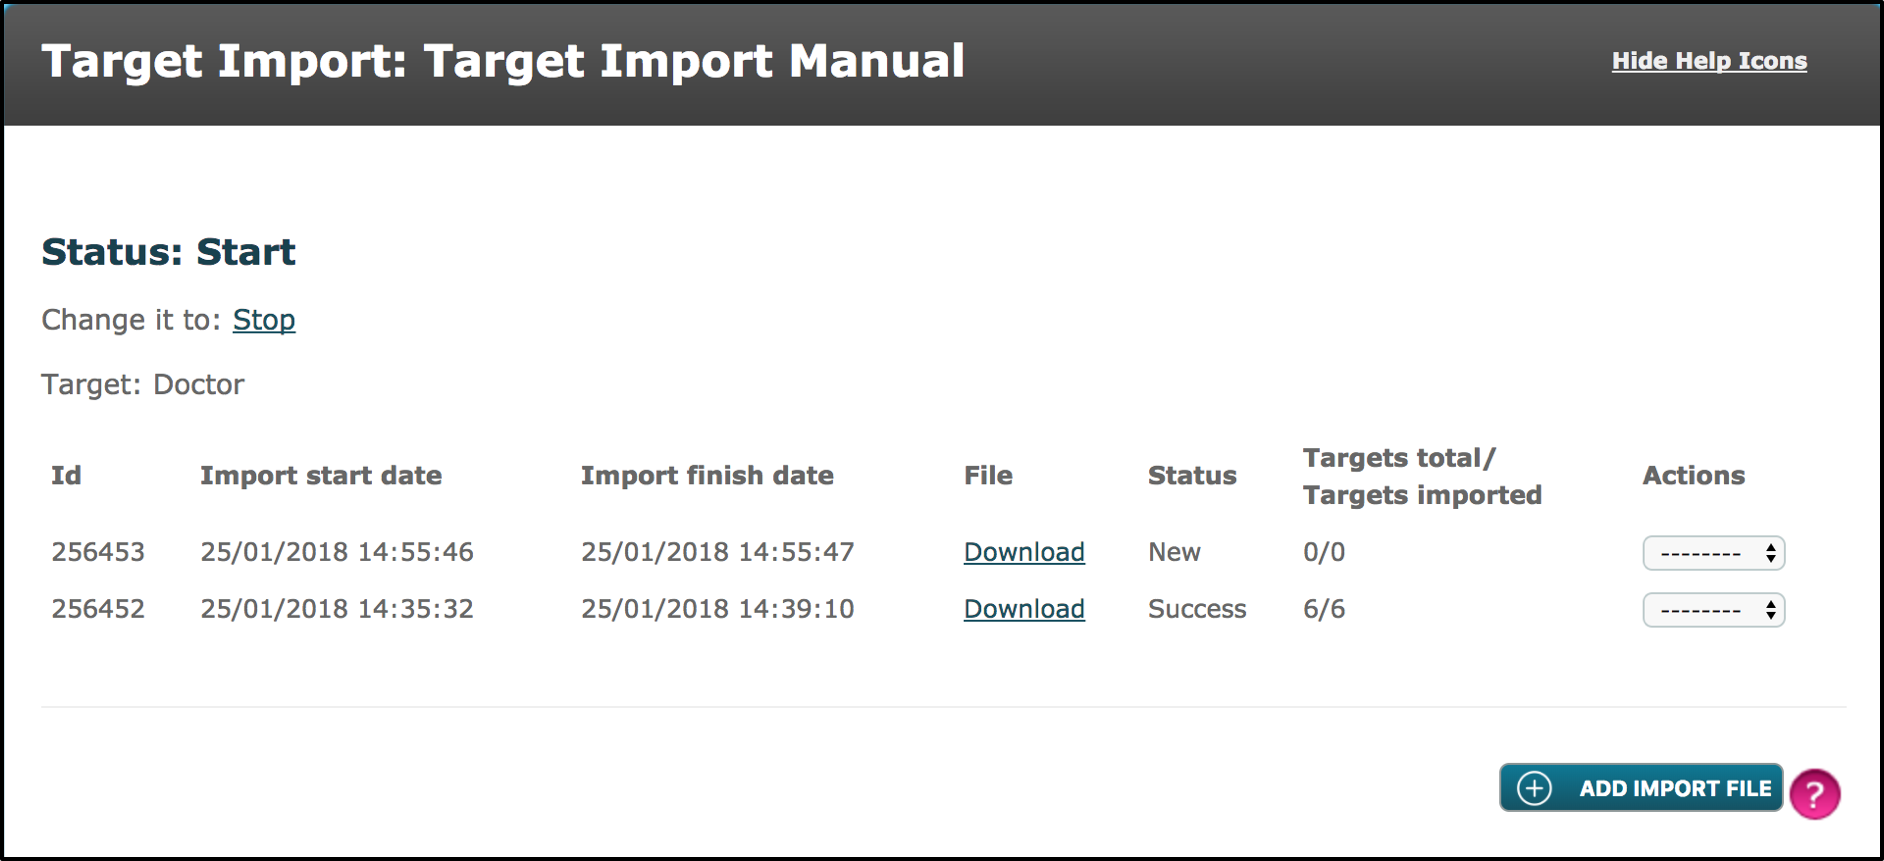
As shown in the image above, the same Excel document has been uploaded and is ready to have its Targets Imported.
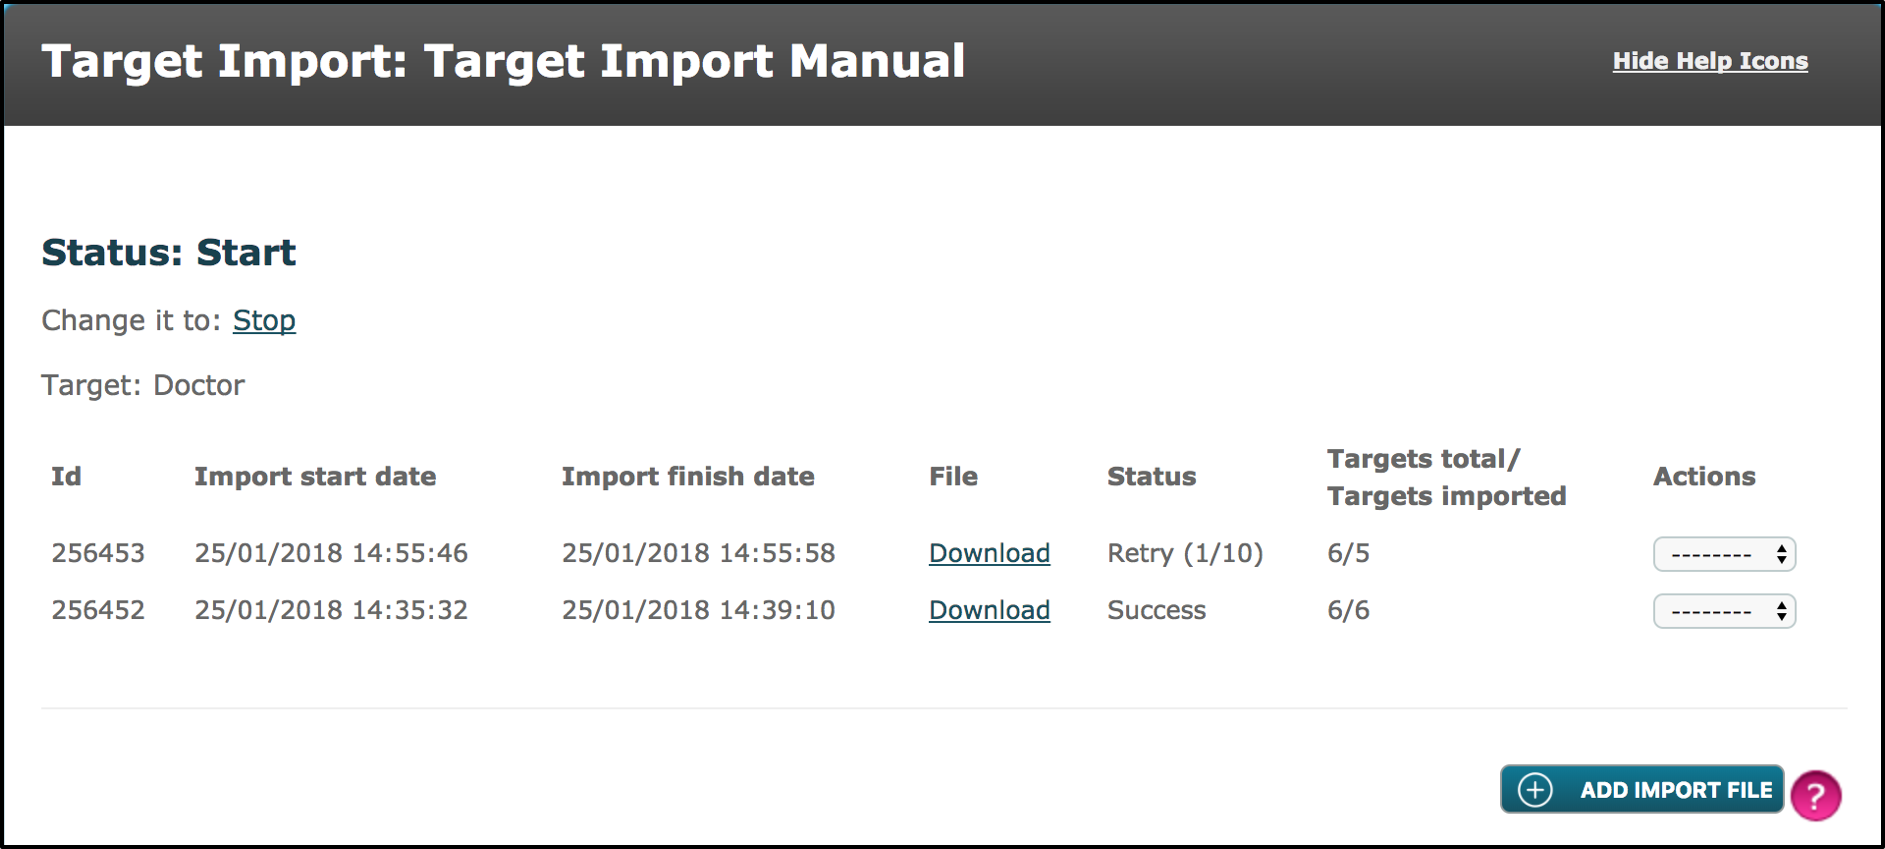
As shown in the image above, the Target Import process has taken place. However, this time, as expected the Excel document has not successfully imported. It also shows that the status is ‘Retry (1/10)’, in step 4 of the Target Import, the ‘Retry’ number of attempts was set at 10. For the unsuccessful file, on the right-hand side select from the ‘Actions’ drop-down menu and select ‘detail’ to find out where specifically the Target Import was unsuccessful.
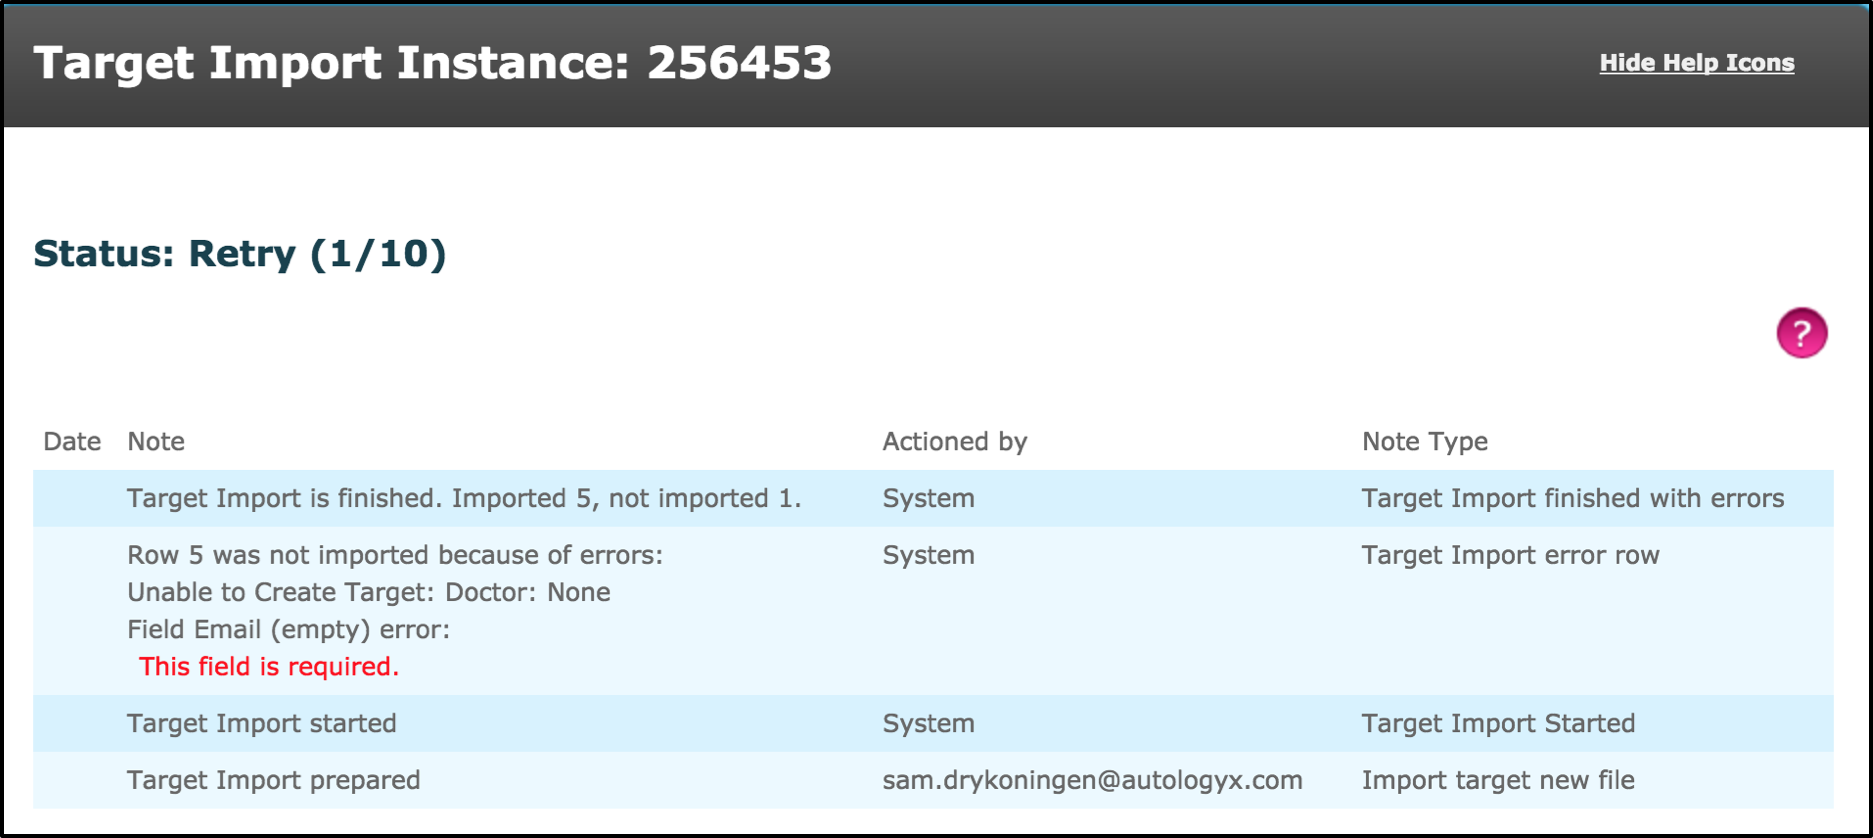
As shown in the image above, it has stated how 1 of the 6 targets failed to import as the Field Type ‘Email’ was empty. This Field Type was set as a mandatory Field Type, hence the error.
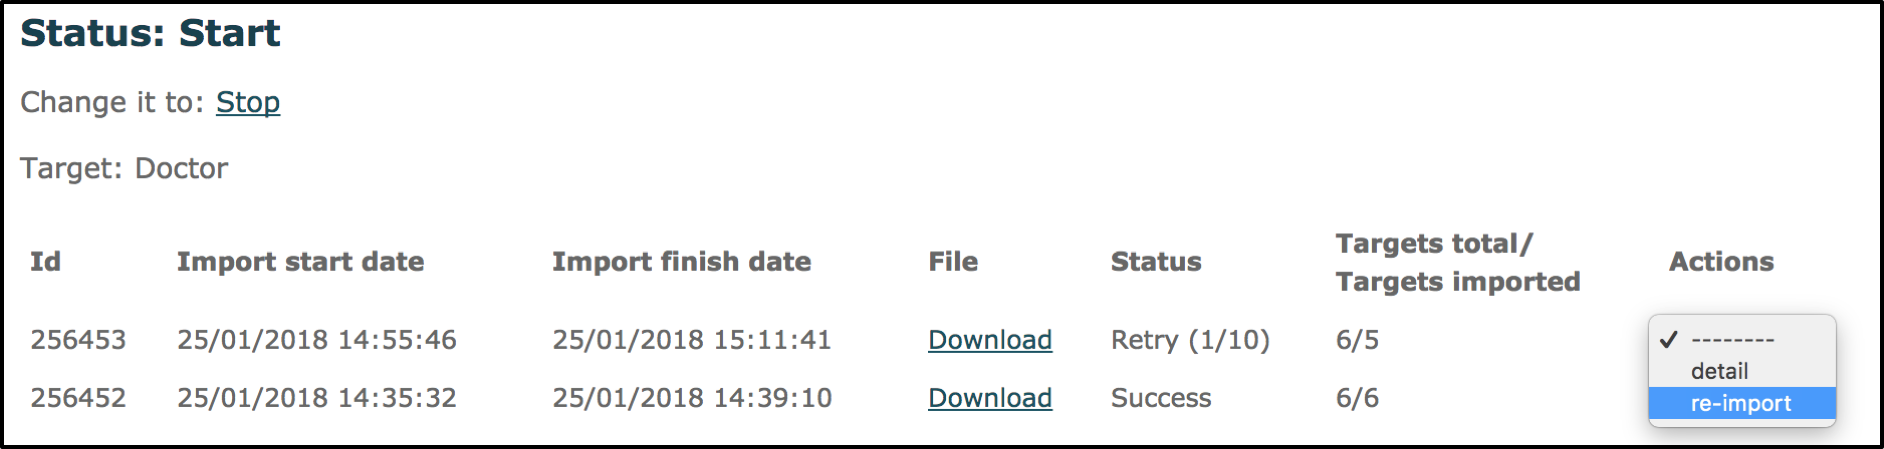
The user also has the option to select ‘re-import’ from the ‘Actions’ drop-down menu. This action is provided, for if they wish to edit the Field Types on the Target Group. Given the error has arisen as a mandatory field has not been filled out, the user can change this field so it is not mandatory anymore. Once changed, the user can select the ‘re-import’ option which will test if the existing Excel document can have its data imported without changing any data within the Excel document. If this ‘re-import’ were to again be unsuccessful, then the status would change from (1/10) to (2/10).
If the user wishes to keep the Target Fields as they are, then they can select the ‘Download’ option under ‘File’. This will then open up the Excel document, where the user can then update the Targets data to amend the error that was presented in the ‘Detail’ option in the ‘Actions’ drop down menu. Once the file has been updated and saved, the user will again select the ‘Add Import File’ and select the Excel document again.
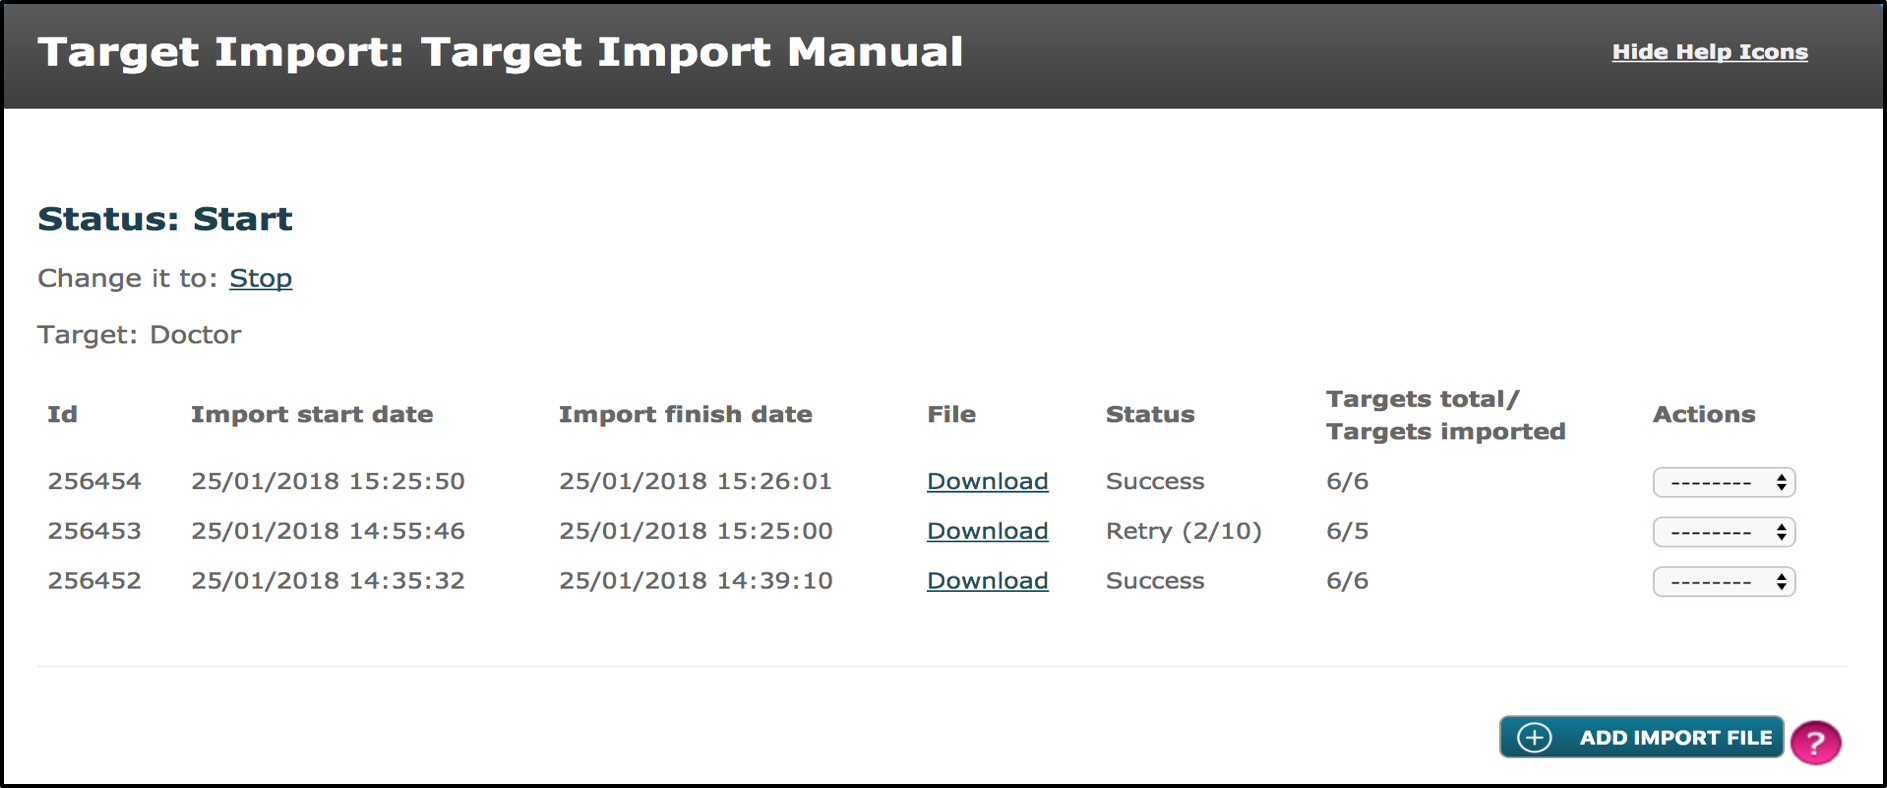
After the Excel document has been updated and imported again, the file can be seen this time with the status saying ‘Success’.
As mentioned previously, in step 4 the user had the option to provide a ‘Notifications Email Address’, where an email would be sent showing if a Target Import was successful or not. Below is the example of the successful and unsuccessful imports demonstrated.
Unsuccessful
 Successful

To view existing Target Imports,
Go to Admin > Targets > Target Import List
Comments
0 comments
Please sign in to leave a comment.