
From the target menu click Create a New Target and select the required relational target group from the drop-down menu on the modal.
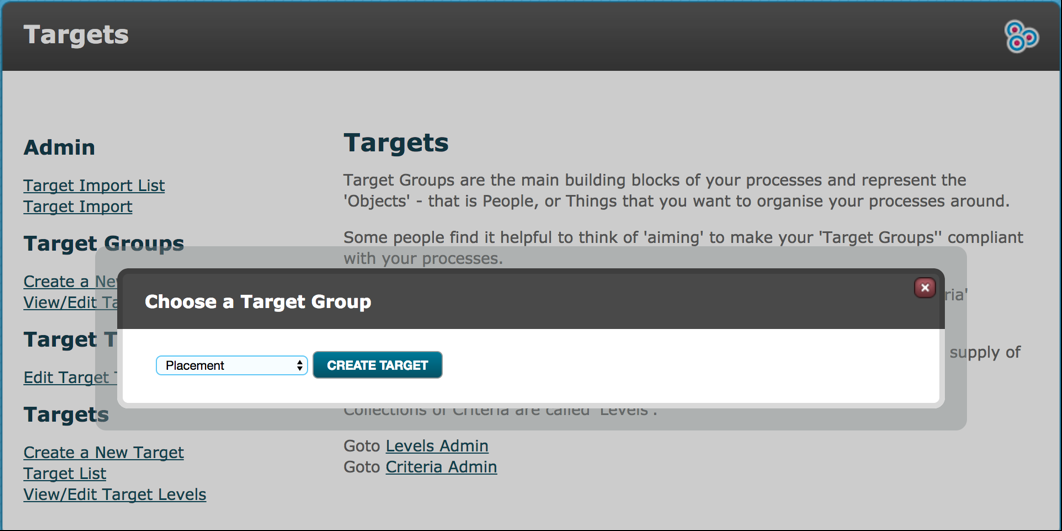
Click Create Target.
You will note at the top of the create target page that you have a lookup link adjacent to the Targets Selected field.
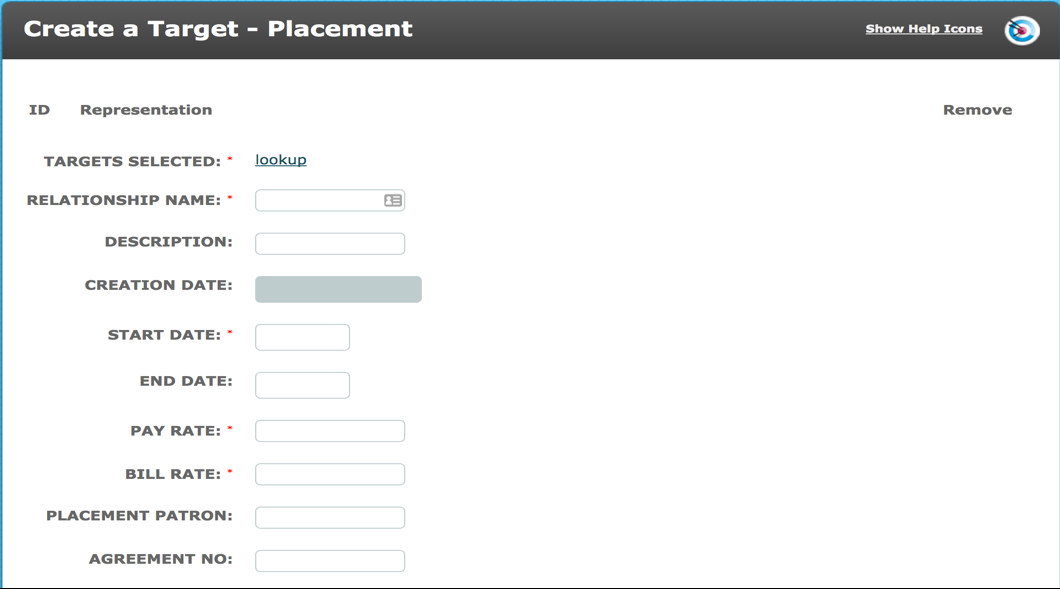
Click this. An additional modal will be presented.
Here you are shown the target groups which are contained in the relationship. You have the ability to search within those target groups for the required targets.
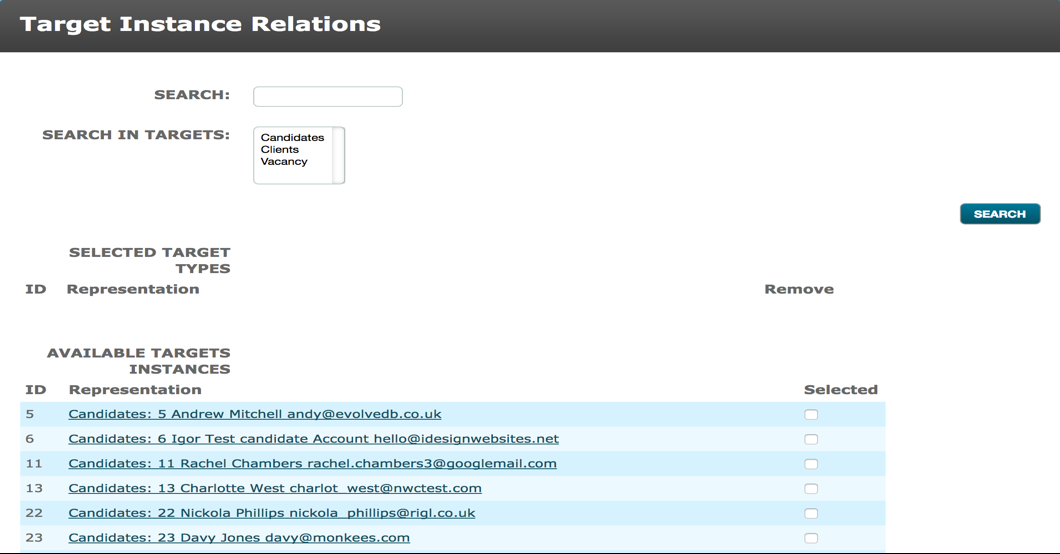
Enter the target name into the search field, click the search button. The results will be listed.
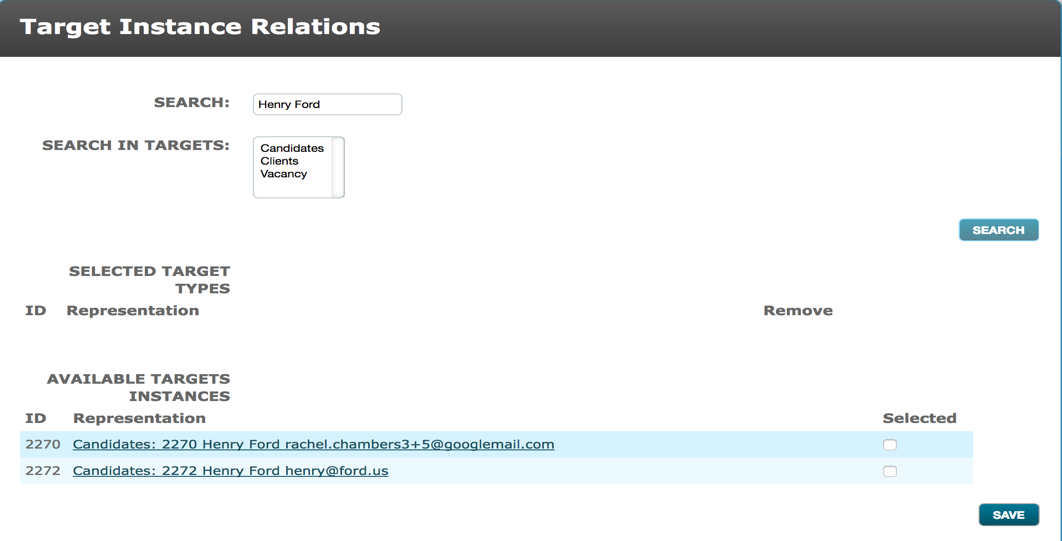
Tick the box to select the required target. The target details will then be shown in the Selected Target area. If you have selected the wrong target there is a Remove link which will reverse the selection.
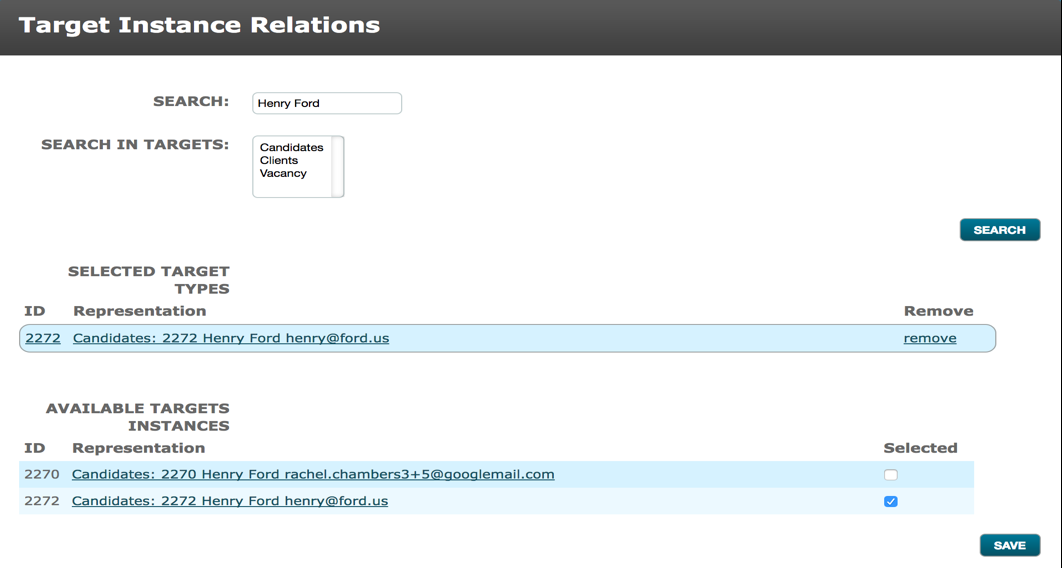
Repeat the search until you have selected all required targets for the relationship.
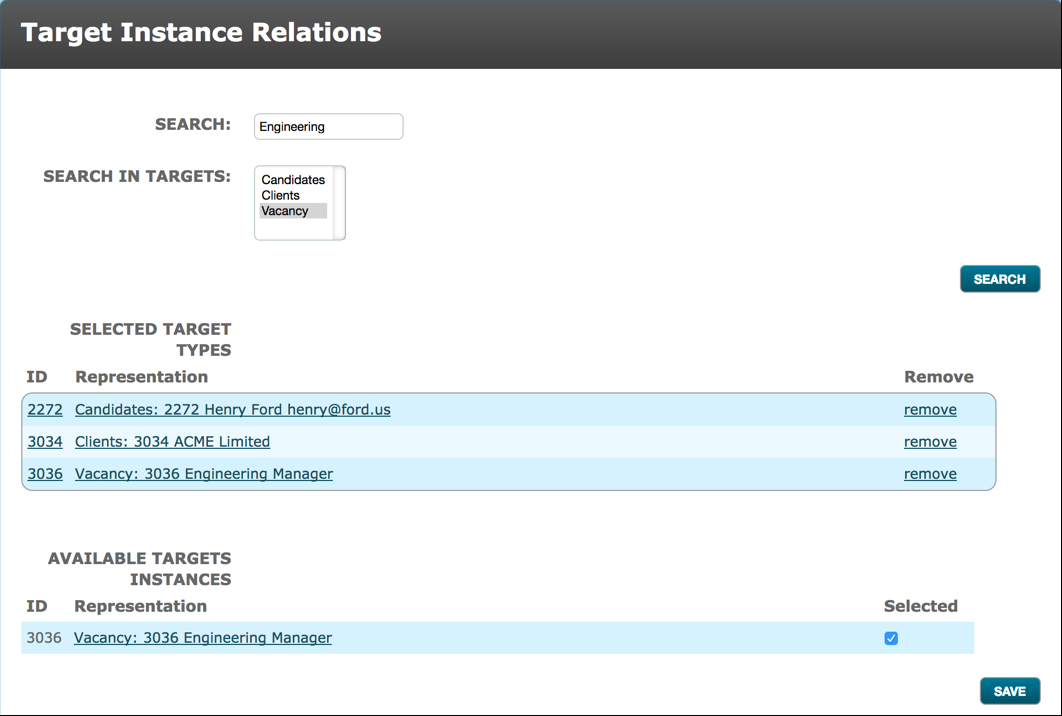
Click Save.
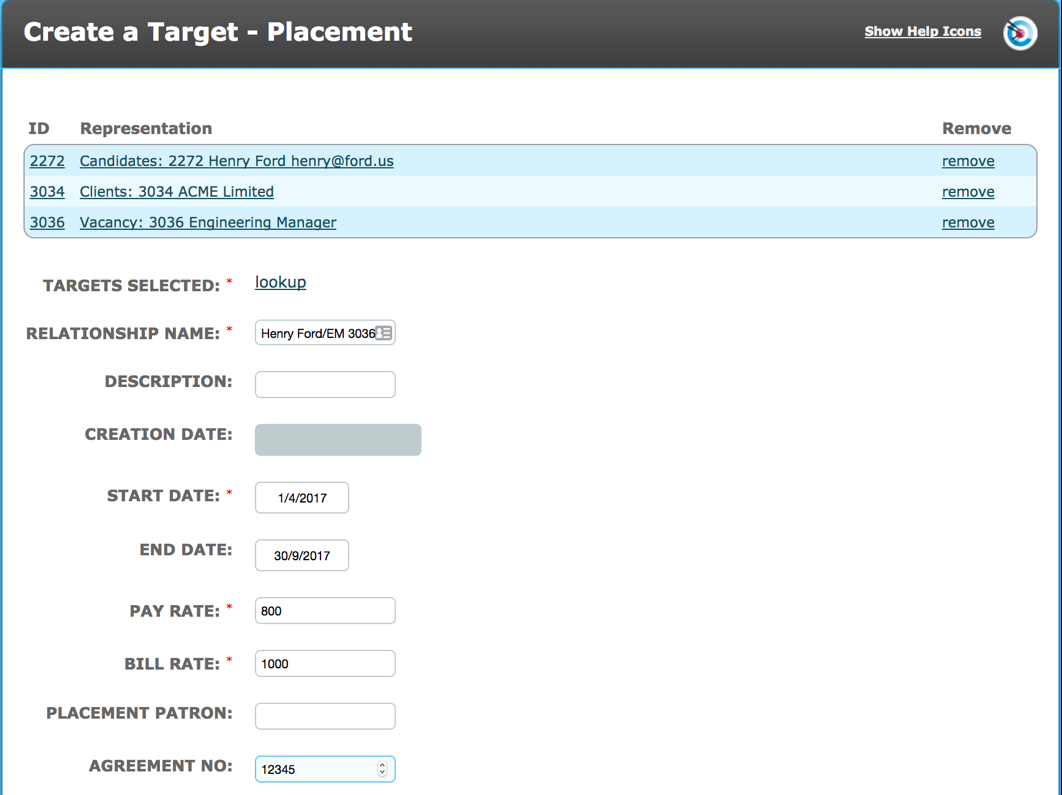
The selected targets will be listed at the top of the page.
Again, you have the ability to remove a target if it has been incorrectly selected.
Enter the field data for the relationship. Remember that fields marked with a red asterisk (*) are mandatory.
The new target will be shown at the top of the Target List. When the page is refreshed the number of Outstanding /Assigned Criteria will be shown.

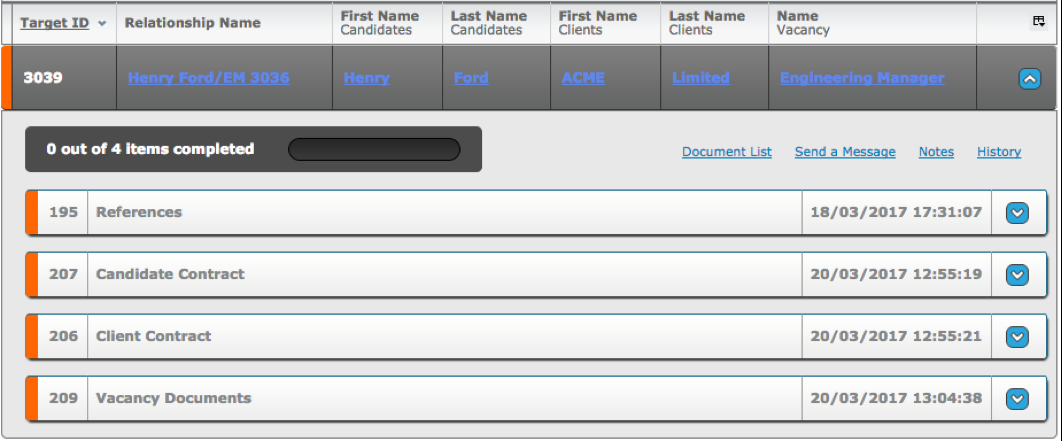
The relational target will be shown on the dashboard with any levels/criteria assigned to all child targets within the relationship.
The below screenshot shows:
Level IDs 195 References and level ID 207 Candidate Contract assigned to the Candidate.
Level ID 206 Client Contract assigned to the Client.
Level ID 209 Vacancy Documents assigned to the Vacancy.
Viewed from the Candidate target group tab the levels assigned via the Placement (relational target group) sequence are shown as below:
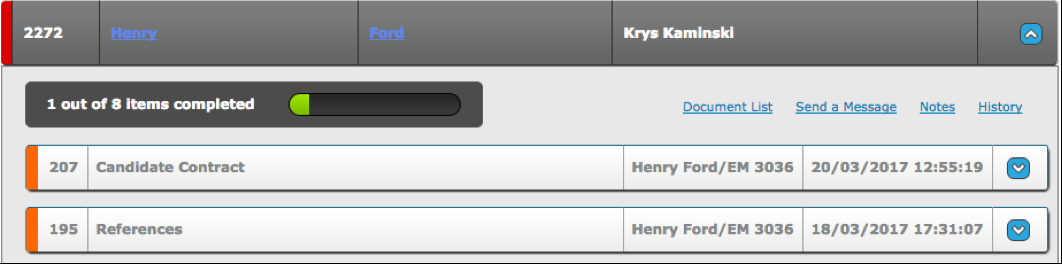
A middle column shows the Relationship Name.
Comments
0 comments
Please sign in to leave a comment.