
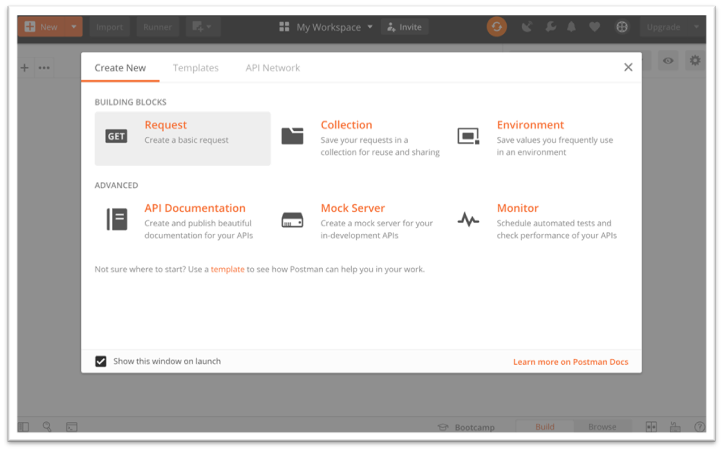
We recommend using Postman’s API development environment for testing your API. Postman’s application provides a nice and easy to use interface for making API Requests. You can find more about Postman here.
Before making any request, we need to know all the available endpoints. You can check this by using autologyx’s swagger, which can be found in the API Connectors List.
API -> View/Edit API Connectors. Find your API Connector and select Docs from the Action menu. You should find a list of all the available endpoints split in different categories. Click on Show/Hide to find the exact endpoint as well as the allowed methods for that category.
If the latter is selected, Select Basic Auth in the Authorization section of Postman and input your username and password.
Let’s configure Postman to make a simple GET Request to autologyx’s backend.
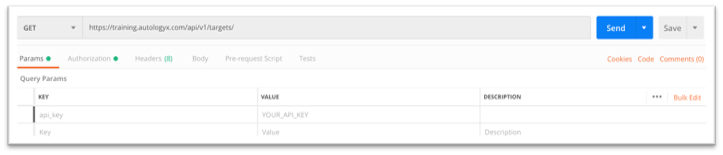
Open Postman and click on Create a basic request, give it a name and save it. In the request configuration enter your request URL, which is your system’s URL + the endpoint that you want to call.
For example, if we want to retrieve a list of targets, the request URL should look something like this:
https://training.autologyx.com/api/v1/targets/
|
Base URL |
|
API Endpoint |
|
|
+
|
|


 /api/v1/targets/
Once you have entered the request URL, you need to configure the Authorisation so that autologyx’s backend can authenticate your request. Click on the Authorization tab and from the Type select API Key. Fields to be configured like so:
|
Key: |
api_key |
|
Value: |
{YOUR_API_KEY} |
|
Add to: |
Query Params |
The above would have also worked if you configured your API Key in the Params tab of Postman. In fact, if you click on it, you can see your API Key that you have configured in the Authorization tab:
If the request has been configured properly, you should get Status: 200 OK. Status code are issued in response to your request from the server. These indicate the status of your request, generally 2xx indicate that your request was received, understood and accepted. In other words, your request was good, and you should have received a response body that looks like this:
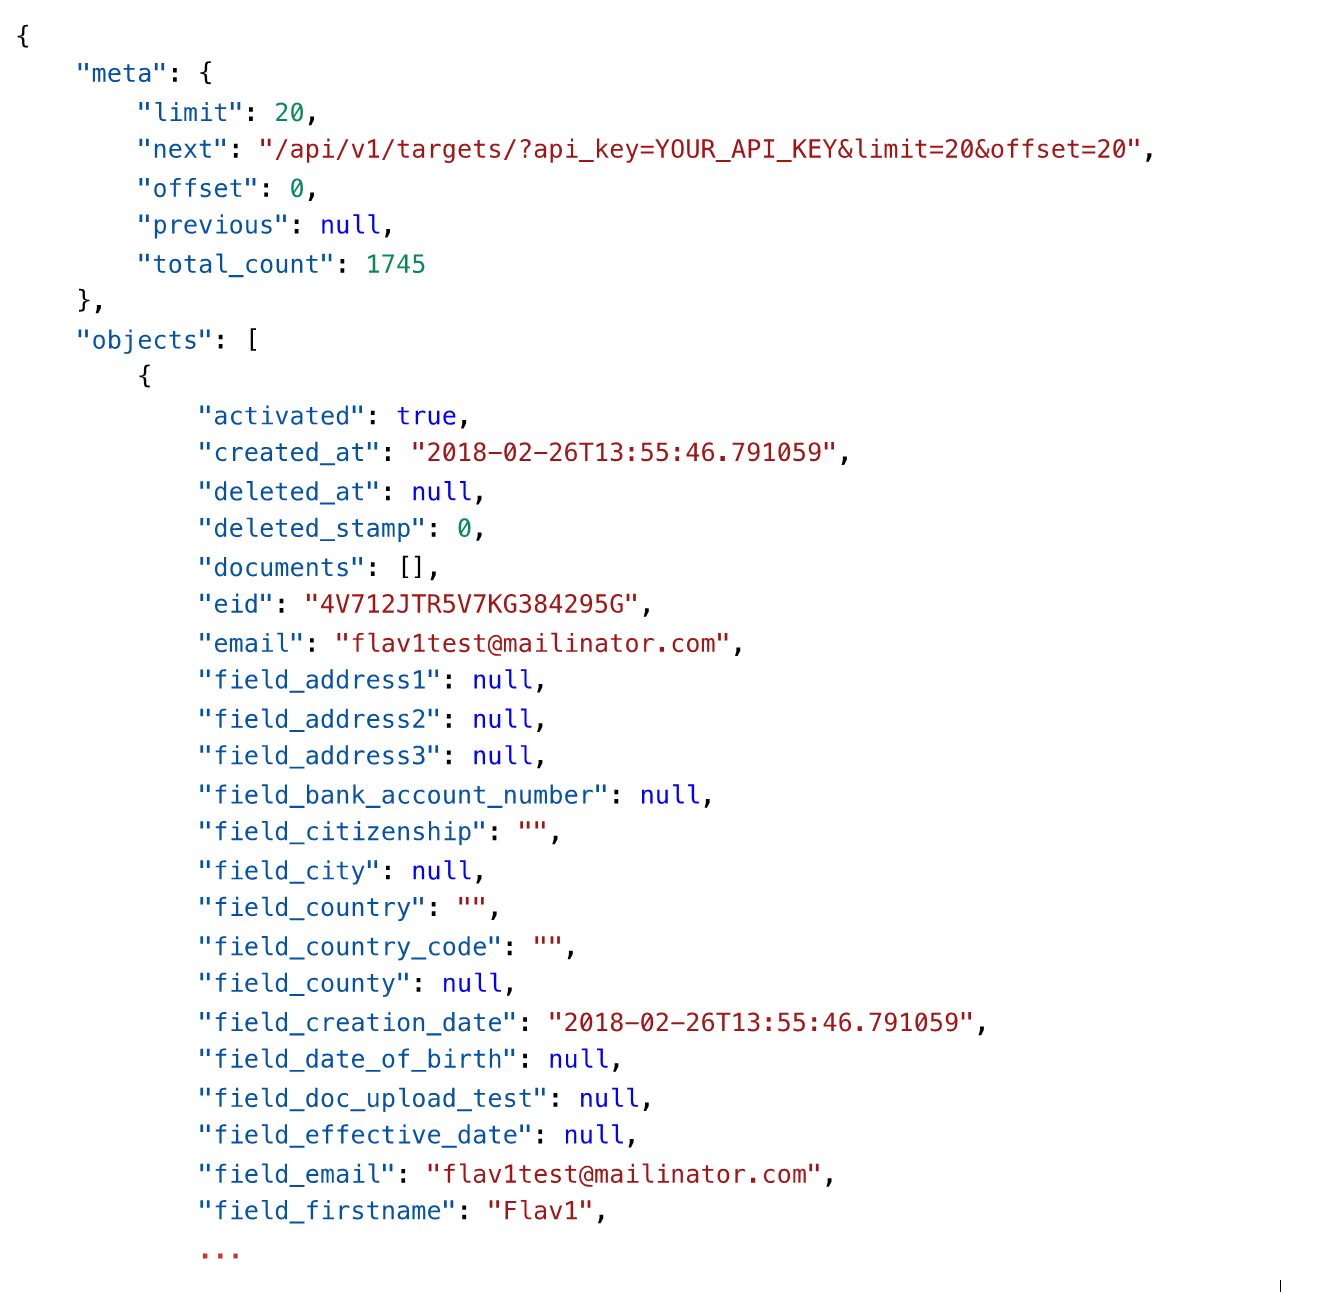
In the above example, we have made a basic GET Request and the system returns the first 20 targets from the system by default. If more targets are needed, just pass the limit as a query parameter and set the desired value.
Making a GET Request and getting a list of targets is not useful and you might want to filter the data you receive from the request itself. You can do this by adding extra parameters in the request. Let’s say you need a list of targets that belong to Target Group ID: 1, all you must do is to add type and the Target Group ID as the value. The backend will give you the first 20 targets associated with that target group. Please Note: You can filter down by any field available in the system.
Let’s configure our Postman session to make a simple POST Request for creating targets in autologyx. The request URL can stay the same, because the endpoint: /api/v1/targets/ accepts both POST and GET requests and based on the method (POST or GET), it will know whether to grab information about targets, or to create a new one. In order to make POST request to create a target in the system, you must include a Request Body which is basically the data associated with the target. Think of the Request Body as a Dynamic Form. You have fields and data associated with those fields.
However, before writing the Request Body, you need to know three things:
- The Data structure of your Target Group, i.e. what fields do I want to create the target with, are there any mandatory fields that I need to include;
- What sort of Data Structure will the endpoint accept? (autologyx’s endpoints only accept JSON formatted objects);
- Target Group ID.
In the below example, I am going to create a target in a person Target Group (ID: 1). I know for a fact that my Target Group has three mandatory fields: First Name, Last Name and Email, so it is imperative to include these in the Request Body.
If you want to create a Target in a Target Group that has similar conditions, your Request Body should look something like this:
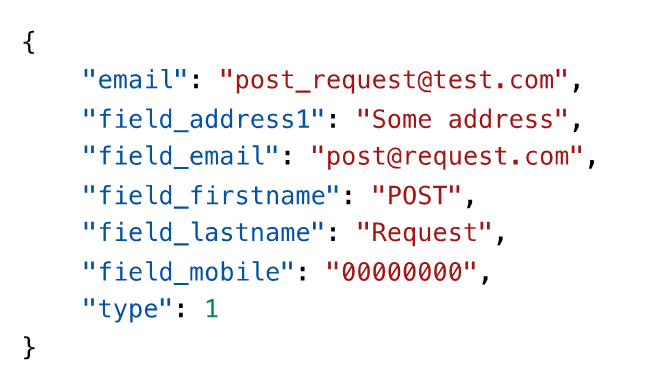
Where the parameter Type corresponds to the Target Group ID. In the above example, I have included an extra two fields, Address1 and Mobile. In Postman, the request should look like this:
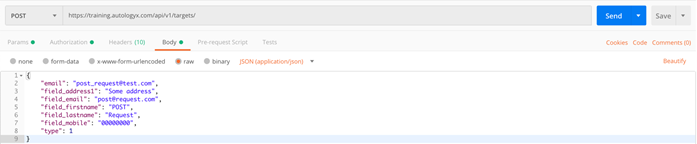
Notice that I have selected JSON in the body type of the request. This selection is appended to the Request’s Headers automatically by Postman.
Upon sending the request, you should have received back Status Code: 201 Created, meaning that the request has been successful, and the target has been created in the system.

PATCH Requests work in a similar way, the only difference is the endpoint, and it looks something like this: /api/v1/targets/<id>/ where <id> is the Target ID. In other words, if you want to make a PATCH Request with the v1 API, you must specify the ID of the target in the Request URL itself.
Remember, PATCH Requests are generally used to update records in each system. The request in Postman should look something like the below:

In the above request, I am updating the target that I have previously created with a POST Request. If the request was successful, you should get Status Code: 202 Accepted.
Comments
0 comments
Please sign in to leave a comment.