
Admin > Levels > Add a New Level
A Level is a collection of things to do, essentially a container for criteria, against which compliance for a target is ascertained or measured.
Most people prefer to build their criteria first then arrange them in appropriate levels usually based around subject matter or task.
Following is a step by step guide for building a level.
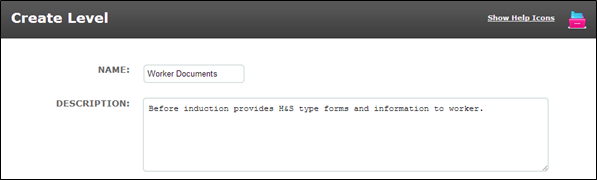
1. Name and Description
The Name and Description fields in a Level are for internal use only. The name should describe the subject of the criteria it will contain.
The description should comprise brief notes to explain to system administrators what the level deals with and why it is important ie a summary of the process, for future reference.
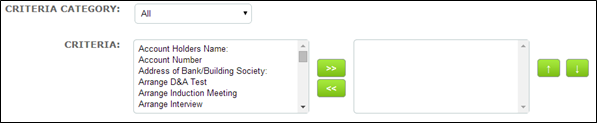
2. Criteria category
• Use the category filter to find the criteria you require
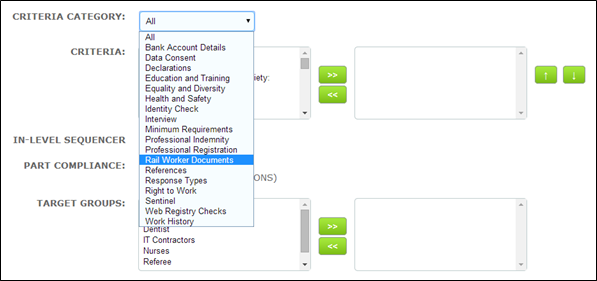
• This will present the criteria from your chosen category in the left hand criteria field
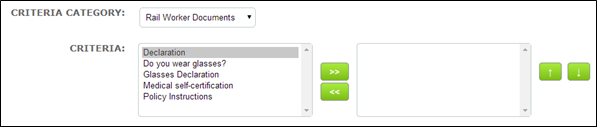
• Select the criteria by highlighting them on the left hand field and using the forward arrow » to move the selection into the right hand field. Alternatively, select and double click
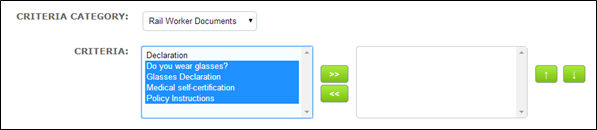

• Use shift on your keyboard to select more than one criteria which are adjacent in the list
• Use Ctrl and shift to select more than one criteria which are separated by others which you do not require
• If you select and move a criteria you do not require undo this by highlighting on the right hand field and using the backward arrow « to move the selection to the left hand field
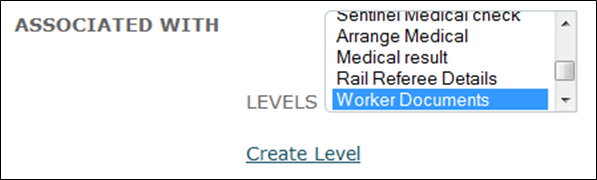
If you choose to build your levels before your criteria you can leave the "Criteria" selection field blank. The level can still be saved without criteria having been added to it.
Later when building your criteria select the appropriate level in the "Associated With Levels" field to make the connection. The criteria will be placed in the level for you.
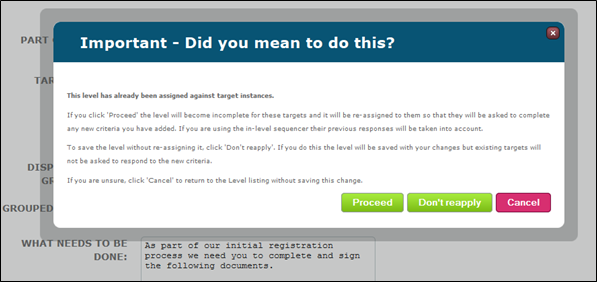
If you add a criteria to a level which has already been assigned to a target you will see the warning modal window shown below when you save the level. The instructions are quite clear but you must be careful to take the appropriate action so that for instance targets are not asked to complete the new criteria if this isn’t necessary.
3. In-Level Sequencer
The In-Level Sequencer functionality allows you to build workflow into a level. It allows the response to one criteria to determine which criteria is assigned to the target next.
It can only be used if you have:
- More than one criteria in a Level
- At least one criteria has specific options for response as in Yes/No, single and multi select and checkbox response types
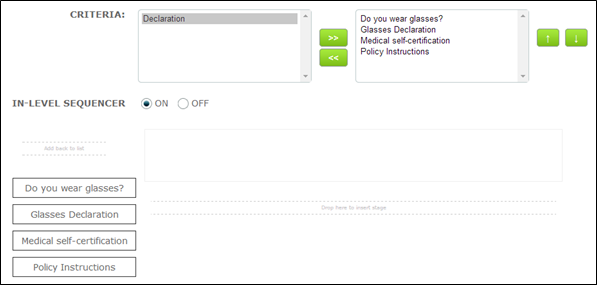
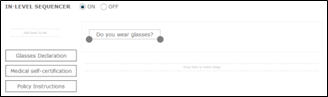
When you have selected your criteria for the level, select the ON radio button to enable the In-Level Sequencer. Your criteria will appear in the In-Level Sequencer list on the far left of the page. You will note that the criteria are listed alphabetically
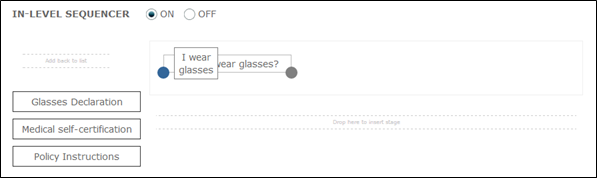
Click and drag your first criteria onto the workspace. Drop it when the background turns green as shown
 |
 |
A node for each of your response options will appear on the bottom edge of the criteria object. When you hover over these you will see the wording of the response option as shown below:
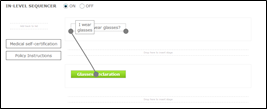
Drag and drop your next and subsequent criteria onto the workspace in the order you wish to connect them
From the node representing the required response on your first criteria drag a connector to the next criteria you wish to assign. If the target or system user gives any other response to the first criteria they will not receive the second criteria
 |
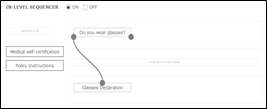 |
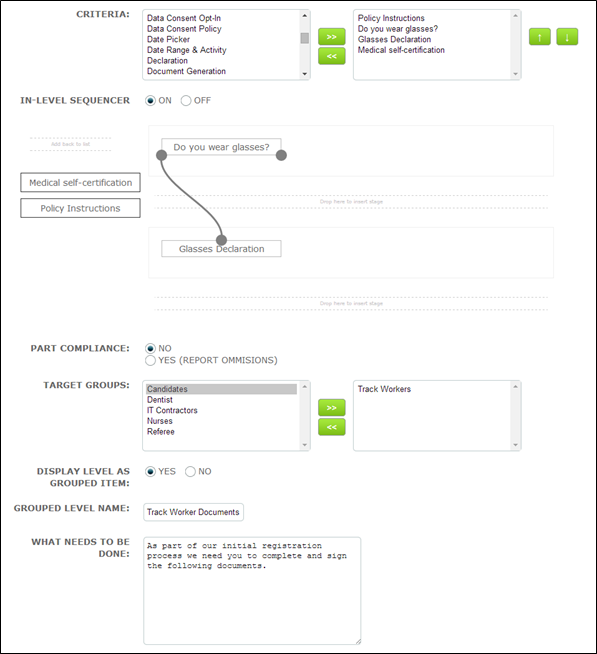
It is important to note that the first criteria in the in-level sequence AND any unconnected criteria will be assigned to all targets in the group. In the example above criteria will be assigned as follows:
| Criteria: Do you wear glasses? |
Assigned to: All targets in the group |
| Glasses Declaration | Targets who select the option to tell us that they wear glasses (option wording shown) |
| Medical Self-certification | All targets in the group |
| Policy Instructions | All targets in the group |
4. Part Compliance
Part Compliance is a feature within a level which is designed to be used in reporting. It is only relevant if you have more than one criteria in the level.
Allowing Part Compliance by selecting the YES radio button as below means that the completion progress of the level can be reported on in percentage terms rather than simply as True or False.
So assuming you have 4 criteria in a level (as above) and one is completed:
If part compliance is enabled – level status = 25%
If part compliance is disabled – level status = False
And if you have 4 criteria in a level and all are completed:
If part compliance is enabled – level status = 100%
If part compliance is disabled – level status = True
5. Target Groups
When creating a Level you need to select which target group the level is designed for. A level can be used for one or several target groups.
• To make your selection, highlight on the left hand field and use the forward arrow » to move the selection into the right hand field, or simply double click your selection
• Use shift on your keyboard to select more than one target group which are adjacent in the list
• Use Ctrl and shift to select more than one target group which are separated by others which you do not require
• If you select and move a target group you do not require undo this by highlighting on the right hand field and using the backward arrow « to move the selection to the left hand field

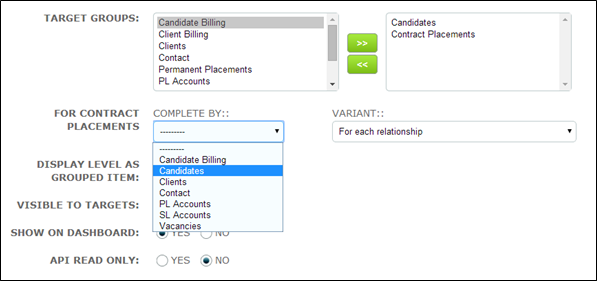
If you want to assign the level to a target group via a sequence for a relational target group you will have to select both the individual and relational target groups as below. Here the “Candidate” target group is a member of the “Contract Placement” target group.
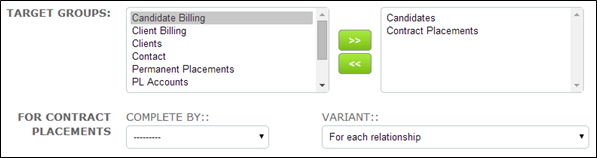
As soon as you select a relational target group additional fields are presented as shown above.
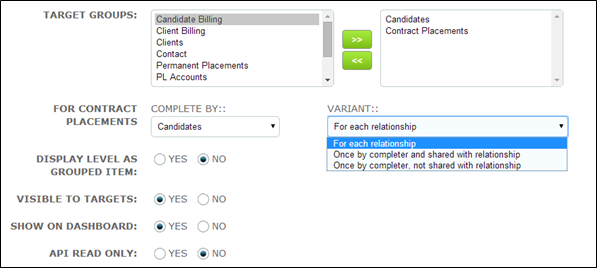
• Click into the “Complete By” field and select the required target group – in this case Candidates
• Select the required “Variant”. Please see help item “Multiple Target Assigning” for further information about how this feature works
6. Display Level as Grouped Item
Levels can be made up of one or many criteria. If the latter, the criteria are usually related by subject or task.
In order to improve the target experience, levels containing more than one criteria can be “grouped” so that rather than appearing as lots of individual items on their home page the grouped criteria are listed as one. This also means that the target can answer each criteria in the level, one after the other, without returning to their home page.
An example of a grouped level follows. You will note that this level also includes an in-level sequence but grouping is of course not dependent on this being present.
In the above example all the criteria are set for target completion.
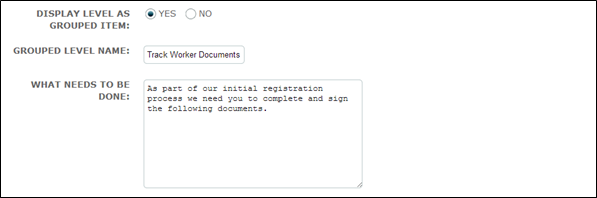
• When you have selected your criteria and target group(s) for the level, select the YES radio button to enable the “Display Level as Grouped Item” feature
• Two new fields namely, “Grouped Level Name” and “What Needs to be Done” will be appear
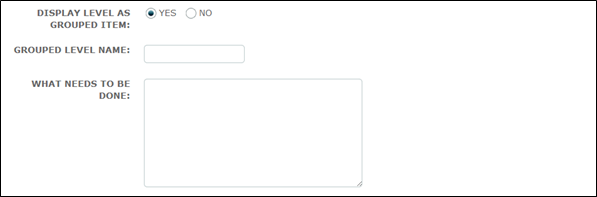
• Enter a name for the level – this displays under “What’s it for?” on the target home page listing
• Enter a short instruction as to what is required – this displays under “What needs to be done?” on the target home page listing
When assigned to a target the grouped level will appear as below:
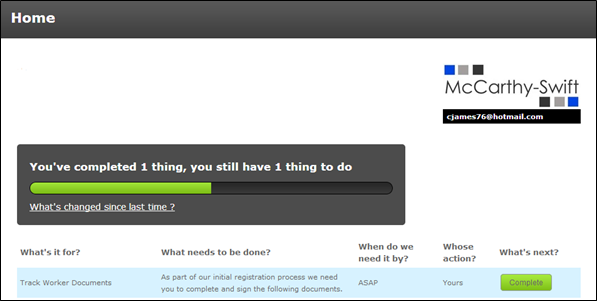
The target is told that they have one thing to do. When they click the complete button the first criteria is displayed:
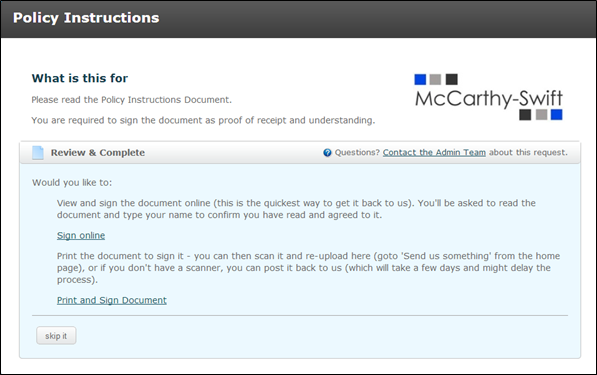
When the target has responded to the first criteria (or used the options to “skip it” or “save for later”, if appropriate) the second criteria will be immediately presented to them without them having to return to the home page. Subsequent criteria will be presented and when all have been actioned in some way the target will be given the option to complete items or return to their home page.

If the level is not grouped (when the radio button is left defaulted to NO) it will appear on the target’s home page as below with each criteria listed separately so that in this case the target is told that they have 3 things to do:
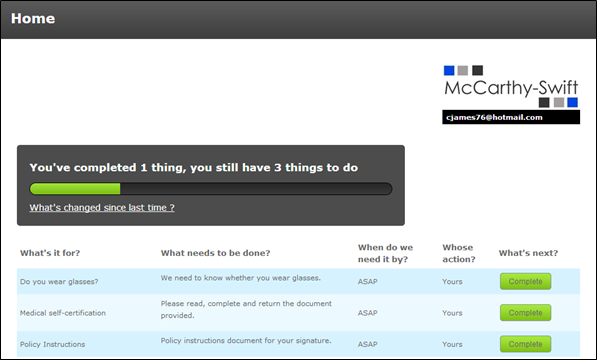
Each item will have to be dealt with individually with the target returning to the home page after completing each one.
7. Visible to Targets/ Show on Dashboard
The options to make a level visible to a target and to be shown on the dashboard combine to make a useful feature whereby you may have a number of criteria to be assigned to a target, some for their action, others for our action. You are able to split or group criteria in certain levels which can be displayed differently for the target and system user.
8. API Read Only
If you have external data influencing this particular Level then select NO. If unsure select YES (it’s the safe option, you can always edit it later).
9. SAVE
Click Save to save this level or click + Save & Add another to save this level and create another one.
Comments
0 comments
Please sign in to leave a comment.