
Admin > System Users and Permissions > Add a New System Role
When creating a System Role you need to allocate permissions carefully. Only one or possibly two roles should be given delete permissions. Also think about who actually needs to edit Document and Message Templates, Criteria, Levels and Sequences. Once these are set up they will require very little change unless a process needs to be amended or a Document Template such as Terms of Business needs to be updated.
You will probably need to create a Role which requires view only permissions for the generation of reports.
From the System Users and Permissions menu, click the link to "Add a New System Role":
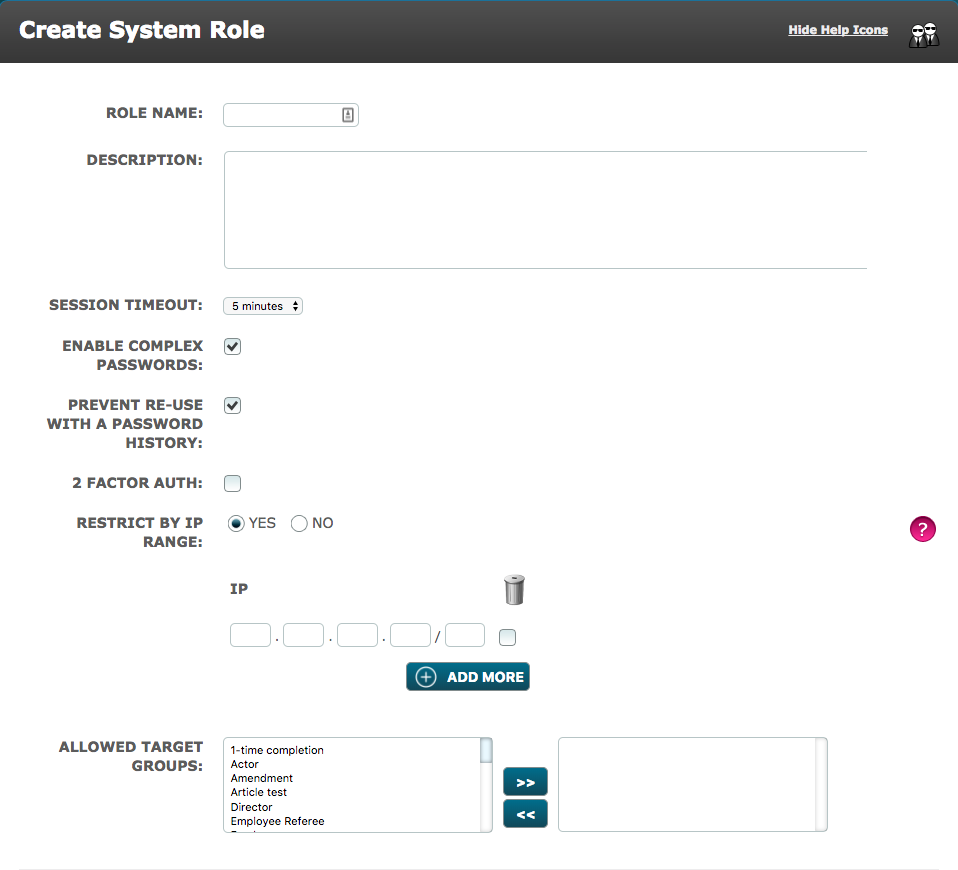
- Role Name - Give the role a name which relates to the Role, Team or Individual within your organisation to whom the role will be assigned.
- Description - Provide a brief description to highlight the function or capabilities of the Role eg "Role with all permissions other than Delete".
- Session Timeout - Select the time after which the session will time out when there is no activity.
- Enable Complex Passwords - Tick the box to apply this feature to the role. The user will be required to set a password with a minimum of 8 case-sensitive alphanumeric characters. This will have to be changed every 90 days.
- Prevent Re-Use With A Password History - Tick the box to apply this feature to the role. The user will not be able to use the same password over and over again but will be prompted for a new different one each time.
- 2 Factor Auth - Select to enable Users within the role, to have to use 2 Factor Authentication.
- Restrict by IP Range - Select YES to apply this feature to the role. The user will only be able to login to Autologyx from a PC within the IP range given.
- Allowed Target Groups - Select the target groups which users with this role are allowed to view on their dashboards. Use shift on your keyboard to select more than one target group which are adjacent in the list. Use Ctrl and shift to select more than one target group which are separated by others which you do not require. If you select and move a target group you do not require, undo this by highlighting on the right hand field and using the backward arrow « to move the selection to the left hand field.
- Role Permissions - Please see the individual help items which explain the Role Permissions tabs in detail.
When you are happy with the Role you have created, click Save.
Comments
0 comments
Please sign in to leave a comment.