
Summary:
This article is to help explain how to create/use a hyperlink in a html section. Each option in configuring the 'Link' icon, will be explained.
Overview:
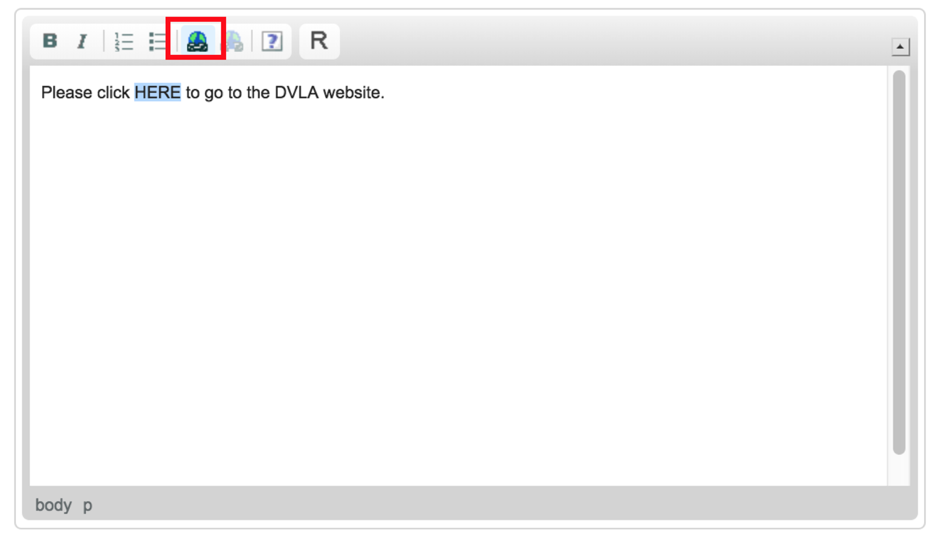
In areas of the system where a User is able to utilise the html capability such as in the criteria setup, message templates and document templates, there is an icon called 'Link'.
To create the hyperlink, select the word(ing) that you wish to have the hyperlink on, then select the icon below highlighted in red.
Once selected, the User will be displayed with the options on how to setup/configure the hyperlink.
Under the first field 'Link Type' there are 3 options:
- URL
- Link to anchor in the text
Depending on what option is chosen, different fields and tabs will be displayed.
URL
Selecting URL will show the below setup.
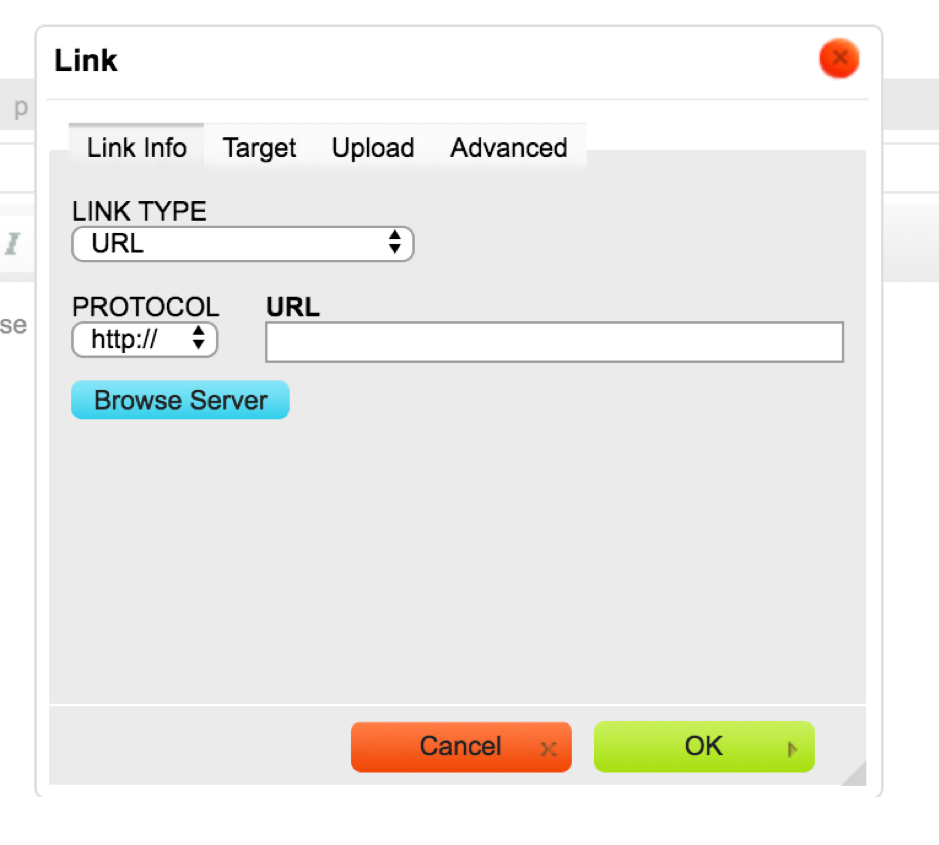
Paste the URL you wish to use as the hyperlink in the URL field, and select the appropriate protocol for this URL.
Selecting Browse Server ...
In the next tab 'Target', a field called 'Target' is displayed where there are the following options:
- <not set>
- <frame>
- <popup window>
- New Window (_blank)
- Topmost Window (_blank)
- Same Window (_self)
- Parent Window (_parent)
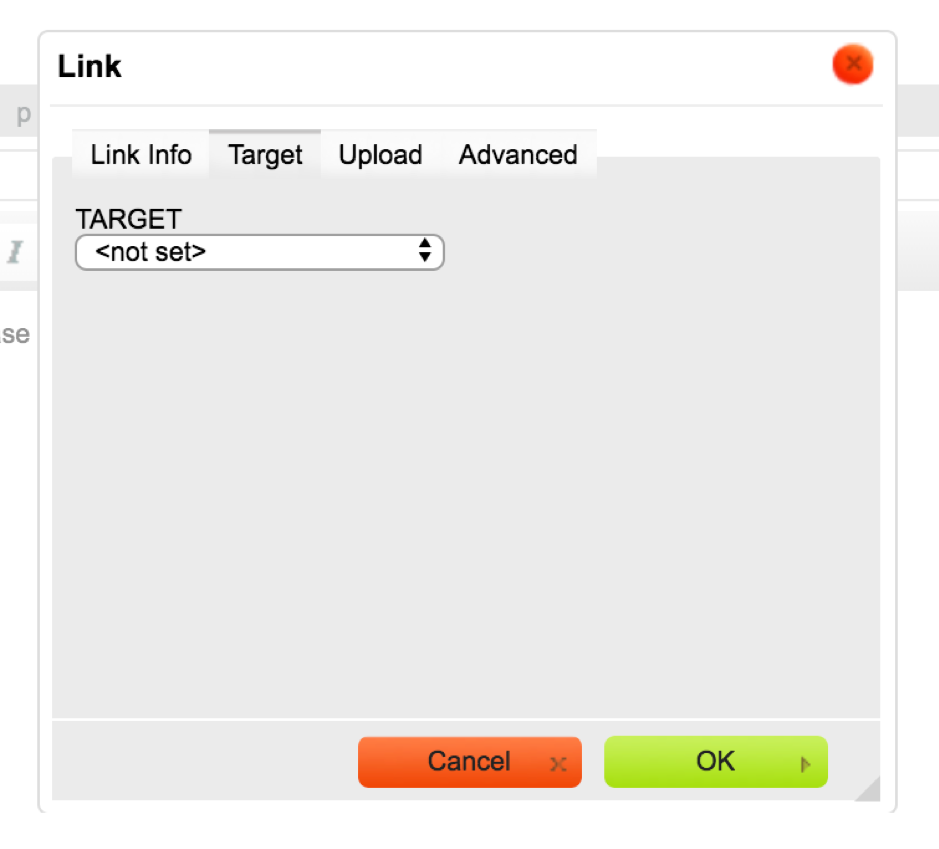
It is advised the User selects 'New Window (_blank)' as this will load the URL in a new tab in the current browser. Selecting one of the other choices, will direct you away from the autologyx page to the URL provided, as the URL is loaded on the current page.
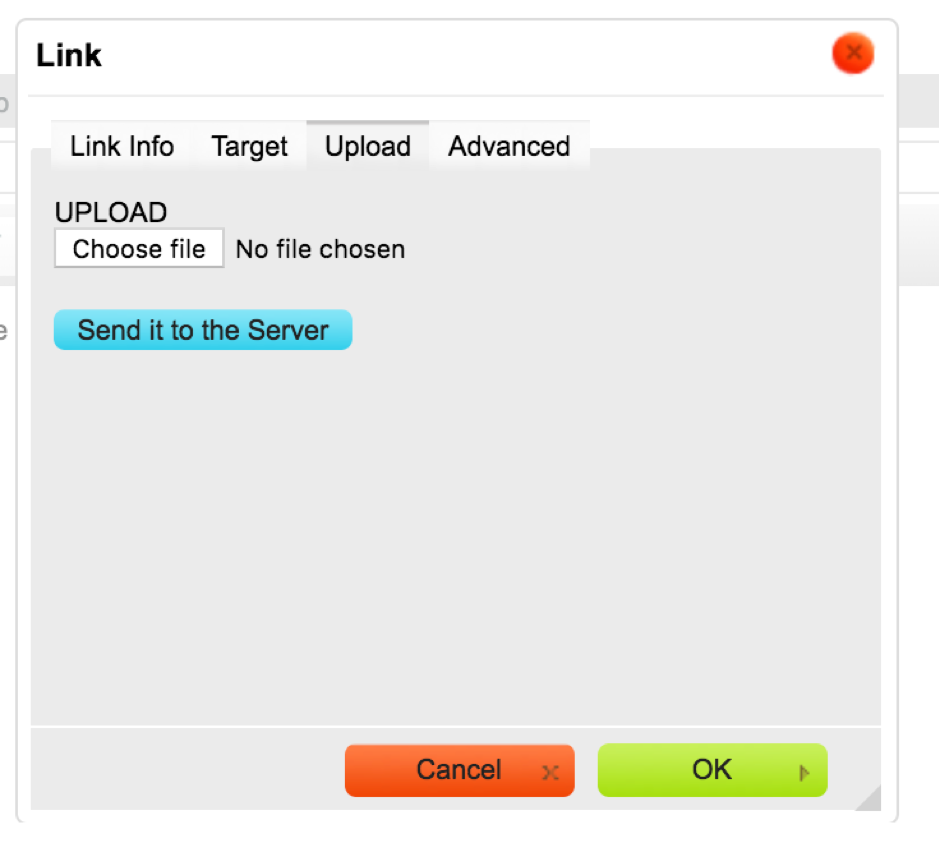
The next tab is 'Upload', this is where the User can upload a file to be used as the hyper link instead of initially inputting a URL in the 'Link Info' tab. Once the file is uploaded, the User will select the 'Send it to the Server' button, this is so the file can be synchronised with autologyx. Once clicked, the 'Link Info' tab will then auto-populate the URL field to have the file in the format of an autologyx file.
Once the target/user clicks this link, they will then be taken to this file in the browser.
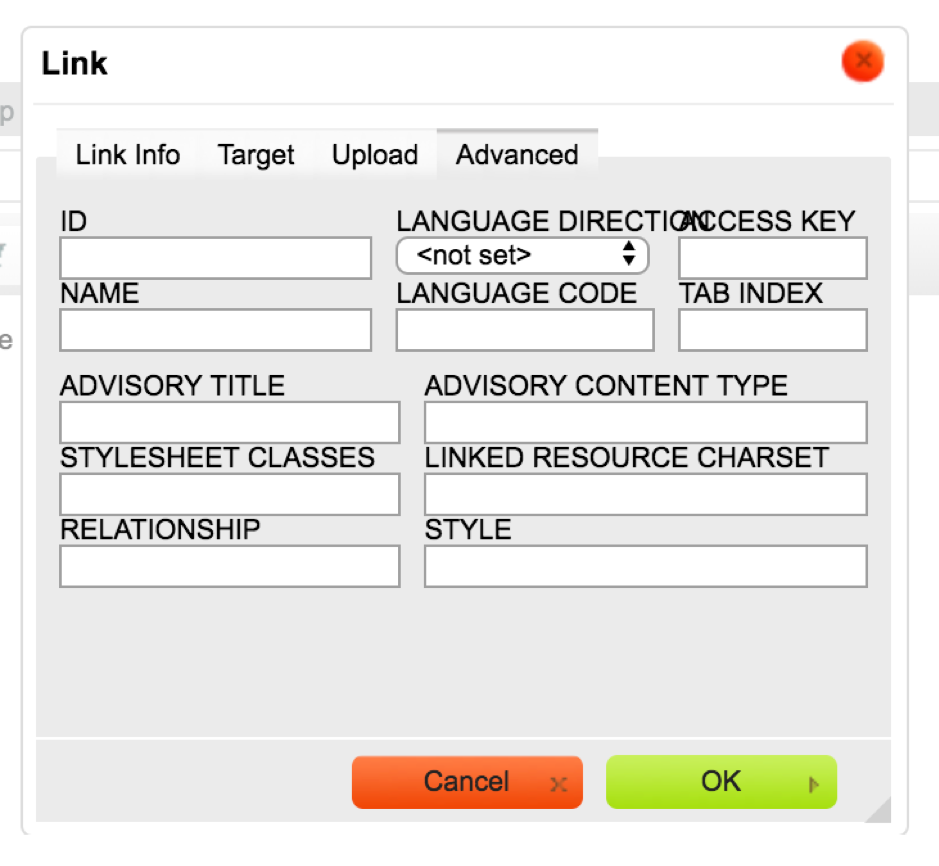
The final tab is 'Advanced', this is where you can set particular conditions towards styling and functionality.

ID - The unique identifier for the hyperlink element/word in the body.
Name - The name for the hyperlink element/word in the body.
Language Direction - The direction of the text: Left to Right (LTR) or Right to Left (RTL).
Access Key - A keyboard shortcut to access the hyperlink for the element/word.
Language Code - What language the content is written using.
Tab Index - The tab order of the link element.
Advisory Title - The title of the element/word, when you hover over the hyperlink this text will display.
Advisory Content Type - This can be used to specify the type of content that is pointed to by the element.
Stylesheet Classes - Where a CSS class can be entered for the element/word.
Linked Resource Charset - The character set of the resource pointed to by the element.
Relationship - The relationship between the hyperlink element/word and the document/body.
Style - Where CSS can be implemented to change styling such as colouring.
Link to anchor in the text
An internal link pointing the reader to a specific point in the document/body.

The final tab is 'Advanced', this is where you can set particular conditions towards styling and functionality. Once setup and saved, if you go to edit the link for the word(ing) that is used for this hyperlink, there will now be an anchor to select from.

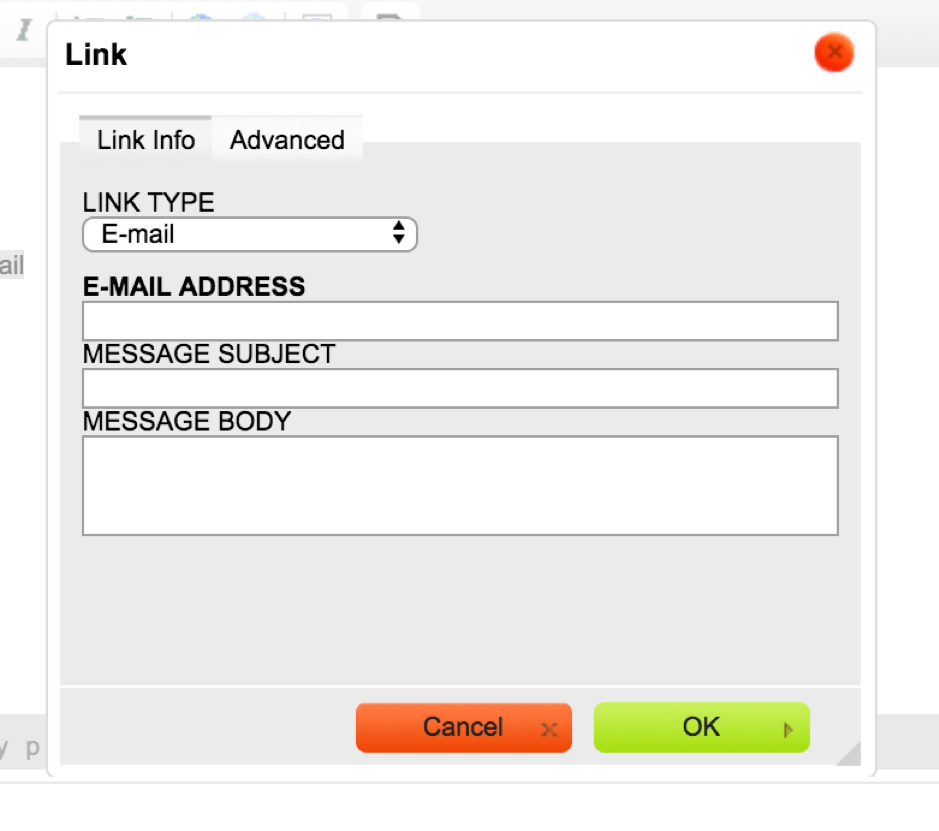
When E-mail is selected in the Link Type field, there are 3 new fields that are displayed. These are E-mail Address, Message Subject and Message Body.
Once these are all filled in as desired, when the target/user clicks the link, their email mail box will open up with a New message that has been generated, where the person who the message is being sent to is filled in with the 'E-mail Address' field value, the subject will also be auto populated too with the 'Message Subject' field value, along with the message body.
This e-mail will not be automatically sent however, the relevant fields will be populated however this message its self will still need the target/user to click the send button.
The final tab is 'Advanced', this is where you can set particular conditions towards styling and functionality.
Comments
0 comments
Please sign in to leave a comment.