
Target Records can be created in a number of ways.
Manual Creation
Although rarely used, there is the ability to create Target Records manually. It is useful for instance in the event that you've had a telephone call with someone and taken basic details in order to start working with them.
The field which has been determined as “Unique” in the Target Group will prevent you from adding another Target with the same unique value. However, it is good practice to check the Target List for duplicates before manually adding a new Target Record.
To do this, go to Admin/ Targets/ Target List.
- Select the relevant Target Group in the target group filter.
- In the search box under the column headed “Target” enter the name or part name of the Person, Company or other object you wish to create. NB: This field will only search the fields marked as “Identifier” in the Target Group.

3. Click out of the search box to check the results.
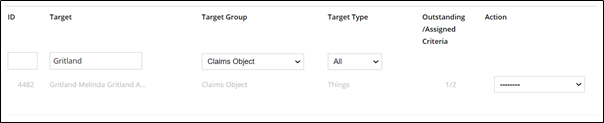
4. If a result is returned, as shown above, and you’re not sure whether it is the same target, click into the Action Menu and select “Edit”.
5. You will be taken into the target record where you will be able to check the details and determine if this is the same person/company, etc.
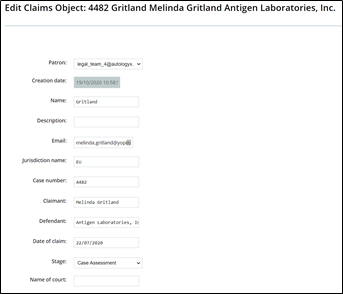
6. If the record is the same person/company/object do nothing, you must not duplicate records. If the target does not exist follow the steps below to add the new target record.
At the bottom of the Target List select the Target Group and click the button which is called “Create Target”.
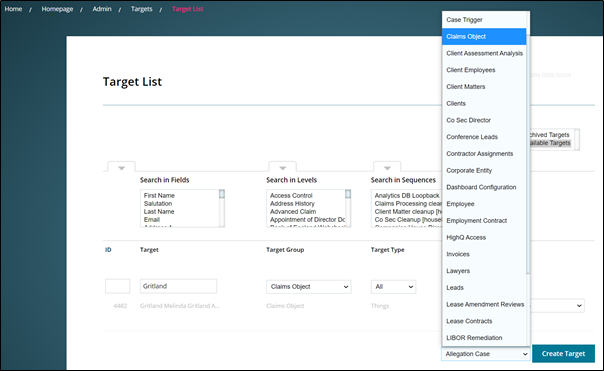
Alternatively, you can go to Admin/ Targets/ Create a New Target. A modal will be presented in which you will need to select the appropriate Target Group before you click the “Create Target” button.

Having selected the appropriate Target Group you will be presented with a screen which lists all the target fields which have been selected as “Available” for your chosen Target Group. The fields which are “Required” will be marked with a red asterisk.

When you manually add a Target Record, your user name will appear in the Patron field. You become the owner by default, as shown above.
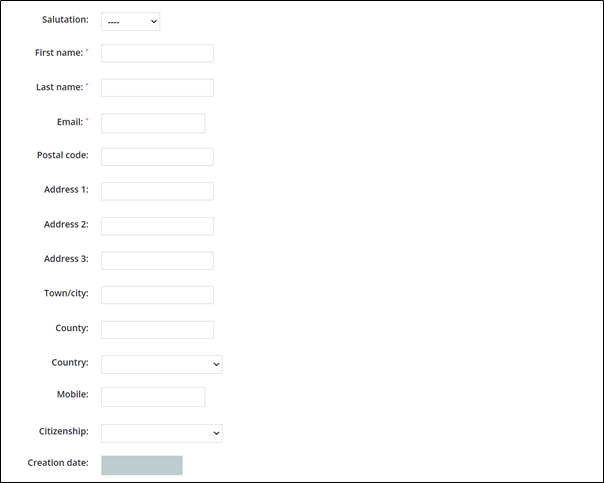
Complete the data entry and click Save. Please note:
- the Save button will only become enabled once all Required (mandatory) fields have been completed
- the above screenshot shows the standard fields for a Person Type Target
Via a Dynamic Form
In Autologyx we call HTML forms "Dynamic Forms"; you will need to install this feature via the Store.
Dynamic Forms are used to create and or edit target records.
A Dynamic Form can be created and saved on a local or shared drive, or a hosted URL. They can be styled in line with your corporate branding and through javascript can made to respond to the current entry by displaying relevant fields or information.
A more detailed section is available HERE which will cover the creation and use of Dynamic Forms.
Via an Import
The ALX target import is a useful way of creating and editing target records in large batches.
Once the import has been created so that the Excel file columns are mapped to ALX Target Group fields, you can upload a csv or other Excel format file manually or you can import from a mailbox.
The first is done as and when required while the latter is on a scheduled basis, the frequency for which is stipulated in the import set up.
More information about Target Imports can be found HERE.
Via API
Targets can be created and updated in ALX via an API call from a third party system.
This system will either have to use an API key created in the ALX system or authenticate with system user account details – username and password.
If using the latter method we recommend that you create a system user account specifically for this purpose. By doing this you can maintain the integrity of that system user account and you do not have to update any details if the nominated user were to leave the organisation.
Comments
0 comments
Please sign in to leave a comment.